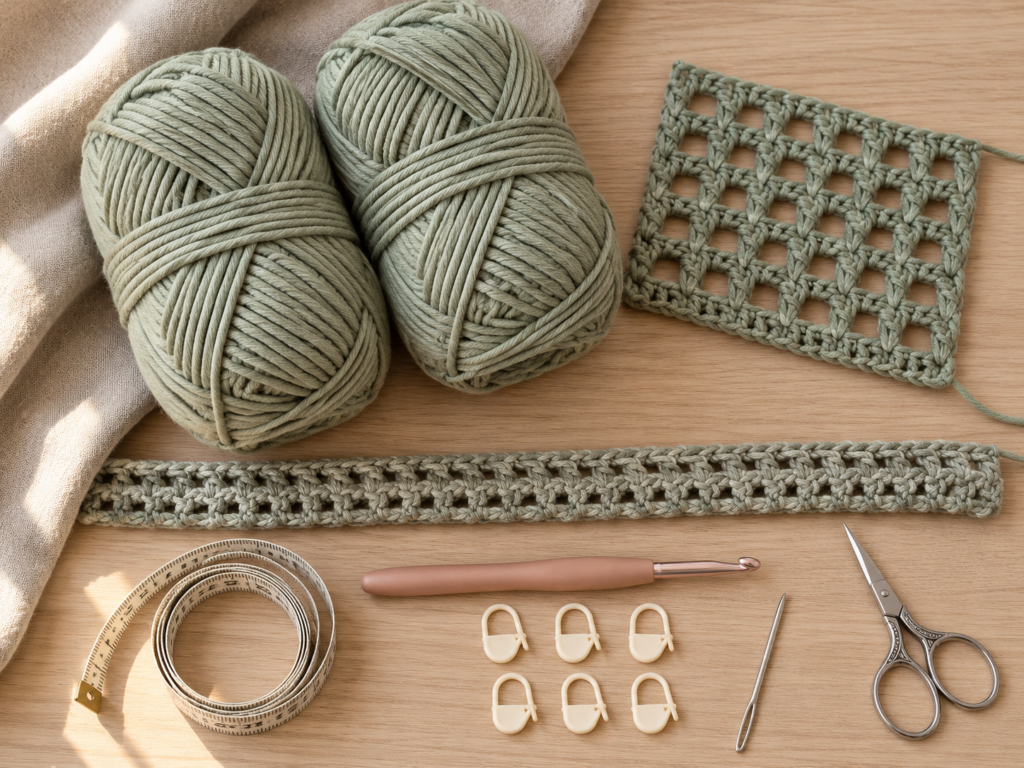
A crochet vest is one of those projects that looks much more complicated than it needs to be. You get to make something you can actually wear, but without the extra work of crocheting sleeves or fitting a complicated sweater.
This easy crochet vest pattern is a lovely place to start if you already know how to make a chain and a double crochet stitch. It uses a simple, repeating mesh pattern to create a lightweight vest with an open front, softly shaped neckline, and two little ties.
The best part is that you don’t have to make lots of separate pieces. You’ll begin with one long rectangle, then work the upper front and back sections directly onto it. After joining the shoulders and adding the ties, your vest is ready to wear.
The open mesh texture makes it comfortable for layering over a tank top, dress, or lightweight shirt. It also means you can see your stitches clearly as you work, which is especially helpful when you’re still getting used to crocheting garments.
In this step-by-step tutorial, I’ll explain how the vest is constructed, how to count the mesh stitches, where to place your markers, and how to shape the armholes and neckline without getting lost.
You’ll also find sizing advice, troubleshooting tips, and photo guidance for every important stage.
What You’ll Learn
By the end of this tutorial, you’ll understand how to:
- Crochet a lightweight mesh fabric using double crochet and chain stitches.
- Make a continuous lower body panel for a vest.
- Divide the upper body into two fronts and one back.
- Shape the armholes and create a simple V-neckline.
- Make two matching shoulder sections.
- Join the shoulder seams neatly.
- Add crochet ties and finish the edges.
- Adjust the length and width to suit your measurements.
This is a confident-beginner project. If you’ve made a scarf, dishcloth, or simple crochet bag, you’re ready to try it.
Crochet Vest Pattern at a Glance
Skill level
Confident Beginner
Estimated time
8–14 hours
Yarn
Medium #4
Hook
5.5 mm
Construction
One-piece body
Terminology
US Crochet
Sample dimensions: Approximately 33.5 inches (85 cm) across the unfolded body fabric and 17.7 inches (45 cm) long, assuming the suggested gauge.
This is a measurement-based sample, not a standardized clothing size. The vest is designed to have an adjustable front opening.
Materials You’ll Need
You don’t need many tools for this project, and you may already have most of them.
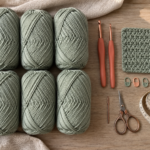
Yarn: Choose a medium-weight (#4) cotton or cotton-blend yarn. A cotton-acrylic blend is a nice option because it combines the definition of cotton with a little softness and flexibility.
For the sample, allow approximately 450–650 yards (410–595 meters), depending on your gauge, size, and desired length. Keep extra yarn available for adjustments.
Crochet hook: A 5.5 mm hook is a reasonable starting point for medium-weight yarn and an airy mesh texture. Adjust if your swatch is too loose or too tight.
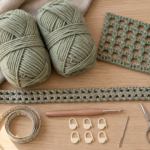
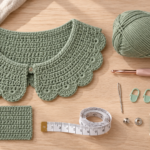
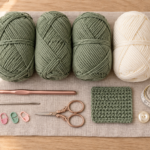
You’ll also need sharp scissors, a blunt yarn needle, locking stitch markers, and a flexible measuring tape.
A notebook is useful for recording your row counts, especially when shaping the two front panels.
Crochet Abbreviations Used
This tutorial uses US crochet terminology.
| Abbreviation | Meaning |
|---|---|
| ch | Chain |
| sc | Single crochet |
| dc | Double crochet |
| sl st | Slip stitch |
| st / sts | Stitch / stitches |
| sp | Space |
| ch-1 sp | Chain-one space |
| sk | Skip |
| rep | Repeat |
| RS | Right side |
| WS | Wrong side |
A US double crochet is called a treble crochet in UK terminology. The terminology difference matters when following instructions from different countries.

Welcome to the Craft Yarn Council
How to Make the Mesh Stitch
The main fabric is built from double crochet posts separated by chain-one spaces.
To make a US double crochet:
- Yarn over and insert your hook into the indicated stitch.
- Yarn over and pull up a loop. You should have three loops on the hook.
- Yarn over and pull through the first two loops.
- Yarn over again and pull through the remaining two loops.
To create the mesh, work one chain between neighboring double crochet posts and skip the corresponding foundation stitch when instructed.
The result is a flexible fabric with small, evenly spaced openings.
Before You Start
Check Your Gauge
Gauge tells you how large your stitches are. For a wearable crochet project, it makes a real difference.
For this sample design, use a working target of approximately:
8 mesh spaces and 8 rows = 4 inches (10 cm).
This is a proposed sample gauge, so confirm it with your chosen yarn and hook before using the sample stitch counts.
Make a swatch at least 6 inches (15 cm) wide. Measure the center rather than the edges.
If your fabric is wider than expected, try a smaller hook. If it is narrower, try a larger one.
The Craft Yarn Council also recommends adjusting hook size according to the gauge of the actual project.
Welcome to the Craft Yarn Council
How to Count Mesh Spaces
For this vest, the easiest way to count is by the little chain-one gaps between double crochet posts.
Don’t confuse the number of spaces with the number of double crochet stitches.
Place a marker every 10 spaces if you’re working a long row. This makes it much easier to notice a missed stitch before you finish several more rows.
How to Keep the Edges Straight
The turning chain represents the first double crochet post and its neighboring chain space.
For the main mesh rows in this tutorial, chain four at the beginning of a new row. The chain four counts as a double crochet and a chain-one space.
Avoid accidentally working an extra stitch at the beginning of the row. That is one of the most common reasons mesh rectangles become wider.
Choose Your Fit Before Starting
Measure around the fullest part of your bust and decide how much of the front you’d like covered.
For example, if your bust measures 36 inches (91 cm), an unfolded fabric width of approximately 33.5 inches (85 cm) leaves about 2.5 inches (6 cm) of front opening when worn without stretching.
If you want the front edges to overlap, make the body wider. If you prefer a larger open-front gap, make it narrower.
Remember that the ties can bring the upper fronts together, but they should not have to stretch the entire vest tightly across your chest.
Step-by-Step Crochet Vest Tutorial
The construction is simple once you understand the order.
First, make the lower body. Next, divide it into three sections. Shape the two fronts and the back. Finally, fold the fronts over the back, join the shoulders, and finish the edges.
The sample instructions below use 68 mesh spaces across the body, divided into 17 spaces for each front and 34 spaces for the back.
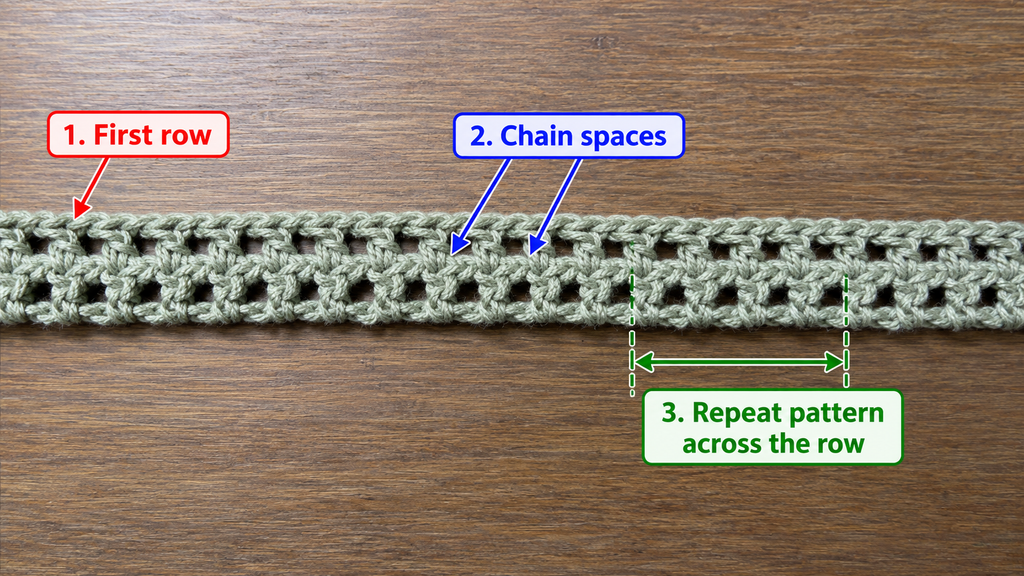
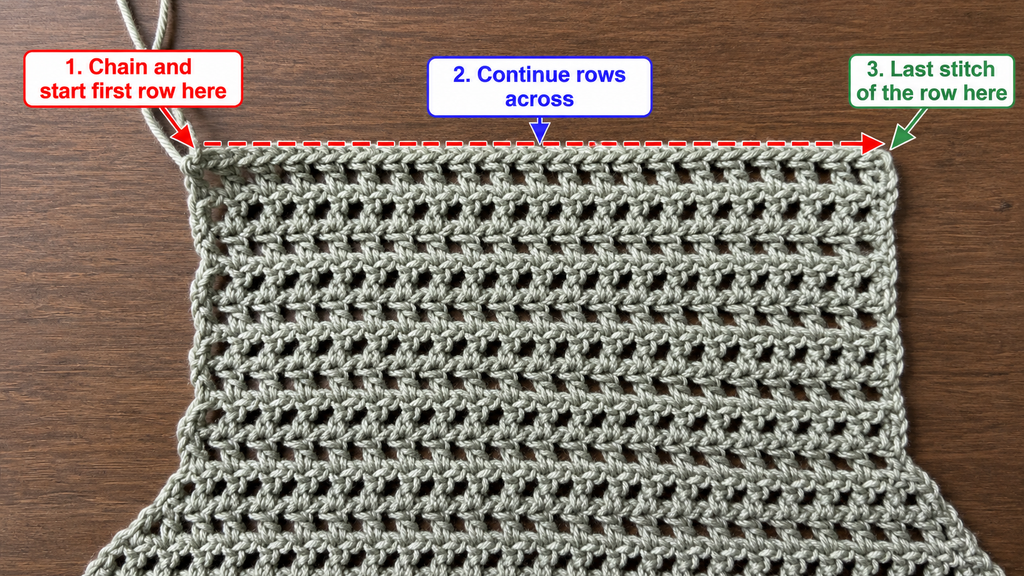
Step 1: Crochet the Foundation Chain
Start with your main yarn color and 5.5 mm hook.
For the sample width, make a slip knot and chain 140.
Work one double crochet into the sixth chain from your hook.
Then repeat:
Chain one, skip the next chain, double crochet into the following chain.
Continue this sequence until you reach the end of the foundation chain.
You should have 68 mesh spaces.
Spread the row gently across your table. It should look like a long strip with small, evenly spaced openings.
Don’t worry if it curls slightly. The fabric will become easier to handle as you add rows.
Beginner tip: Make your foundation chain a little looser than your normal chain tension. A tight foundation can pull the bottom of your vest inward.
Common mistake to avoid: Don’t count the loop on your hook as a chain. Also, check that you haven’t skipped two foundation chains instead of one.
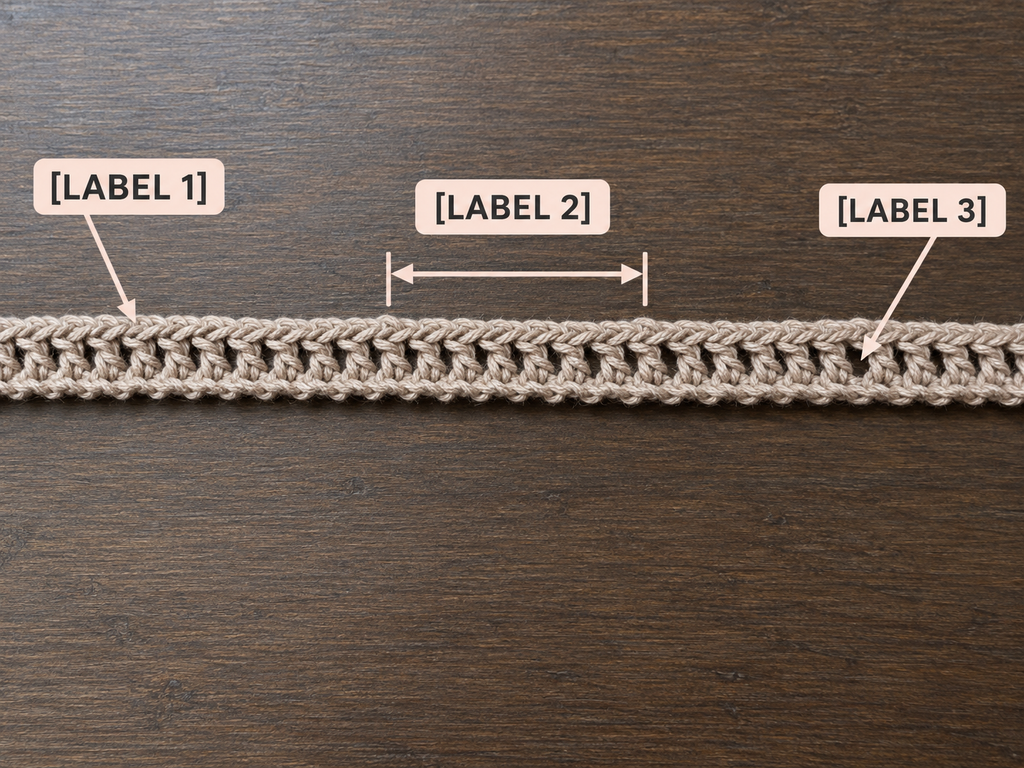
Step 2: Work the Mesh Stitch Repeat
Now you’ll build the fabric upward.
Row 2: Chain four and turn your work. The chain four counts as your first double crochet and chain-one space.
Skip the first double crochet directly below the turning chain and work a double crochet into the next double crochet post.
Continue working one chain followed by a double crochet into the next double crochet post.
At the far edge, work the final double crochet into the top of the previous row’s turning-chain post.
Count your mesh spaces again. You should still have 68.
Row 3 and onward: Repeat Row 2.
The important thing is to keep each double crochet aligned above the corresponding double crochet from the previous row.
You’re working into the stitch posts, not into the open chain-one spaces.
As the fabric grows, you’ll see tidy columns of stitches forming a grid.
Beginner tip: After the first few rows, stop and look at your fabric from a little distance. The holes should appear evenly spaced.
Common mistake to avoid: If the edges begin widening, you may be adding an extra stitch beside the turning chain. If they narrow, check that you haven’t missed the last turning-chain post.
Step 3: Continue Until the Lower Body Is Complete
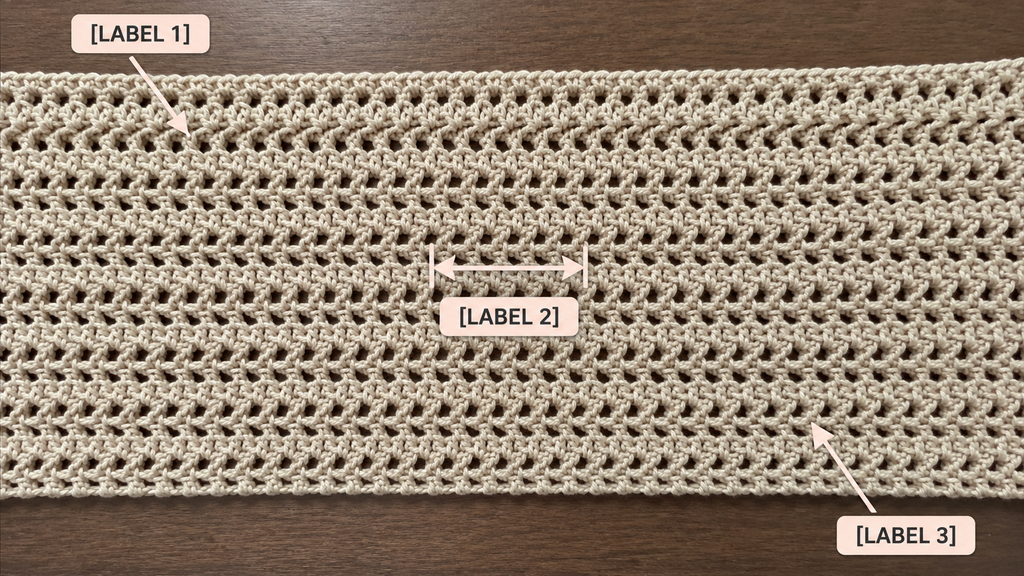
Keep repeating the mesh row until the lower body reaches the point where you want the armholes to begin.
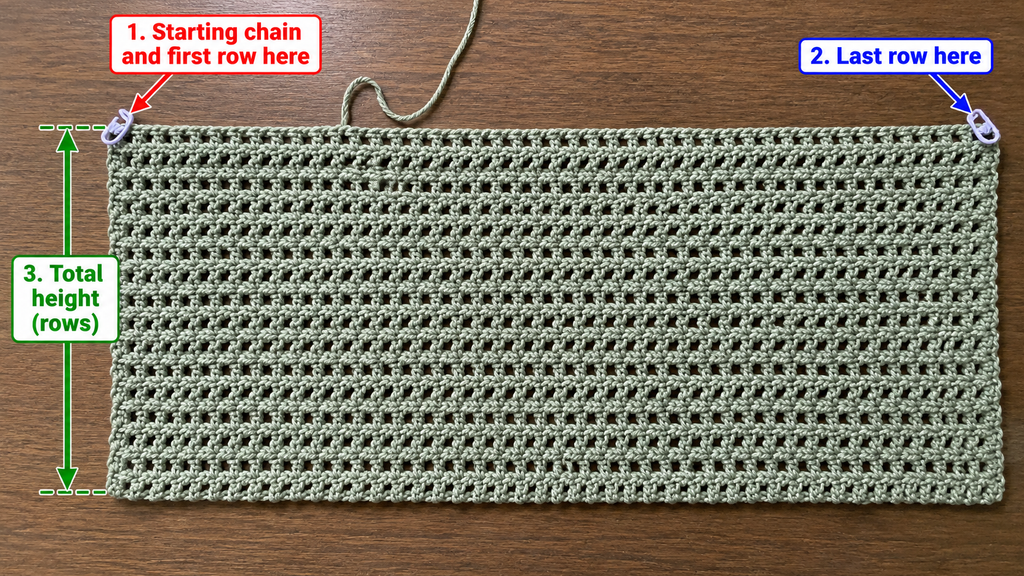
For the sample, work 19 body rows in total, including the foundation row.
At the suggested row gauge, this gives approximately 9.4 inches (24 cm) from the lower edge to the underarm.
You can change this measurement.
For a cropped vest, stop sooner. For a longer vest, add rows before beginning the armhole shaping.
Try holding the fabric against your body. The top edge should reach approximately the place where you want the bottom of your armhole opening.
Lay the panel flat and check that the edges are reasonably straight.
Beginner tip: Write down the number of completed rows. You may want to repeat the project later in another color, and your notes will save time.
Common mistake to avoid: Don’t judge the length while pulling the fabric tightly. Measure it relaxed.
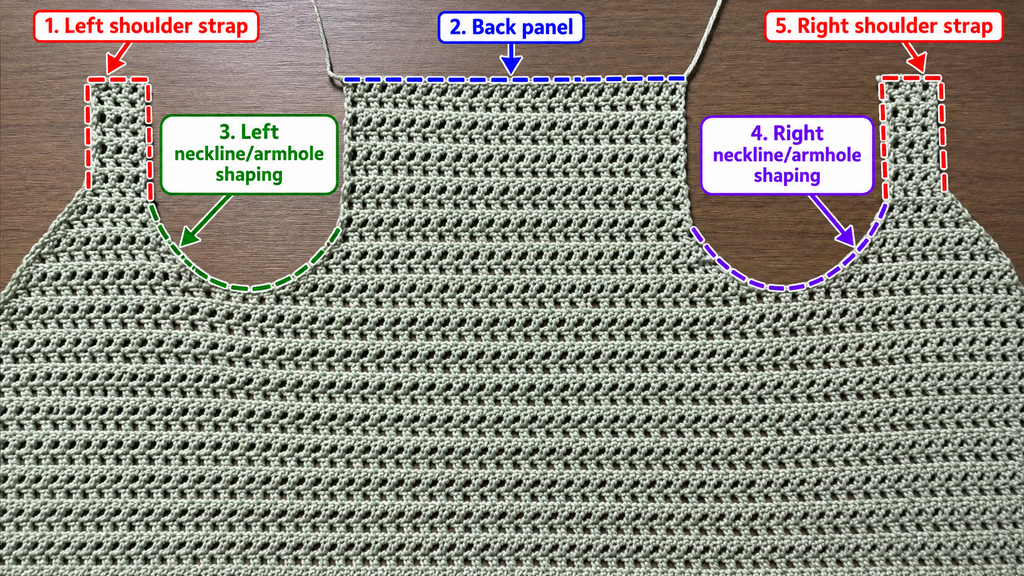
Step 4: Divide the Body Into Three Sections
Now comes the part where the rectangle begins to look like clothing.
Lay the completed body flat, with the last row along the top.
Count the mesh spaces from one end.
For the sample, divide the 68 spaces as follows:
| Section | Mesh spaces |
|---|---|
| First front | 17 |
| Back | 34 |
| Second front | 17 |
| Total | 68 |
Place your first stitch marker in the double crochet post after the 17th mesh space.
Count another 34 spaces and place your second marker in the post after the 51st space.
You should now have three clearly marked sections.
The two smaller sections will become the fronts. The wider center section will become the back.
These marker positions identify the boundaries; the upper sections will be worked separately from this point onward.
Beginner tip: Count the sections twice before continuing. It is much easier to correct a misplaced marker now than after several rows of shaping.
Common mistake to avoid: Don’t count the double crochet posts instead of the mesh spaces. Each section measurement refers to the chain-one gaps.
Step 5: Begin Shaping the First Front Panel
Choose one front section and attach your working yarn if necessary.
This section starts with 17 mesh spaces.
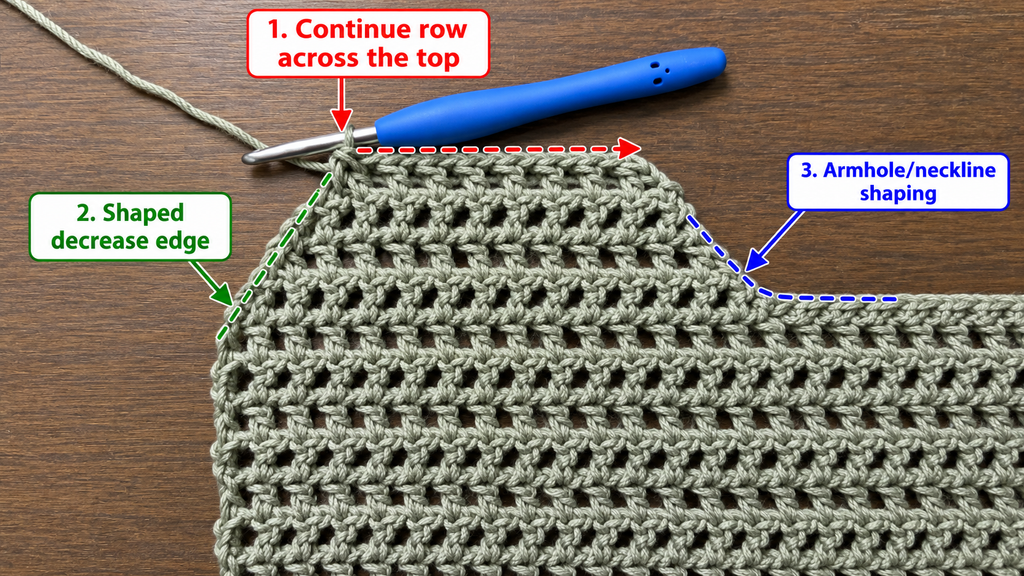
We want the fabric to become narrower as it approaches the shoulder. First, we’ll shape the armhole edge.
For the first three upper rows, reduce the panel width by one mesh space at the armhole edge only.
Your target space counts are:
| Upper row | Remaining spaces |
|---|---|
| 1 | 16 |
| 2 | 15 |
| 3 | 14 |
You can make a simple stepped reduction by leaving one full mesh space unworked at the edge.
If the reduction is at the end of your row, stop one mesh space before the previous edge post.
If the reduction is at the beginning, slip stitch across the first chain-one space to the next double crochet post, then begin the new mesh row from that post.
When starting a fresh upper section, join the yarn at the appropriate post and work only within its marked boundaries.
Keep the opposite, front-opening edge straight during these three rows.
The armhole edge will gradually slope inward.
Beginner tip: Place a removable marker on the armhole edge so you always know which side you’re shaping.
Common mistake to avoid: Don’t reduce both sides yet. At this stage, only the armhole edge becomes narrower.
Step 6: Shape the V-Neckline
After completing the three armhole-shaping rows, you’ll begin narrowing the opposite edge.
This creates the diagonal front neckline.
Continue working in the established mesh pattern, but reduce one mesh space at the front-opening edge on each of the next nine upper rows.
For the sample, the counts should progress like this:
| Upper row | Remaining spaces |
|---|---|
| 4 | 13 |
| 5 | 12 |
| 6 | 11 |
| 7 | 10 |
| 8 | 9 |
| 9 | 8 |
| 10 | 7 |
| 11 | 6 |
| 12 | 5 |
The armhole edge stays straight after its initial three reductions.
The neckline edge becomes a diagonal line that moves gradually inward toward the shoulder.
If the neckline is on the starting side of a row, move inward by one mesh unit before beginning the next row. If it is on the finishing side, end the row one mesh unit early.
Continue counting after every row.
Beginner tip: Place the shaped front against your chest occasionally. This will help you decide whether the neckline is becoming too deep or too shallow for your preference.
Common mistake to avoid: Don’t remove two mesh spaces at once unless you deliberately want a steeper neckline. For this sample, remove one per shaping row.
Step 7: Finish the First Shoulder Strap
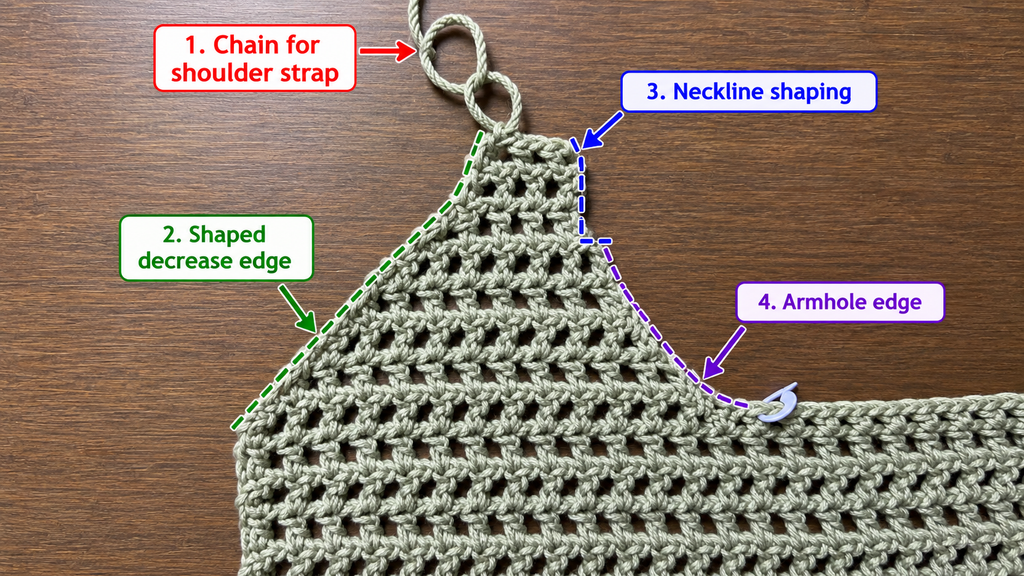
Once the front panel is five mesh spaces wide, stop decreasing.
Work five more rows in the regular mesh pattern, keeping the same number of spaces across each row.
These are upper rows 13–17.
Your strap should now be a narrow rectangle extending above the shaped front section.
The straight rows provide enough fabric to reach the back shoulder.
Check the total height from the underarm to the top of the strap.
At the suggested gauge, 17 upper rows measure approximately 8.4 inches (21 cm).
Fasten off, leaving a long yarn tail for sewing the shoulder seam later.
Beginner tip: If you prefer a wider strap, stop the neckline reductions sooner and continue straight from that width. You’ll also need to adjust the matching shoulder seam on the back.
Common mistake to avoid: Don’t pull the narrow strap tightly while measuring. Open mesh fabric can stretch and give you a misleading measurement.
Step 8: Make the Second Front Panel
Now repeat the process on the opposite side of the body.
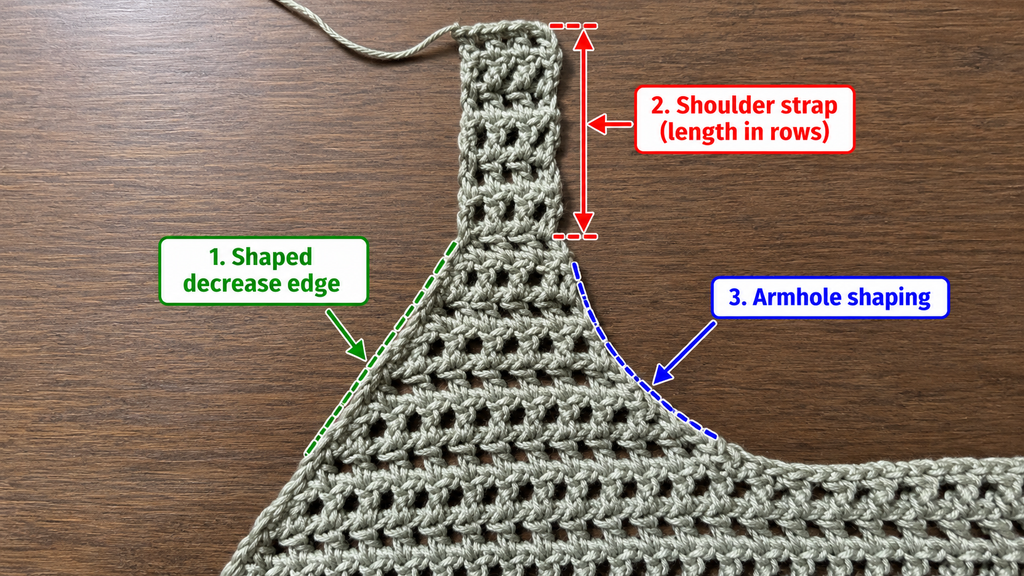
The second front panel should mirror the first.
Start with the remaining 17-space front section.
Work three rows of armhole shaping, reducing one mesh space per row at the armhole edge.
Next, work nine rows of neckline shaping, reducing one space per row at the front-opening edge.
Finally, work five straight rows across the remaining five mesh spaces.
The second panel should have the same total number of upper rows as the first.
Lay both fronts beside each other and compare the shape.
Their armhole edges should slope toward the outside of the garment, while the neckline edges slope inward toward the center opening.
If one strap is longer, check your row count before proceeding.
Beginner tip: Turn the work so you can see both front sections together. This is the easiest way to confirm that you’ve mirrored the shaping correctly.
Common mistake to avoid: Don’t repeat the first panel’s decreases on the same physical side. The second panel must be a mirror image, not an identical orientation.
Step 9: Crochet the Back Panel
The back section begins between the two stitch markers and is 34 mesh spaces wide.
Unlike the front panels, the back needs a wide, mostly straight upper section.
We’ll shape the armholes on both sides, then continue upward.
For upper rows 1–3, reduce one mesh space at each outside edge of the back section.
The space counts should be:
| Upper row | Remaining spaces |
|---|---|
| 1 | 32 |
| 2 | 30 |
| 3 | 28 |
To shape both sides, begin one mesh unit inward from the previous edge and finish one mesh unit before the opposite edge.
Use the same start-of-row and end-of-row reduction methods explained in Step 5.
After the three shaping rows, stop decreasing.
Work upper rows 4–17 straight across the remaining 28 mesh spaces.
Fasten off.
The back panel should now be the same height as the two front shoulder straps.
Its upper edge remains wide, allowing you to attach the shoulder straps near the outer corners and leave a neck opening in the center.
Beginner tip: Lay the back panel flat and measure both side edges. They should be symmetrical.
Common mistake to avoid: Don’t shape the back neckline as deeply as the front. This version uses a straight back edge with an open center between the shoulder seams.
Step 10: Check the Vest Before Assembly
This is an important checkpoint.
Lay the entire project flat with the upper sections pointing away from you.
You should see a long lower body with three upper sections: two narrow shaped fronts and one wider back.
Check that both front straps have the same number of rows.
Check that the back panel reaches the same height.
The armhole shaping should look balanced on both sides.
For this sample, each front strap finishes at five mesh spaces wide, while the back finishes at 28 spaces wide.
The two shoulder straps will attach at the outer five-space sections of the back, leaving the center 18 mesh spaces unseamed for the back neckline.
Before sewing, gently fold the fronts inward to see how the pieces line up.
Beginner tip: Use stitch markers to hold the shoulders temporarily and try the vest on carefully before sewing. This can reveal fit problems while they are still easy to correct.
Common mistake to avoid: Don’t sew immediately if the front and back heights are different. Correct the row counts first.
Step 11: Join the Shoulder Seams
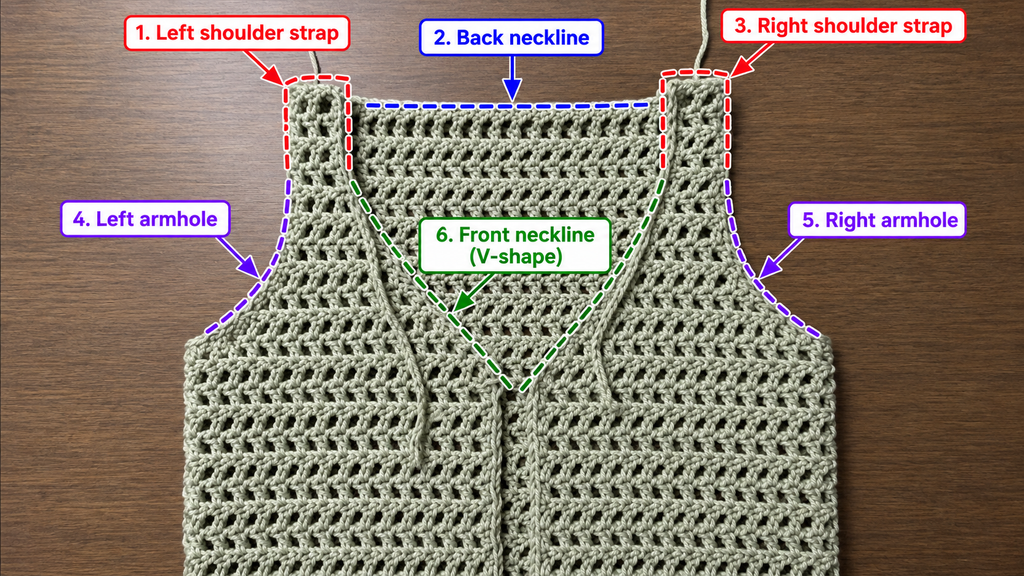
Fold the two front panels inward over the back panel.
Align the top of each narrow front strap with the corresponding outer edge of the back.
Make sure the front-opening edges are facing toward the center.
Place stitch markers through both layers to hold the shoulder edges together.
Thread your yarn needle with the long tail left from the first front strap.
Sew across the shoulder using a whip stitch or mattress stitch, matching the stitch posts and chain spaces as evenly as possible.
Keep your stitches firm enough to hold the pieces together but not so tight that the seam puckers.
Repeat on the second shoulder.
Turn the vest right side out and check the neckline.
You should now have two armholes, a back neckline, and an open front.
Beginner tip: Sew a few stitches, then spread the seam gently with your fingers. It should lie flat without pulling.
Common mistake to avoid: Don’t accidentally close the center back neckline. Only sew the narrow shoulder sections.
Step 12: Add the Crochet Front Ties
The front ties give this vest a relaxed, adjustable closure.
Choose a position near the upper front opening, close to where the V-neck shaping begins.
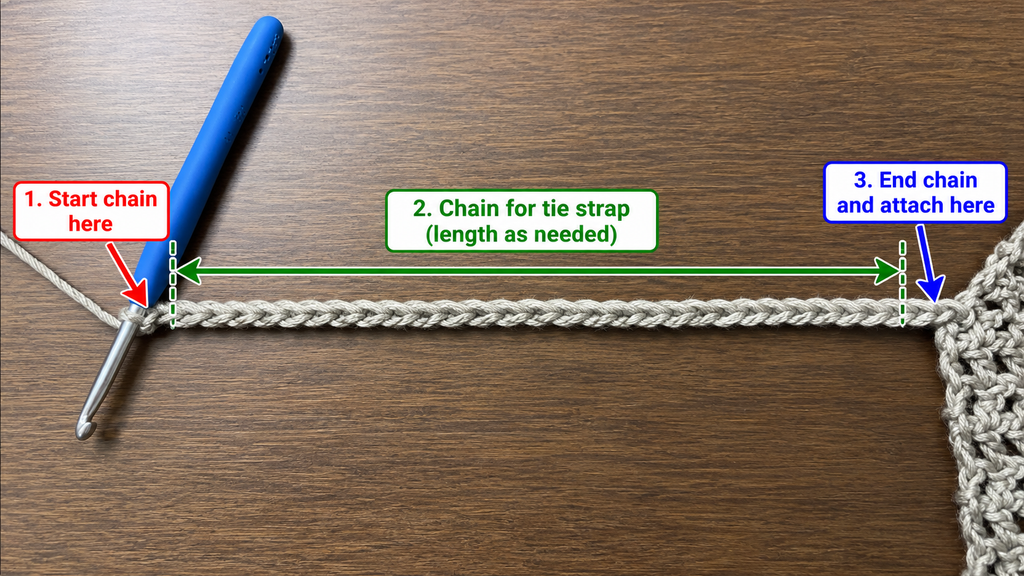
Attach your yarn to the edge of the first front panel.
Chain 55.
Starting in the second chain from the hook, work one slip stitch into each chain back toward the vest.
You should have 54 slip stitches along the cord.
Slip stitch into the vest edge to secure the tie, then fasten off.
Repeat on the opposite front at the same height.
Your two ties should be approximately equal in length.
You can leave them loose for an open-front look or tie them into a small bow.
Beginner tip: Keep the slip stitches relaxed. Very tight slip stitches can cause the cord to twist or shorten.
Common mistake to avoid: Don’t place one tie noticeably higher than the other. Measure from the lower edge of the vest before attaching the second cord.
Pattern Notes and Stitch Counts
Here is the complete construction sequence in one place.
| Section | Sample instructions |
|---|---|
| Foundation | Chain 140 |
| First mesh row | 68 mesh spaces |
| Lower body | 19 rows total |
| Front divisions | 17 spaces each |
| Back division | 34 spaces |
| Front armhole shaping | Reduce 1 space for 3 rows |
| Front neckline shaping | Reduce 1 space for 9 rows |
| Front strap | Work 5 straight rows over 5 spaces |
| Back armhole shaping | Reduce 1 space at each edge for 3 rows |
| Back upper section | Work 14 straight rows over 28 spaces |
| Shoulder seams | Join 5-space front straps to outer back sections |
| Ties | Chain 55, then 54 slip stitches back |
Turning-chain rule: The beginning chain four represents a double crochet post and chain-one space in the main mesh repeat. It is not an extra mesh repeat.
Right side and wrong side: Because this is a simple open mesh fabric, the two sides look similar. Choose the side with the neater appearance as the right side and keep that orientation consistent when joining.
Size adjustments: Change the foundation mesh-space count to alter the width. Recalculate the front/back division and shoulder shaping before starting. Change the number of lower-body rows to alter the length.
Common Beginner Mistakes and How to Fix Them
1. The vest keeps getting wider
This usually happens when an extra double crochet is added at the turning edge.
Check that you’re not treating the turning chain as both a completed stitch and an empty place requiring another stitch.
Count your mesh spaces after every row until the repeat becomes familiar.
2. The bottom edge curls
A tight foundation chain can pull the lower edge inward.
Try making the foundation with a slightly larger hook, then switching back to your main hook for the body.
You can also gently relax the edge with your fingers as you work.
3. The mesh holes are different sizes
Uneven yarn tension often causes some openings to look larger than others.
Avoid pulling the chain-one stitches too tightly.
Try to keep your hands relaxed and work at a comfortable pace.
Small variations are normal, especially in a first garment.
4. The front panels don’t match
The most likely causes are different row counts or shaping the wrong edge.
Count the rows on both fronts and compare them before joining.
Keep written notes such as “three armhole rows, nine neckline rows, five straight rows.”
5. The armholes feel too small
The upper sections may be too short, or your gauge may be tighter than expected.
Before sewing the shoulders, compare the upper-panel height with the desired armhole depth.
If needed, add the same number of straight rows to the front straps and back panel.
6. The neckline pulls or looks uneven
Check that both front neckline edges have the same number of reductions.
Also make sure the shoulder seams are not sewn too tightly.
A slightly loose neckline can often be stabilized with a gentle single crochet border.
7. The finished vest stretches longer than expected
Cotton blends and some plant-based yarns can grow under their own weight.
Make a swatch, let it hang for a while, and measure it again.
If your yarn stretches noticeably, shorten the lower body or upper sections before finishing.
How to Customize Your Crochet Vest
Once you’ve made the basic version, you can change the look quite easily.
Try a Different Yarn
Cotton is a lovely choice for a summer vest because it feels cool and shows the stitches clearly.
A cotton-acrylic blend may be lighter and softer.
For a warmer vest, you could try a smooth wool blend, although it may give the mesh a different drape.
Avoid switching yarn weights without making a new gauge swatch.
Change the Color
A single color gives this project a clean, classic appearance.
Cream, sage, dusty rose, muted blue, oatmeal, and warm terracotta all work beautifully for a handmade vest.
You could also use one color for the body and another for the ties or edging.
For a striped version, change colors at the beginning of a full mesh row and weave the ends in securely.
Make It Longer
The easiest length adjustment is to add more rows to the lower body before dividing it into three upper sections.
For example, if you want approximately 2.5 inches (6 cm) of additional length, add about five rows at the suggested gauge.
Measure as you go because your yarn may behave differently.
Make It More Relaxed
For a looser vest, add more mesh spaces to the foundation.
Remember to distribute the extra spaces between the front and back sections.
The back should remain approximately as wide as the two fronts combined for this particular silhouette.
Add a Decorative Border
A simple round of single crochet around the armholes can give them a neater finish.
Attach yarn at the underarm, work single crochet evenly around the opening, and join with a slip stitch.
Adjust the number of stitches along row ends so the border lies flat without ruffling or pulling.
You can also add a single crochet border around the front opening and neckline.
For a more decorative look, consider a narrow shell edging, but test it on a small swatch first.
Turn It Into a Gift
A handmade crochet vest can make a thoughtful birthday or holiday gift.
Choose a neutral yarn if you’re unsure about the recipient’s favorite colors.
The adjustable ties make this design a little more forgiving than a tightly fitted sweater, but it’s still worth checking the recipient’s measurements.
Finishing Instructions
A little attention to finishing makes a big difference to how your vest looks and feels.
Fasten Off and Weave In Ends
After completing the ties and any optional borders, cut your yarn, leaving a tail long enough to weave in.
Pull the yarn through the final loop to secure it.
Thread the tail onto a blunt yarn needle.
Weave it through several neighboring stitches, change direction, and weave back through the fabric.
Avoid pulling so tightly that the mesh bunches together.
Trim the remaining yarn close to the fabric after it is secure.
Shape the Vest
Lay the vest flat and gently smooth the shoulders, front edges, and hem.
Make sure the two sides are symmetrical.
Check that the front ties hang evenly.
If the fabric looks slightly uneven, light blocking may help.
Blocking
Follow the washing and care instructions on your yarn label.
For a washable cotton blend, you may be able to dampen the vest, gently squeeze out excess water, and lay it flat to dry.
Do not twist or wring the fabric.
Shape the neckline and armholes while the vest is damp.
Let it dry completely before wearing.
Washing and Care
Hand washing or a gentle machine cycle may be appropriate, depending on your yarn.
Use mild detergent and avoid high heat.
Lay the vest flat to dry to reduce stretching, particularly if you’ve used a yarn that becomes heavy when wet.
Store the finished garment folded rather than hanging for long periods if the yarn tends to stretch.
Finished Crochet Vest
Your finished vest should have a softly shaped V-neckline, two narrow shoulder straps, an open mesh body, and matching front ties.
The lower body remains continuous, so you don’t have bulky side seams.
The simple mesh pattern also makes the vest comfortable to layer over different outfits.
Try it over a fitted tank top for warm weather, a long-sleeve shirt for cooler days, or a casual dress for a softer look.
Quick Printable-Style Crochet Vest Pattern Summary
Easy Tie-Front Mesh Crochet Vest
Skill Level: Confident Beginner
Materials: Medium-weight (#4) yarn, 5.5 mm hook, scissors, yarn needle, stitch markers, measuring tape.
Stitches: Chain, double crochet, single crochet (optional border), slip stitch.
Foundation: Chain 140 for the sample.
Mesh Repeat: Double crochet posts separated by chain-one spaces.
Lower Body: Work 19 mesh rows.
Panel Division: 17 front / 34 back / 17 front.
Front Shaping: Three armhole reductions, nine neckline reductions, five straight rows.
Back Shaping: Three rows decreasing at both outside edges, followed by 14 straight rows.
Assembly: Join the shoulder straps to the outer back sections.
Ties: Chain 55 on each side and slip stitch back along each chain.
Finishing: Weave in ends, add optional edging, and block gently.
Frequently Asked Questions
Is a crochet vest a good beginner project?
Yes. A vest is often easier than a sweater because it doesn’t require sleeves. This design uses a repeating mesh stitch and simple upper-body shaping, making it suitable for confident beginners.
If you’re completely new to crochet, practice making a small rectangle of double crochet mesh before starting the garment.
How much yarn do I need for a crochet vest?
It depends on your size, yarn weight, gauge, and vest length.
For this sample, a planning estimate is approximately 450–650 yards (410–595 meters) of medium-weight yarn.
A longer or wider vest will require more yarn. Check your yarn label for the yardage per skein before purchasing.
What is the best yarn for a summer crochet vest?
Cotton and cotton-blend yarns are good options because they are breathable and show stitch detail clearly.
A lightweight cotton-acrylic blend may be especially comfortable for a casual mesh vest.
Choose a yarn that feels pleasant against your skin and has enough drape for the style you want.
Can I make this crochet vest without sewing?
This vest requires only two short shoulder seams.
The lower body is crocheted as one continuous piece, so you won’t need to sew separate side panels together.
If you prefer completely seamless construction, look for a vest worked in the round or one with joined-as-you-go shoulders.
How do I make the vest bigger?
Begin by measuring your bust and deciding how much front coverage you want.
Make a gauge swatch, then calculate how many mesh spaces you need for the desired width.
Increase the foundation chain accordingly and redistribute the extra mesh spaces between the two fronts and the back.
You may also need to adjust the number of upper-body rows and shoulder shaping.
Why is my crochet vest curling?
Curling is often caused by a foundation chain that is too tight or by uneven tension.
Try using a larger hook for the foundation chain and keeping your mesh stitches relaxed.
Gentle blocking may also improve the appearance of the finished fabric.
How long does it take to crochet a vest?
A simple mesh vest may take approximately 8–14 hours for someone comfortable with basic stitches.
Your first vest may take longer because you’ll spend time measuring, counting, and learning the shaping.
There’s no need to rush. Working carefully usually produces a neater result.
Conclusion
Making your first crochet vest is a satisfying way to move from simple flat projects into handmade clothing.
You begin with familiar stitches, build a straightforward mesh rectangle, and gradually turn it into something wearable.
Once you understand how the front and back sections fit together, you’ll find it much easier to experiment with other vest styles, including longer open-front designs, colorful summer layers, and textured sweater vests.
Save this easy crochet vest pattern for your next project, and consider making a second version in a different color once you’ve found the fit you like.