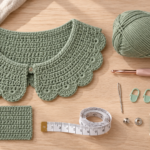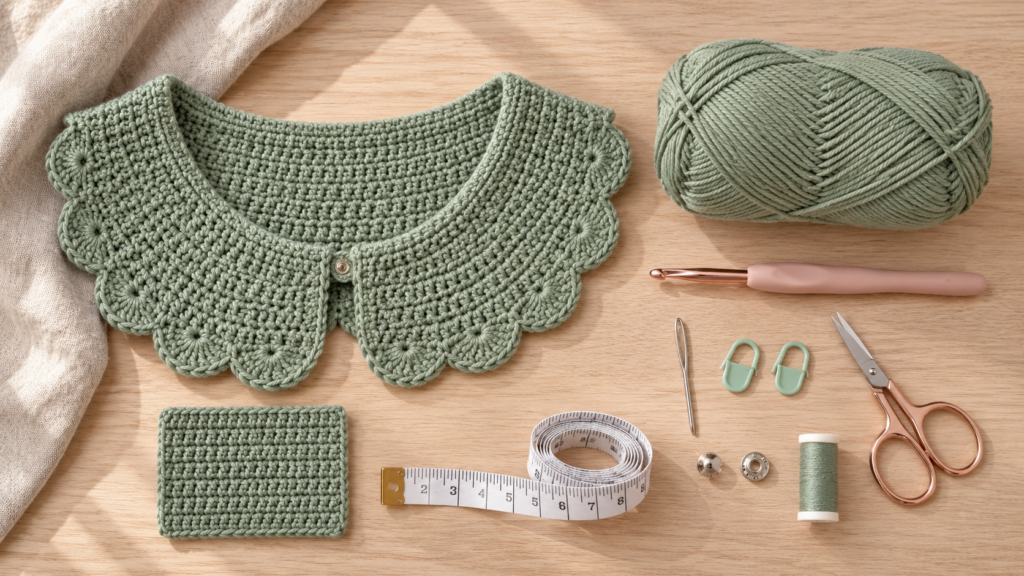
A plain blouse can look completely different with one small handmade detail. That’s what makes a crochet collar such a lovely project. It adds texture around the neckline, gives simple clothing a vintage-inspired finish, and can be removed whenever you want a different look.
This easy crochet collar pattern is designed for beginners who already know how to make a chain and a single crochet stitch. If you’re still learning double crochet, don’t worry. We’ll practice that stitch as we make the decorative scallops.
The collar is worked in one piece, starting with a narrow neckband and finishing with a row of rounded shells. There’s no complicated shaping, no sewing separate crochet panels together, and no need to follow a chart.
You’ll also learn how to adjust the neckline measurement, keep the decorative shells evenly spaced, and attach a discreet fastening so you can wear your collar over different outfits.
The result is a lightweight, detachable accessory that looks pretty over a cotton blouse, a simple dress, or a lightweight sweater.
What You’ll Learn
By the end of this tutorial, you’ll know how to:
- Crochet a foundation chain for a comfortable neckline.
- Build a neat single-crochet neckband.
- Make rounded scallops using groups of double crochet stitches.
- Count and space your decorative shells correctly.
- Adjust the pattern for different neckline measurements.
- Attach a small snap fastener.
- Block and shape your finished crochet collar.
This tutorial includes a complete original pattern, stitch explanations, troubleshooting advice, and image placements for each important stage.
Crochet Collar Pattern at a Glance
| Detail | Information |
|---|---|
| Project | Detachable scalloped crochet collar |
| Skill level | Confident beginner |
| Construction | Worked flat in turned rows |
| Yarn | Sport-weight (#2) cotton |
| Hook | 3.5 mm |
| Estimated yarn | 75–100 yards (69–91 m) |
| Approximate neckline | 17 inches (43 cm) before fastening |
| Approximate depth | 1.5–2 inches (4–5 cm) |
| Decorative edging | 21 five-double-crochet shells |
| Fastening | Small sew-on snap |
| Time | Approximately 2–3 hours |
Sizing note: Measurements are estimates based on a target gauge of 20 single crochet stitches per 4 inches (10 cm). The design has not been independently sample-tested, so check the neckband against your intended neckline before adding the shells.
Materials You’ll Need
For this project, I recommend smooth cotton yarn rather than fuzzy or very bulky yarn. A smooth yarn makes it easier to see the stitches, especially when you’re learning to place several double crochets into the same stitch.
Yarn
Choose approximately 75–100 yards of sport-weight cotton yarn.
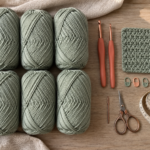
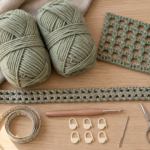
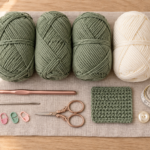
For the tutorial photographs, we’re using a soft dusty sage shade. This muted color makes the individual stitches easy to see and looks beautiful against neutral clothing.
Other lovely options include ivory, pale pink, warm beige, lavender, or dusty blue.
Crochet Hook
Use a 3.5 mm crochet hook to start.
If your stitches feel too tight, try a 4 mm hook. If the fabric looks loose or floppy, consider going down a hook size.
Other Supplies
- Small sharp scissors
- Blunt tapestry needle
- Two locking stitch markers
- Measuring tape
- One small sew-on snap fastener
- Sewing needle and matching thread
- Rustproof blocking pins
- Clean towel or foam blocking mat
You don’t need a sewing machine. The snap is attached by hand with a few small stitches.
Crochet Abbreviations Used
This pattern uses US crochet terminology.
| Abbreviation | Meaning |
|---|---|
| ch | Chain |
| sc | Single crochet |
| dc | Double crochet |
| sl st | Slip stitch |
| st / sts | Stitch / stitches |
| sk | Skip |
| rep | Repeat |
| RS | Right side |
| WS | Wrong side |
Important for UK crocheters: A US single crochet is a UK double crochet, and a US double crochet is a UK treble crochet.
How to Make the Main Stitches
Chain (ch): Yarn over and pull the yarn through the loop already on your hook.
Single crochet (sc): Insert the hook into the stitch, yarn over, pull up a loop, yarn over again, and pull through both loops on your hook.
Double crochet (dc): Yarn over, insert the hook into the stitch, yarn over and pull up a loop. You now have three loops on your hook. Yarn over and pull through two loops, then yarn over and pull through the remaining two loops.
Slip stitch (sl st): Insert the hook, yarn over, and pull the yarn through the stitch and the loop on your hook in one movement.
The decorative edging uses a simple shell made by working five double crochet stitches into one stitch.
Before You Start
1. Check Your Gauge
For the sample sizing, aim for approximately 20 single crochet stitches across 4 inches (10 cm).
A small swatch will help you understand how tightly you crochet with your chosen yarn and hook.
If you have fewer stitches per 4 inches, your finished neckband will be longer. If you have more stitches, it will be shorter.
The collar is small enough that you can also begin the actual neckband and measure it after a few rows.
2. Measure Your Neckline
Measure around the neckline of the garment where you plan to wear the collar.
Don’t measure tightly around your neck. Instead, follow the neckline of the blouse or dress, allowing the collar to rest comfortably over the fabric.
The sample begins with 85 single crochet stitches, which should measure approximately 17 inches at the suggested gauge.
Remember that the snap fastening will create a small overlap.
3. Understand the Construction
The collar has two main sections.
The first is a narrow strip of single crochet that sits closest to your neck.
The second is a row of decorative shells worked along one long edge of that strip.
Because each shell spreads outward from a smaller number of base stitches, the outer edge becomes fuller and can curve around the neckline.
4. Count Your Stitches
For this pattern, counting is especially important.
The sample uses 85 stitches across the neckband. That number allows us to create 21 evenly spaced shells with a single-crochet anchor at each end and between the shells.
If you accidentally add or lose a stitch, the final decorative repeat may not fit correctly.
5. Keep Your Tension Relaxed
Try not to pull the foundation chain too tightly.
A tight foundation can make the inner neckline uncomfortable and cause the collar to bunch.
The working yarn should slide smoothly over your fingers without becoming loose enough to create large, uneven loops.
Step-by-Step Crochet Collar Tutorial
Step 1: Make the Foundation Chain
Start with a slip knot on your 3.5 mm crochet hook.
Chain 86.
This foundation chain will become the starting edge of your collar.
As you make each chain, try to keep the loops approximately the same size.
Avoid tightening the chains by pulling hard on the working yarn after each stitch.
When you’ve completed all 86 chains, lay the chain on the table.
It should form a smooth, flexible line without twisting or curling tightly.
Beginner tip: If you regularly make tight foundation chains, use a 4 mm hook for the chain only, then switch back to 3.5 mm for the first row.
Common mistake to avoid: Don’t count the slip knot as a chain stitch. Start counting with the first actual chain you make.
Step 2: Crochet the First Neckband Row
Now we’ll turn the foundation chain into a narrow strip of crochet fabric.
Insert your hook into the second chain from the hook.
Make one single crochet.
Continue working one single crochet into each remaining chain until you reach the end.
Row 1: Sc in the second ch from hook and in every ch across. Turn. (85 sc)
Stop and count your stitches.
You should have exactly 85 single crochet stitches.
The first row may look a little uneven, especially if you’re new to crocheting into a foundation chain. That’s normal.
Once you add more rows, the fabric should begin to look smoother.
Beginner tip: Work under the top two loops of each chain, or use the back bumps if you prefer a neater foundation edge. Whichever method you choose, use it consistently.
Common mistake to avoid: Don’t accidentally work into the turning loop at the beginning. Starting in the second chain from the hook gives you the correct 85 stitches.
Step 3: Build the Neckband
The next four rows create the solid portion of your crochet collar.
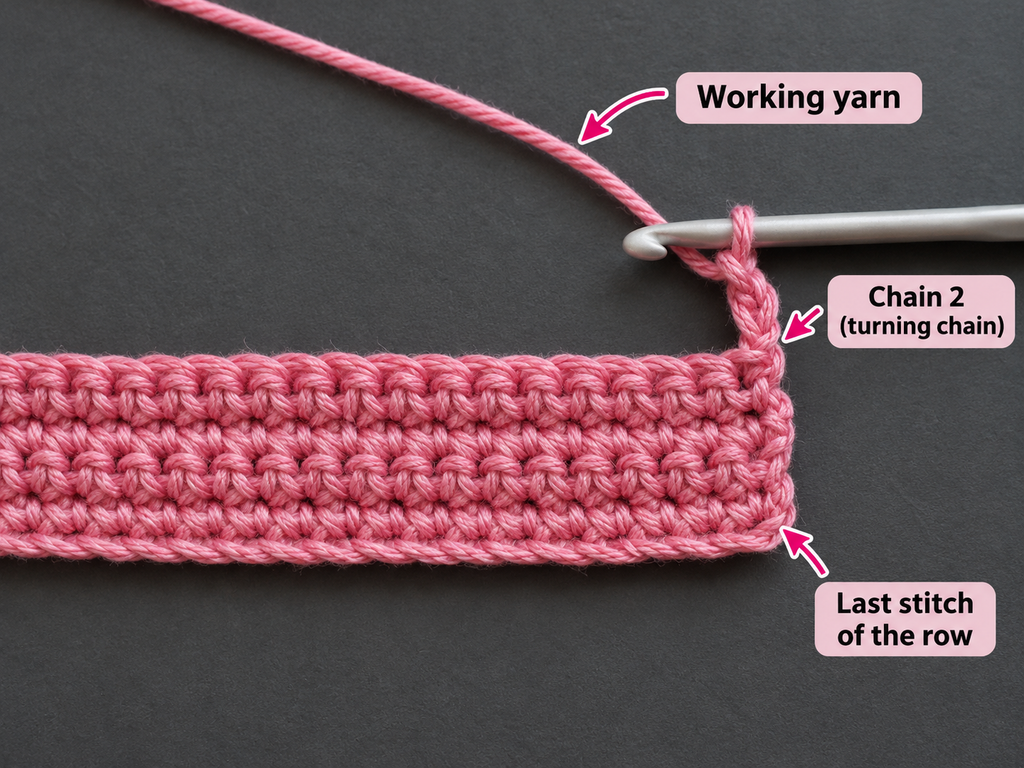
Rows 2–5: Ch 1, turn, sc in every st across. (85 sc per row)
The chain 1 is a turning chain and does not count as a stitch.
Work your first single crochet into the first actual stitch.
Continue across the row, placing one single crochet in each stitch.
Repeat until you’ve completed Row 5.
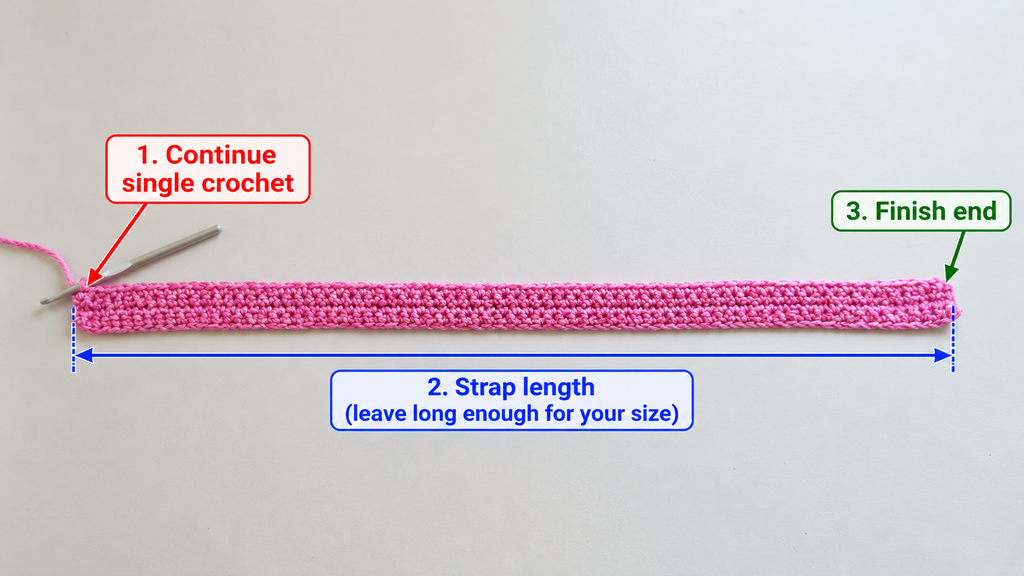
You should now have a long, narrow strip with five rows of single crochet.
Lay it flat and check both ends.
The sides should be straight, and the strip should have approximately the same width from one end to the other.
If one side becomes wider, check whether you’ve accidentally added an extra stitch at the end of a row.
If it becomes narrower, you may have missed the final stitch.
Beginner tip: Place a locking stitch marker in the first stitch of a row until you become comfortable recognizing the edges.
Common mistake to avoid: Don’t work into the turning chain as though it were an extra stitch.
Step 4: Prepare for the Scalloped Border
This is where your simple neckband starts turning into a decorative collar.
Before beginning the shells, count the stitches in Row 5 one more time.
You need 85 stitches for the sample size.
Place a stitch marker in the first stitch and another in the last stitch if that helps you identify the ends.
Turn your work after Row 5 and chain 1.
Make one single crochet in the first stitch.
Now you’re ready to begin the repeating shell pattern.
Each shell repeat uses four stitches from the previous row:
- Skip one stitch.
- Work five double crochets into the next stitch.
- Skip one stitch.
- Work one single crochet into the next stitch.
This sequence creates a rounded fan separated from the next fan by a lower single-crochet stitch.
Beginner tip: Before starting, use your finger to identify the next four stitches. Seeing the repeat physically makes it much easier to follow.
Common mistake to avoid: Don’t work the five double crochets into five separate stitches. All five must go into the same base stitch.
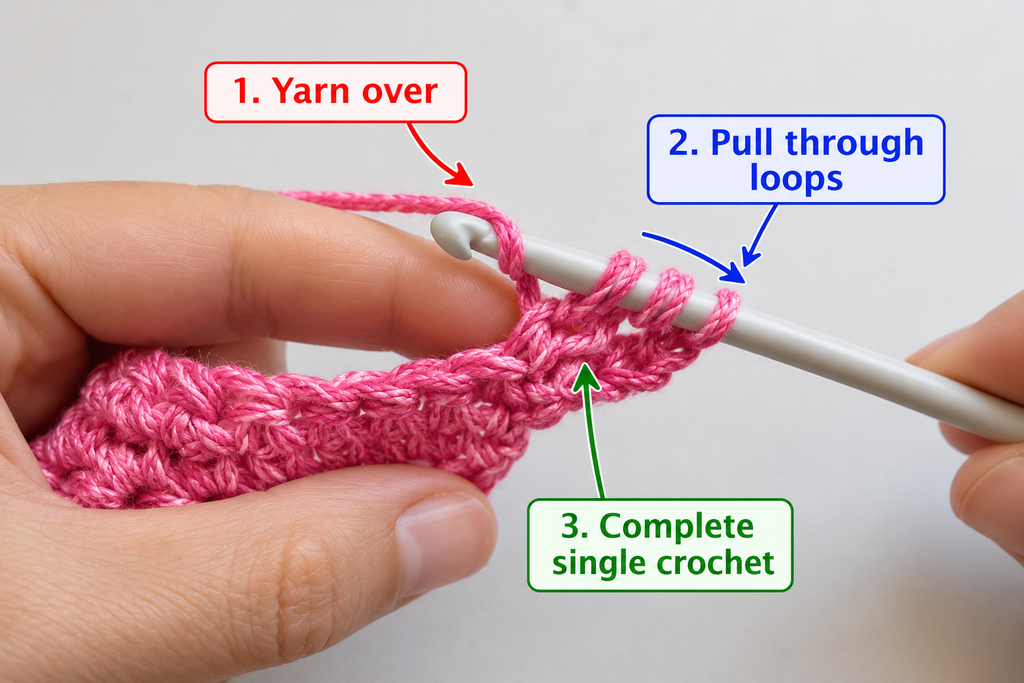
Step 5: Make the First Double Crochet
Skip the next stitch after your starting single crochet.
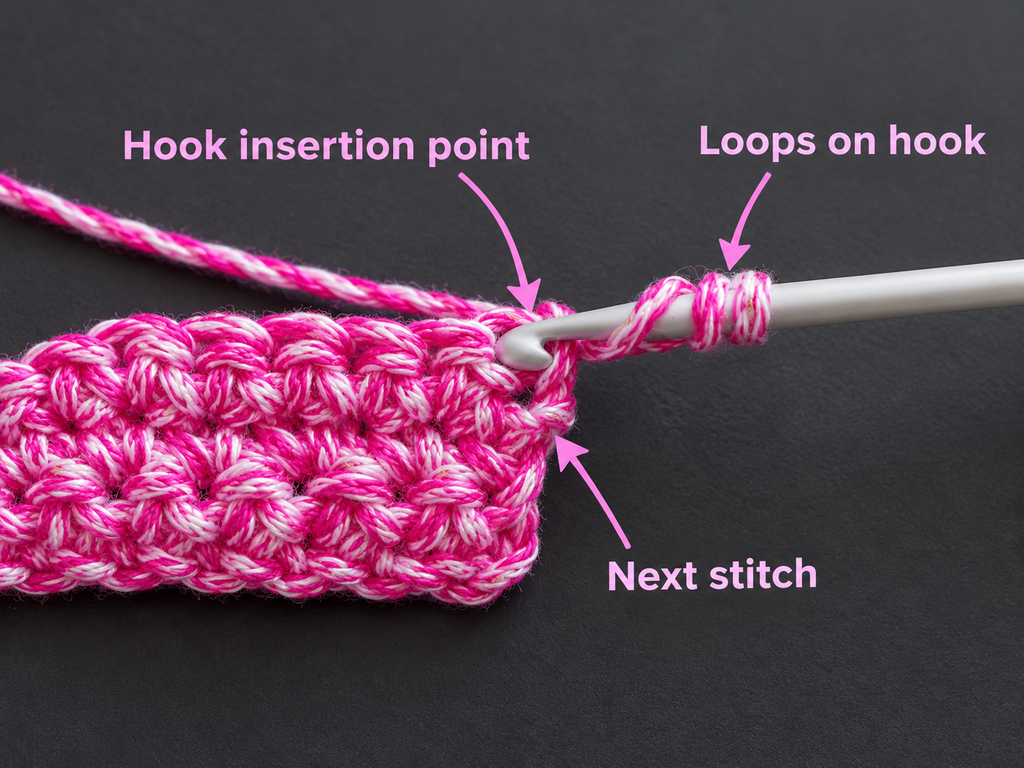
Yarn over once.
Insert your hook into the following stitch.
Yarn over and pull up a loop.
You should have three loops on your hook.
Yarn over and pull through the first two loops.
Yarn over again and pull through the remaining two loops.
You’ve completed one double crochet.
Notice that a double crochet is taller than a single crochet.
That extra height is what allows the shell to rise above the solid neckband.
Beginner tip: Keep the base of the stitch steady with your thumb and index finger while pulling through the loops.
Common mistake to avoid: Don’t yarn over twice before inserting the hook. That would begin a treble crochet rather than the double crochet required here.
Step 6: Complete the First Scallop
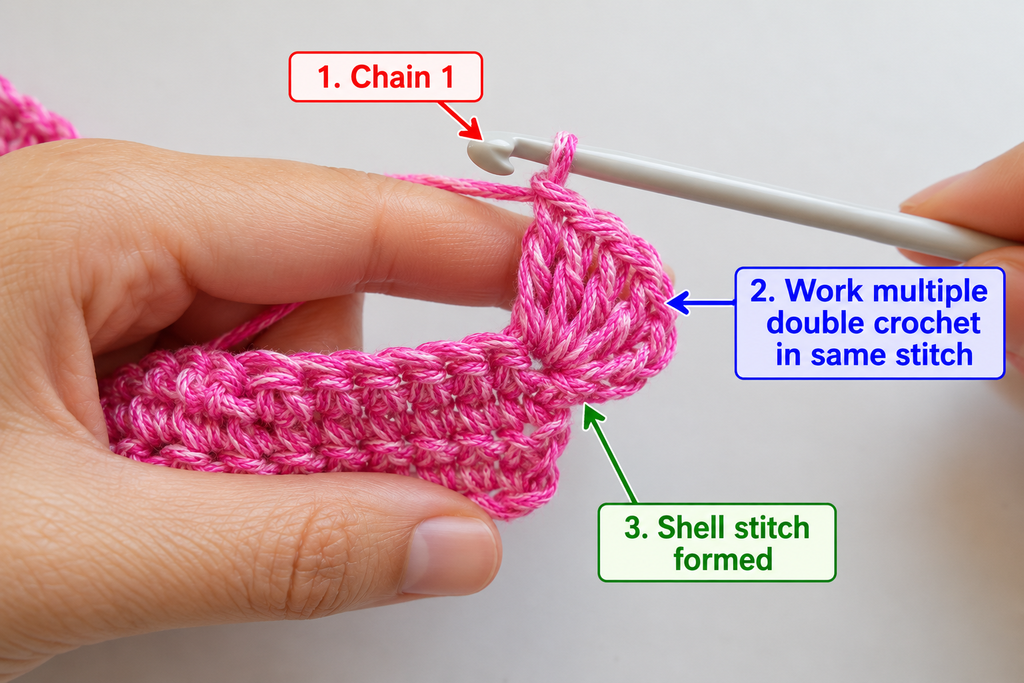
You have one double crochet in your chosen base stitch.
Now make four more double crochets into that same stitch.
You should have a total of five double crochet stitches emerging from one base stitch.
The stitches will spread outward to form a rounded fan.
This group is called a shell.
If the shell looks slightly crowded while it’s on your hook, don’t worry. Once the next single-crochet anchor is added, its rounded shape becomes easier to see.
Try to keep all five double crochets approximately the same height.
Beginner tip: Count each double crochet as you make it: one, two, three, four, five.
Common mistake to avoid: Don’t accidentally add a sixth double crochet. Uneven shell counts can make the scallops look different sizes.
Step 7: Anchor the Shell
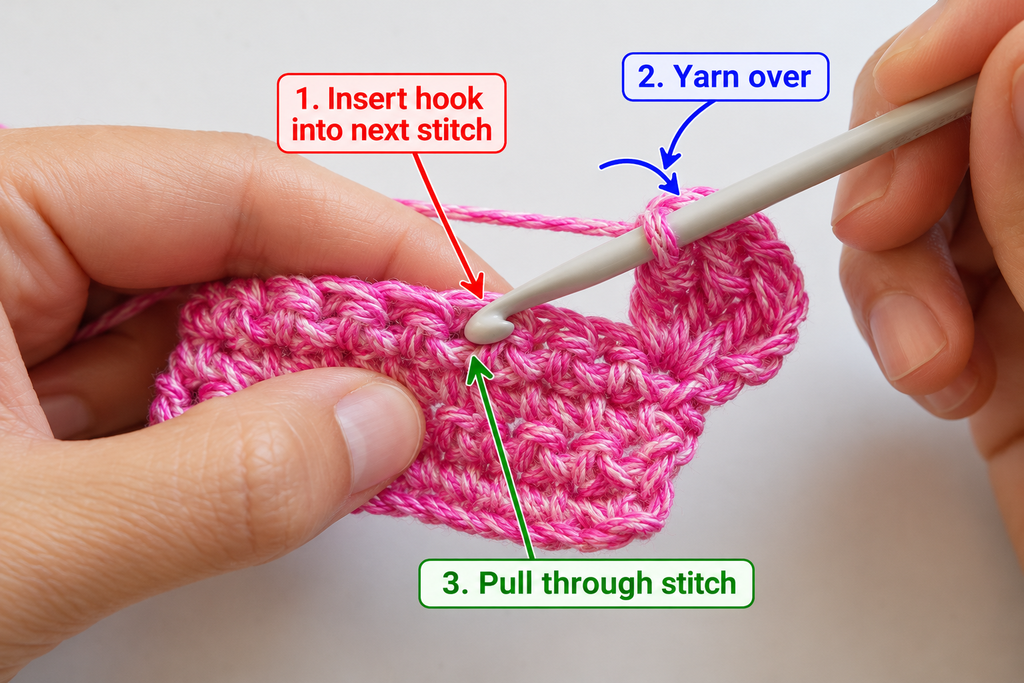
After finishing the five double crochets, skip the next stitch on the neckband.
Work one single crochet into the following stitch.
This single crochet pulls the fabric back down toward the neckband and separates one shell from the next.
Take a moment to look at your work.
You should see one rounded scallop with a lower stitch beside it.
That small difference in stitch height is what creates the repeating decorative edge.
Beginner tip: If you have trouble finding the stitch after the shell, gently spread the neckband with your fingers and count the stitches underneath.
Common mistake to avoid: Don’t place the anchor into the top of the shell. It belongs in the next designated stitch of the neckband.
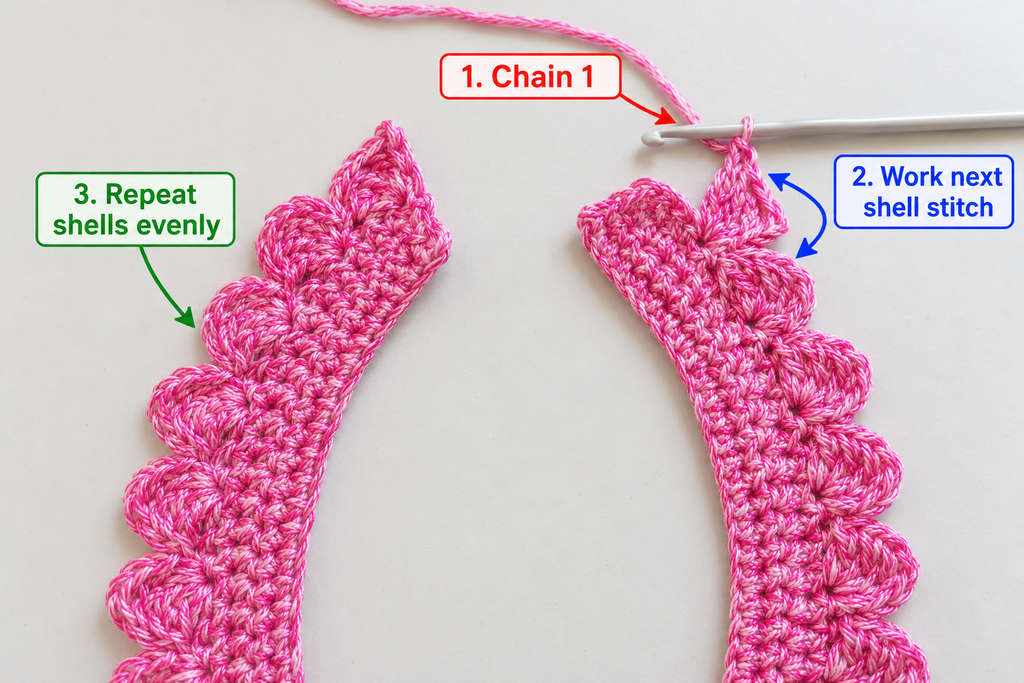
Step 8: Repeat the Shell Pattern Across the Collar
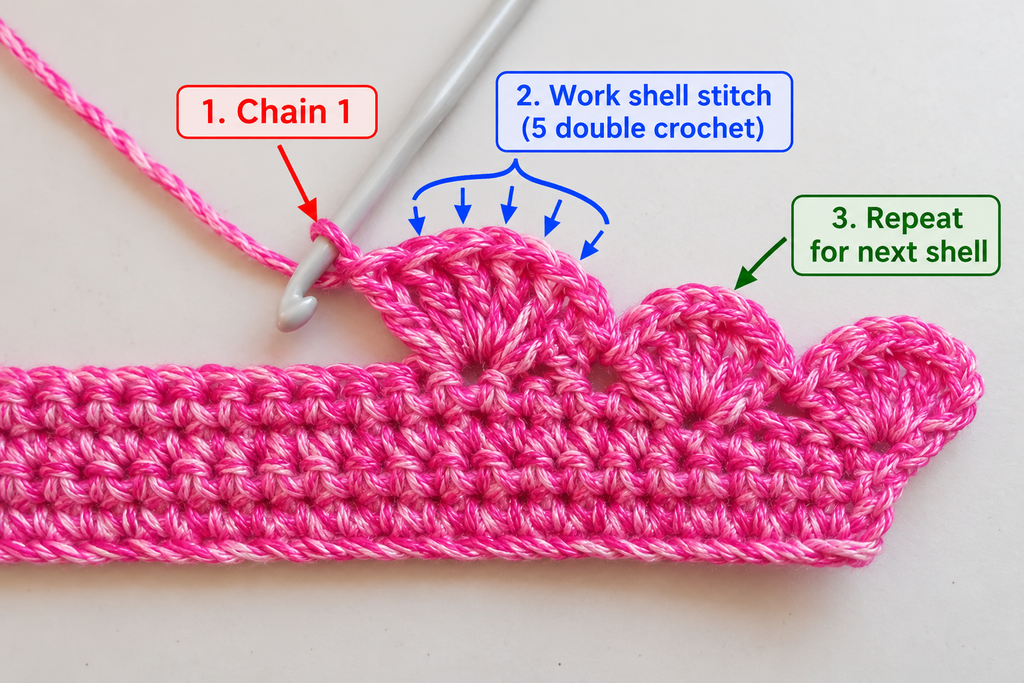
Now continue repeating the same sequence across the remaining neckband stitches.
Row 6 — Scalloped edging:
Ch 1 and turn after Row 5. Sc in the first stitch.
Then repeat the following sequence 21 times:
Skip 1 stitch, work 5 dc in the next stitch, skip 1 stitch, sc in the next stitch.
After the 21st repeat, you should have reached the final stitch of the row.
Your edging should contain:
- 21 rounded five-double-crochet shells.
- 22 single-crochet anchors, including the first and last anchors.
Work slowly for the first few repeats.
Once you’ve made three or four shells, you’ll probably find the sequence much easier to remember.
Try to maintain the same yarn tension throughout the decorative row.
If one shell looks larger than the others, check whether you’ve added an extra double crochet.
If two shells look crowded together, check whether you’ve forgotten to skip a stitch.
Beginner tip: Count the completed shells in groups of five. This makes it easier to keep track of your progress across a long row.
Common mistake to avoid: Don’t confuse the five double crochets in a shell with five separate stitch positions. They all use one base stitch.
Step 9: Check the Collar’s Shape
As you work more shells, the decorated edge may begin to curve.
This is expected.
The inner edge has fewer stitches and remains relatively narrow, while the outer shell row spreads outward.
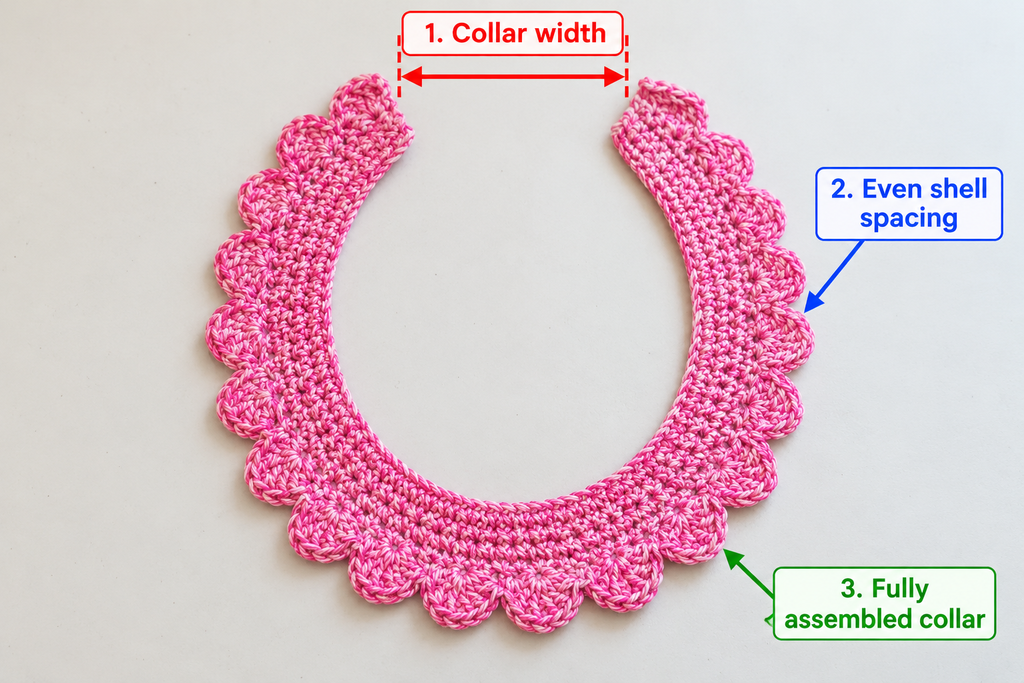
When you’ve completed the decorative row, place the collar on a flat surface.
Gently arrange it into a horseshoe shape, with the straight neckband forming the inside curve and the scallops forming the outside.
The two ends should remain separate because this is a detachable collar, not a closed circular neckline.
Look for smooth, evenly spaced shells.
A little waviness is normal before blocking, but the fabric shouldn’t form deep, uncontrolled ruffles.
If the outer edge ruffles excessively, your double crochet stitches may be unusually loose. Try a smaller hook for the decorative row or make a new swatch to check the shape.
If the collar pulls inward, your stitches may be too tight.
Beginner tip: Place the collar around the neckline of the blouse you plan to wear it with. This gives you a more useful fit check than measuring it on a table alone.
Common mistake to avoid: Don’t stretch the inner neckband aggressively to make it fit. Adjust the starting stitch count if the neckline is too short.
Step 10: Fasten Off the Crochet Work
Once the decorative row is complete, cut the working yarn, leaving a tail approximately 6 inches (15 cm) long.
Pull the yarn tail through the remaining loop on your hook.
Gently tighten the loop to secure the final stitch.
Thread the tail through a tapestry needle.
Weave it through several stitches on the wrong side of the neckband.
Change direction once and weave through another short section of stitches.
This helps keep the tail secure without leaving a noticeable knot.
Repeat with the starting yarn tail.
Don’t trim the tails too close to the fabric until you’re confident they’re secure.
Step 11: Attach the Snap Fastener
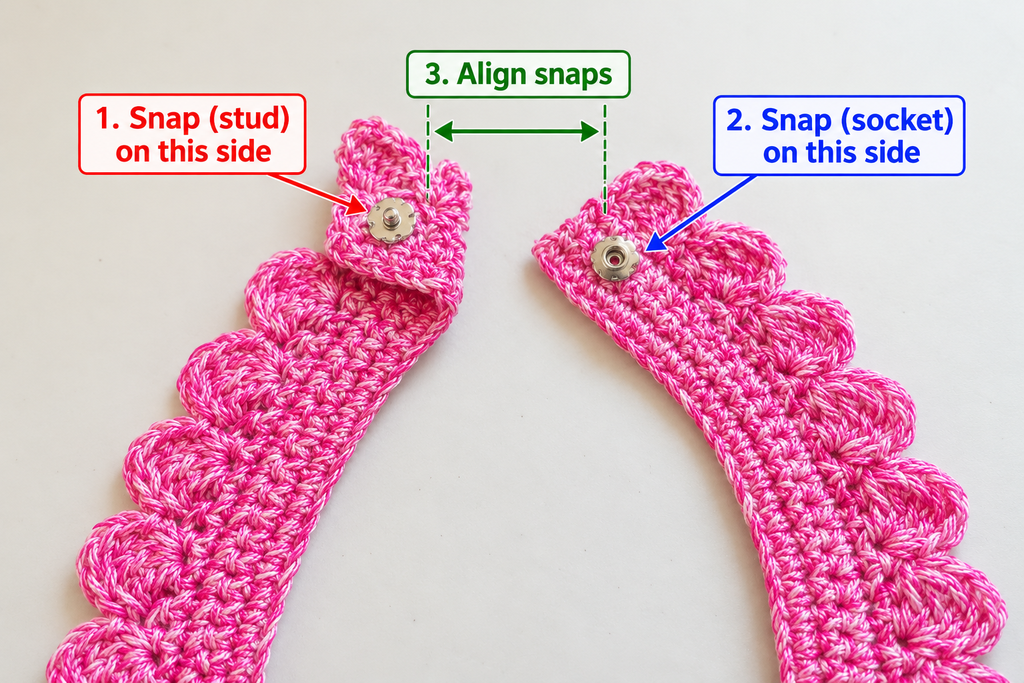
A small sew-on snap makes this crochet collar easy to remove.
Choose a lightweight snap that suits the thickness of your yarn.
Lay the collar flat with both front ends facing you.
Position one half of the snap near the inner neckline corner of one end.
Position the matching half on the opposite-facing side of the other end so the ends overlap neatly when closed.
Use a sewing needle and matching thread to attach each snap half through the crocheted fabric.
Make several small stitches through the snap’s sewing holes.
Keep your stitches secure without pulling so tightly that the fabric puckers.
When both halves are attached, close the snap and check the alignment.
The collar should lie smoothly without twisting at the front.
Beginner tip: Pin the fastener in place and test the fit over your intended blouse before sewing permanently.
Common mistake to avoid: Don’t attach both snap halves to the same facing side of the fabric. They must meet correctly when the collar ends overlap.
For children’s clothing, small fasteners must be attached securely because detached components can present a choking hazard. This particular sample is intended as an adult accessory.
Step 12: Block and Shape Your Crochet Collar
Blocking helps the collar look neat and finished.
It can soften uneven edges, improve the appearance of the scallops, and encourage the collar to lie smoothly.
For a cotton collar, lightly dampen the fabric with cool water.
Gently squeeze out excess moisture using a clean towel.
Avoid twisting or wringing the crochet fabric.
Place the collar on a blocking mat or folded towel.
Arrange the inner neckline into a smooth curve.
Spread the scallops gently so each shell has a rounded shape.
Use rustproof pins if needed to hold the shape while the collar dries.
Allow the collar to dry completely before removing the pins.
Check the yarn label before washing or blocking. Different cotton blends and other fibers may require different care.
Pattern Notes and Stitch Counts
Here are the most important details to keep nearby while working.
Turning Chain Rules
The chain 1 at the beginning of each single-crochet row does not count as a stitch.
Always work into the first actual stitch after turning.
Stitch Count
Rows 1–5 contain 85 single crochet stitches each.
Row 6 contains 21 shells, with five double crochet stitches in each shell, and 22 single-crochet anchors.
Repeat Pattern
The decorative repeat is:
Skip 1, 5 dc in next st, skip 1, sc in next st.
Work this repeat 21 times after the initial single crochet.
Right Side and Wrong Side
The single-crochet neckband is fairly similar on both sides.
Choose the side you prefer as the right side when attaching the fastener.
The finished shell edge will have slightly different stitch definition on each face, so check its appearance before sewing the snap.
How to Adjust the Size
This pattern uses a multiple of four stitches plus one for the single-crochet neckband.
The foundation chain is one chain longer than the desired single-crochet stitch count.
| Size option | Starting chain | Neckband stitches | Shells | Approximate length at sample gauge |
|---|---|---|---|---|
| Smaller | 78 | 77 | 19 | 15.4 in |
| Standard | 86 | 85 | 21 | 17 in |
| Larger | 94 | 93 | 23 | 18.6 in |
These are approximate dimensions before the snap overlap and are not standardized clothing sizes.
If you’re making a collar for a particular garment, measure the garment neckline and adjust your starting chain accordingly.
Common Beginner Mistakes and How to Fix Them
1. The Foundation Chain Is Too Tight
Problem: The collar feels stiff around the neckline.
Why it happens: The foundation chain is shorter than the rows worked above it.
Fix: Crochet the foundation chain more loosely or use a slightly larger hook for that first chain.
2. The Neckband Becomes Wider at One End
Problem: The straight strip looks uneven or trapezoid-shaped.
Why it happens: You’ve accidentally increased or decreased the number of stitches.
Fix: Count your stitches at the end of every row. Remember that the turning chain doesn’t count as a stitch.
3. The Scallops Have Different Sizes
Problem: Some shells are larger or smaller than others.
Why it happens: The number of double crochets or your tension varies between shells.
Fix: Count five double crochets in every shell and try to keep the stitches at a similar height.
4. The Scalloped Edge Looks Too Ruffled
Problem: The outer edge has deep waves instead of a gentle curve.
Why it happens: The decorative stitches may be too loose for the neckband or your chosen yarn.
Fix: Try a smaller hook for the shell row. Make a short sample before repeating the entire border.
5. The Collar Curls Upward
Problem: The outer edge lifts away from the table.
Why it happens: The stitch tension or fabric structure may be pulling the edges inward.
Fix: Check the stitch counts first. Then lightly block the collar. If it still curls, test a slightly larger hook for the decorative row.
6. The Collar Doesn’t Fit the Garment
Problem: The collar is too short or too long for the neckline.
Why it happens: The foundation length was chosen without checking the actual garment.
Fix: Measure the garment neckline before beginning. Adjust the foundation chain in increments of four stitches while keeping the stitch-count formula.
7. The Fastener Pulls the Fabric Out of Shape
Problem: The ends pucker when the snap is closed.
Why it happens: The sewing stitches are too tight or the snap is positioned too far from the neckline.
Fix: Remove and reposition the snap, making sure the ends overlap naturally.
How to Customize Your Crochet Collar
One of the nicest things about this project is how easy it is to change its appearance without learning an entirely new technique.
Try Different Yarn Colors
For a traditional vintage look, use ivory or soft white cotton.
For a romantic style, choose blush pink, lavender, or pale peach.
For something more modern, try deep forest green, navy, or charcoal.
A contrasting color can make the scalloped border stand out against a simple blouse.
Use Different Yarn Weights
Sport-weight cotton creates a lightweight accessory with relatively delicate stitches.
DK cotton can produce a thicker, more noticeable collar.
If you change yarn weight, make a gauge swatch and recalculate the starting chain. Don’t assume the original 86-chain foundation will produce the same size.
Make the Collar Wider
For a slightly wider solid neckband, add one or two extra rows of single crochet before working the scalloped edging.
This increases the depth of the collar without changing the number of shells.
Try on the collar before adding too many extra rows, because a wider neckband may affect how smoothly it sits on the shoulders.
Add a Contrasting Border
For a subtle two-color version, crochet the neckband in one shade and the scalloped row in another.
For example, use ivory for the neckband and dusty rose for the shells.
Change colors at the end of Row 5, secure the new yarn carefully, and continue with the decorative row.
Change the Closure
If you don’t like snap fasteners, you can use crocheted ties instead.
Make two narrow chain cords and attach one to each neckline end.
A ribbon closure can also create a pretty vintage-inspired finish.
Whichever fastening you choose, make sure it holds the collar comfortably without pulling the neckline too tightly.
Make a Matching Gift Set
A handmade crochet collar looks lovely paired with a small crochet flower brooch, a simple hair bow, or a matching crochet bracelet.
Choose the same yarn color for the accessories to make the set feel coordinated.
Finishing Instructions and Care
Once the collar is dry, inspect the entire project.
Check that the starting and ending yarn tails are securely woven in.
Look over the scallops and make sure each one has five double crochet stitches.
Test the snap several times to confirm that it opens and closes easily.
If any thread ends are visible around the fastening, trim them carefully.
Washing
For cotton yarn, gentle handwashing is usually a good option, but always follow the care instructions on your yarn label.
Use cool or lukewarm water and a mild detergent suitable for the fiber.
Avoid vigorous rubbing or twisting.
Drying
Roll the collar in a towel to remove excess moisture.
Reshape the neckline and scallops while damp.
Lay it flat to dry.
Avoid hanging a wet collar, as this can stretch the fabric.
Storing
Store your collar flat in a drawer or a small fabric pouch.
If you fold it, avoid pressing sharp creases into the decorative edge.
Quick Printable-Style Crochet Collar Pattern Summary
Pattern: Easy Detachable Scalloped Crochet Collar
Skill Level: Confident Beginner
Yarn: Sport-weight (#2) cotton, approximately 75–100 yards
Hook: 3.5 mm
Other Supplies: Scissors, tapestry needle, stitch markers, measuring tape, sew-on snap, sewing needle and thread
Stitches: ch, sc, dc
Gauge Target: 20 sc = 4 inches (10 cm)
Starting Chain: Ch 86
Row 1: Sc in 2nd ch from hook and each ch across. Turn. (85 sc)
Rows 2–5: Ch 1, turn, sc in each st across. (85 sc)
Row 6: Ch 1, turn, sc in first st. Sk next st, 5 dc in next st, sk next st, sc in next st. Rep from * to * 21 times.
Shell Count: 21
Finishing: Fasten off, weave in ends, attach a small snap at the neckline ends, lightly block, and dry flat.
Size Adjustment: Use a starting chain of 4n + 2, where n is the number of shells you want. The neckband will have 4n + 1 single crochet stitches.
Frequently Asked Questions About Crochet Collar Patterns
1. Can a complete beginner make this crochet collar?
Yes, although it will be easier if you already know how to make a foundation chain and single crochet.
The decorative row introduces double crochet, but you use the same stitch repeatedly.
If you’re new to double crochet, practice making a few shells on a small swatch before starting the actual collar.
2. What is the best yarn for a crochet collar?
Smooth cotton yarn is an excellent choice because it makes the stitches easy to see and creates a defined decorative edge.
Sport-weight cotton is particularly suitable for a lightweight collar.
Cotton blends can also work well, but the finished drape will depend on the fiber and gauge.
3. How much yarn do I need for a crochet collar?
For this sample, plan on approximately 75–100 yards of sport-weight yarn.
The exact amount depends on your tension, yarn thickness, neckline size, and whether you add extra rows or ties.
It’s always helpful to have a little yarn left over for adjustments.
4. How do I make a crochet collar bigger?
Increase the number of stitches in the starting chain while preserving the pattern’s multiple.
For this design, each additional four neckband stitches allows one extra decorative shell.
Measure the intended neckline and calculate the number of stitches using your gauge.
5. Why is my crochet collar curling?
Curling can happen when the foundation chain is too tight, the decorative stitches are uneven, or the fabric hasn’t been blocked.
Check the stitch counts and tension first.
If everything is correct, gently dampen and block the collar into its intended shape.
6. Can I attach this crochet collar permanently to a dress?
Yes.
Instead of adding a detachable fastener, position the finished collar around the garment neckline and secure it with small hand stitches.
Use thread that matches the garment and avoid stretching either fabric while sewing.
Check that the collar sits evenly before stitching it permanently.
7. Is this a Peter Pan collar?
This pattern is inspired by the soft, rounded look associated with Peter Pan collars.
However, it uses one continuous curved strip with a scalloped outer edge rather than two separately shaped rounded collar points.
If you prefer a traditional two-piece Peter Pan shape, look for a pattern specifically designed with two mirrored collar sections.
Conclusion
A crochet collar is one of those small projects that can make a surprisingly big difference to an outfit.
You don’t need a complicated lace chart or advanced crochet techniques to create something decorative. A simple single-crochet neckband and a row of evenly spaced shells are enough to make a pretty, wearable accessory.
Once you’ve finished your first collar, try experimenting with different colors, yarn weights, or fastening styles.
And if you enjoyed this project, save the crochet collar pattern to your Pinterest crochet board so you can find it again when you’re ready to make another one.