A handmade crochet poncho is one of those pieces you’ll find yourself reaching for again and again. It’s comfortable, easy to layer over a simple outfit, and surprisingly approachable even when you’ve never crocheted clothing before.
If you can make a chain, work a single crochet stitch, and crochet a straight rectangle, you’re already well on your way to making your first poncho.
This easy crochet poncho pattern uses two matching rectangles joined at the shoulders. There’s no complicated shaping, no sleeves to construct, and no need to learn increases or decreases. The body is made using a simple textured stitch, and you can finish the neckline with an optional decorative collar.
We’ll go through the process from beginning to end, including choosing yarn, checking gauge, making the foundation chain, crocheting the panels, joining the shoulders, and finishing the garment.
You’ll also find image placements throughout the tutorial so you can see exactly what each stage should look like.
The best part? Once you understand the construction, you can easily make a shorter poncho for spring, a longer version for autumn, or a generously sized layering piece for colder weather.
What You’ll Learn
By the end of this tutorial, you’ll know how to:
- Choose suitable yarn for a comfortable crochet poncho.
- Crochet an even foundation chain.
- Make the textured single crochet grit stitch.
- Keep rectangular crochet panels straight and consistent.
- Adjust a poncho pattern using simple measurements.
- Join two crochet panels with neat shoulder seams.
- Create a comfortable neckline.
- Crochet an optional decorative iris stitch collar.
- Weave in ends and finish a wearable crochet garment.
Crochet Poncho Pattern Overview
| Detail | Pattern Information |
|---|---|
| Skill level | Beginner / Confident beginner |
| Construction | Two rectangular panels |
| Sample panel size | Approximately 28 × 23 inches (71 × 58 cm) |
| Sample neck opening | Approximately 12 inches wide when laid flat |
| Body stitch | Single crochet grit stitch |
| Collar stitch | Iris stitch |
| Yarn weight | DK / Light #3 |
| Body hook | 5.5 mm |
| Collar hook | 5.0 mm |
| Estimated yarn | 1,200–1,500 yards for the sample, plus a little extra if needed |
| Finishing | Shoulder seams, optional side seams, collar, weaving in ends |
Pattern note: The measurements and starting stitch counts below are a new, measurement-led example, not a reproduced version of the reference pattern. They are planning estimates rather than independently sample-tested gauge results. Always make a swatch and measure your fabric before committing to the full garment.
Materials You’ll Need
Yarn
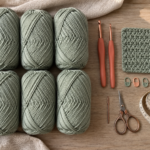
For this beginner poncho, choose a soft DK-weight yarn that produces a flexible fabric.
A cotton-bamboo blend is particularly suitable if you want a lightweight garment with a smooth finish and attractive drape. It feels comfortable over a T-shirt and allows the stitch texture to remain visible.
For a warmer version, you could use a soft acrylic blend or lightweight wool blend instead.
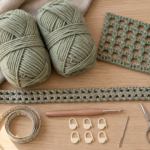
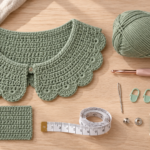
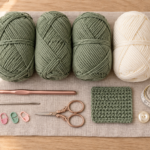
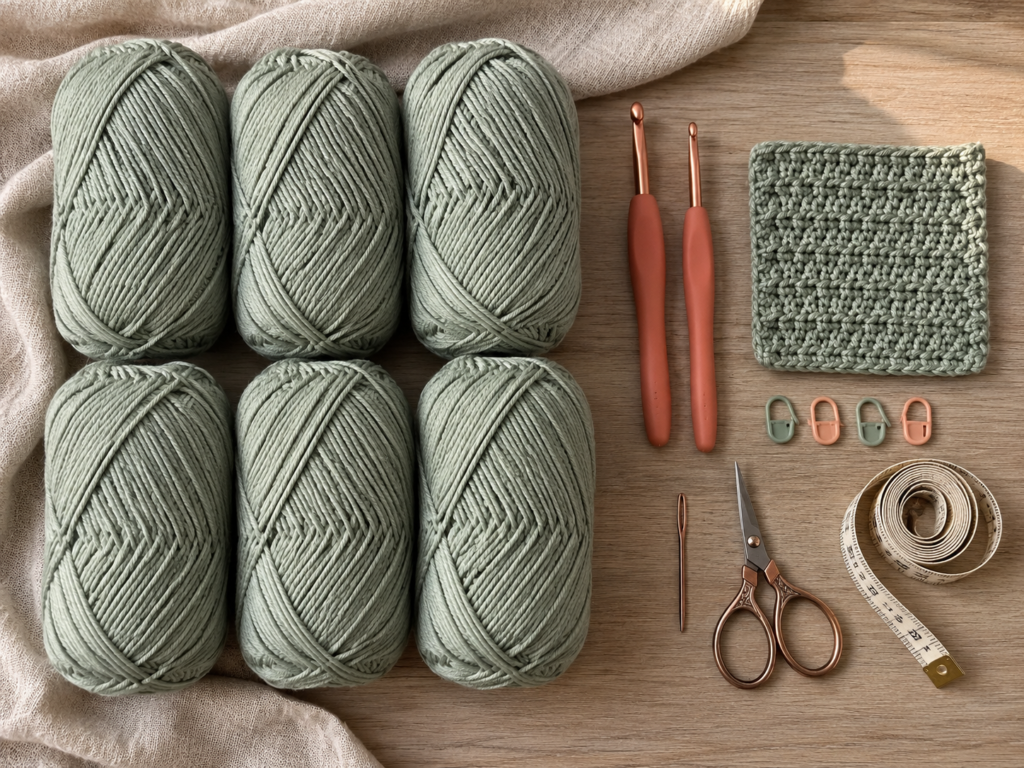
For our example, we’ll use dusty sage cotton-bamboo yarn throughout the entire poncho, including the collar.
Plan for approximately 1,200–1,500 yards for the sample size, although your actual usage will depend on yarn thickness, stitch tension, dimensions, and collar size. Buying an extra skein from the same dye lot is sensible.
Tools
You’ll need a 5.5 mm crochet hook for the main panels, a 5.0 mm hook for the optional collar, a tapestry needle, scissors, a flexible measuring tape, and at least four locking stitch markers.
A few rustproof blocking pins and a blocking mat are also useful, although they’re not essential for completing the poncho.
Choose an ergonomic hook if you find your hands becoming tired during longer projects. This poncho contains many repeated stitches, so comfort matters.
Crochet Abbreviations Used
This tutorial uses US crochet terminology.
| Abbreviation | Meaning |
|---|---|
| ch | Chain |
| sc | Single crochet |
| dc | Double crochet |
| sl st | Slip stitch |
| st / sts | Stitch / Stitches |
| sk | Skip |
| rep | Repeat |
| ch-1 sp | Chain-one space |
| RS | Right side |
| WS | Wrong side |
The stitch instructions use two basic stitches: single crochet for the textured body and double crochet for the optional collar.
If you’re following UK crochet terminology, remember that a US single crochet is called a UK double crochet, while a US double crochet is called a UK treble crochet.

Welcome to the Craft Yarn Council
Before You Start
Understanding the Construction
This poncho begins with two matching rectangles. One becomes the front and the other becomes the back.
After crocheting both pieces, you’ll align their top edges and sew the shoulder sections together, leaving a centered opening for your head.
The sides can remain open for a relaxed poncho shape. If you prefer the garment to stay closer to your body, you can sew a short section near the lower side edges while leaving generous arm openings.
The optional collar is crocheted separately and attached around the neckline.
Because the garment is made from rectangles, you can change its width or length without learning complicated shaping techniques.
Checking Your Gauge
Gauge simply tells you how many stitches and rows fit into a measured area.
For this example, our planning gauge is approximately:
17.5 body stitches × 20 rows = 4 inches (10 cm) in the single crochet grit stitch.
This is a target for calculating the sample dimensions, not a guaranteed result with every DK yarn.
Make a swatch at least 5 inches wide and tall. Lay it flat without stretching, then count the stitches and rows inside the central 4 inches.
If you have more stitches than the target, your fabric is tighter or smaller. Try a slightly larger hook.
If you have fewer stitches, your fabric is looser or wider. Try a smaller hook.
For a poncho, don’t focus only on the stitch count. Hold your swatch up and see how it hangs. A fabric that feels stiff on the table may also feel bulky on your shoulders.
Counting Stitches and Keeping Straight Edges
One of the most common beginner mistakes is accidentally adding or losing stitches at the end of a row.
To avoid this, place a marker in the first and last stitches of your working row, especially during the first several rows.
Move the markers upward as you work.
For this pattern, the turning chain does not count as a stitch. This makes it easier to recognize the actual first stitch and maintain a consistent count.
Count your stitches every few rows instead of waiting until the rectangle is nearly finished.
Choosing the Right Color
Light and medium yarn colors make crochet stitches easier to see.
Dusty sage, oatmeal, muted rose, pale blue, and soft gray are all beginner-friendly choices.
Very dark yarn can make it difficult to identify the stitch loops, especially when you’re learning a textured pattern.
For your first poncho, a single color also makes the construction easier because you won’t have to manage multiple color changes.
Step-by-Step Crochet Tutorial
Step 1: Make the Foundation Chain
Begin by making a slip knot and placing it on your 5.5 mm crochet hook.
Hold the working yarn comfortably in your non-dominant hand. Wrap the yarn over the hook and pull it through the loop to create your first chain stitch.
Continue making chains until you have the required number for your chosen width.
For our sample:
Foundation: Chain 125.
This produces 122 body stitches after the first row using the instructions below.
Your finished panel should measure approximately 28 inches wide if your gauge matches the planning gauge.
Try not to pull the foundation chain too tightly. A tight starting chain can cause the bottom edge to curve inward, even when the rest of your crochet is perfectly even.
If your foundation feels unusually stiff, try making the chain with a slightly larger hook and switching back to 5.5 mm for the first row.
Beginner tip: Place a removable stitch marker every 20 chains while counting. It makes a long foundation much easier to manage.
Common mistake to avoid: Counting the loop on your hook as a chain stitch. The working loop is not included in your chain count.
Step 2: Crochet the First Textured Row
Now we’ll begin the single crochet grit stitch.
This stitch creates a gently textured fabric by combining skipped stitches with pairs of single crochet stitches.
The pattern looks more interesting than plain single crochet but is still straightforward once you understand the repeat.
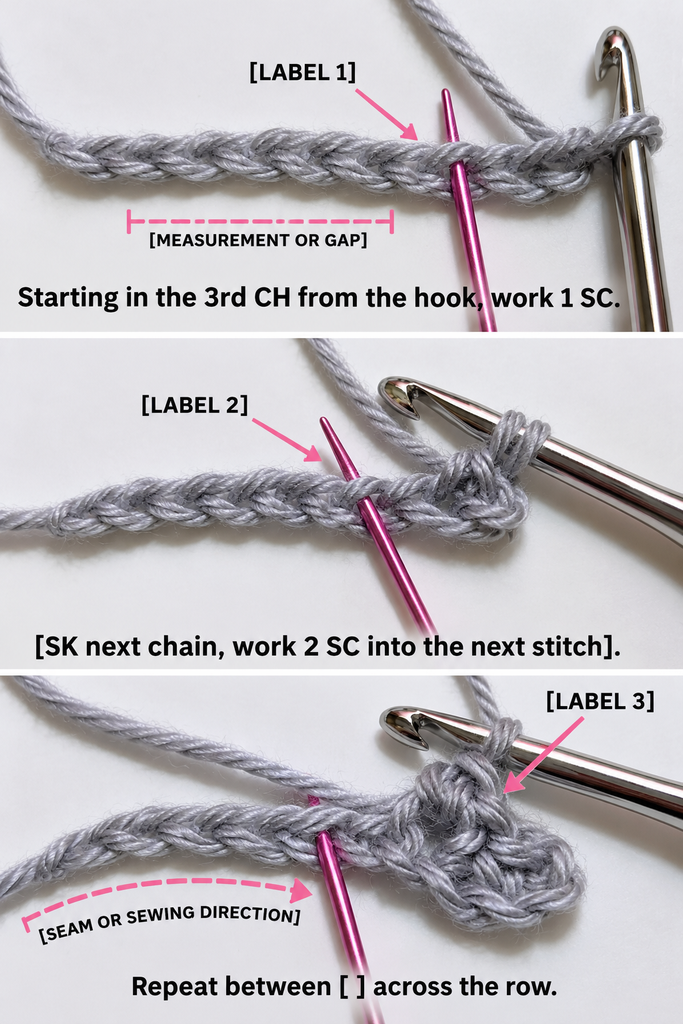
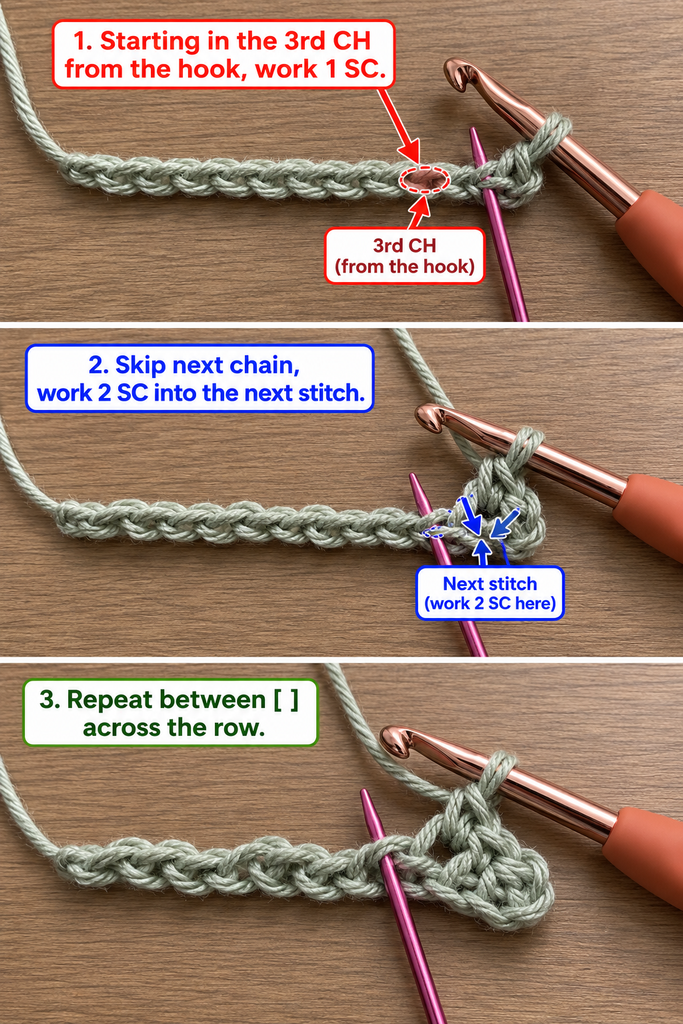
Start by inserting your hook into the third chain from the hook.
Yarn over and pull up a loop. Yarn over again and pull through both loops to complete one single crochet.
Next, skip one foundation chain.
Work two single crochet stitches into the following chain.
Continue repeating this sequence across the row: skip one chain, then work two single crochet stitches into the next chain.
When two foundation chains remain, skip the first of those two chains and work one single crochet into the final chain.
You should now have 122 stitches.
The extra single crochet at the beginning and end helps create balanced edges.
Beginner tip: After completing the first ten or twelve stitches, stop and look at the fabric. You should see small paired stitch groups forming along the foundation.
Common mistake to avoid: Working two single crochet stitches into two separate chains. Both stitches must go into the same chain to form the textured repeat.
Step 3: Finish the First Row and Check Your Edge
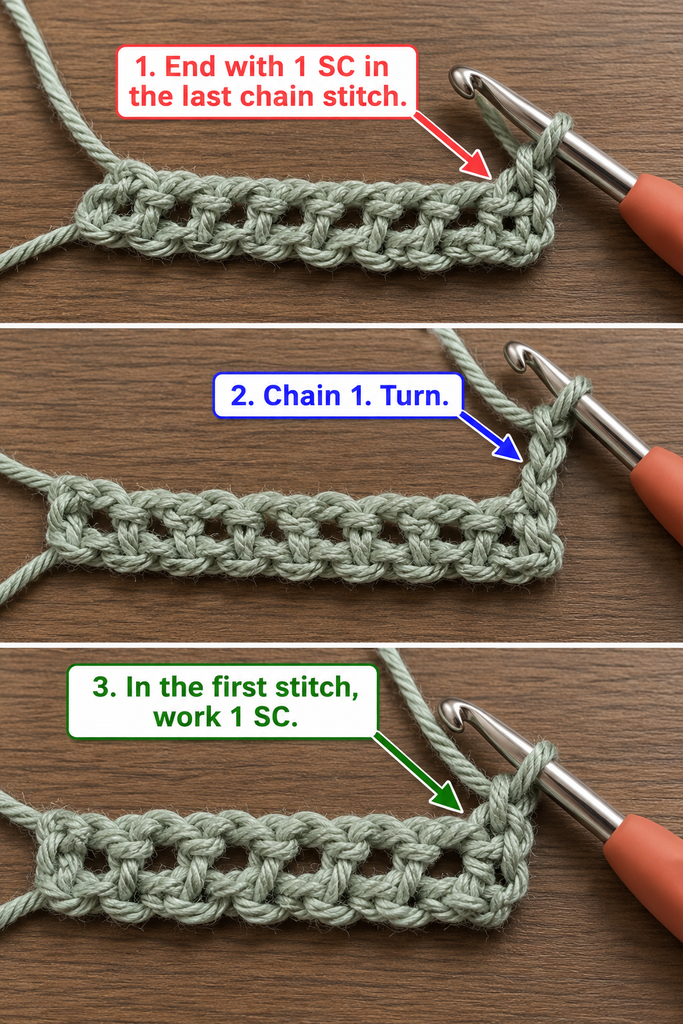
Before turning your work, check the stitch count.
Your sample should contain 122 stitches, including the single crochet stitches at both ends.
Look closely at the final stitch. It should sit at the end of the foundation chain, not halfway along the row.
If your edge appears uneven, you may have skipped the final chain or worked an extra stitch into the same space.
It’s much easier to correct this now than after another ten rows.
Once you’re happy with the first row, make one chain stitch and turn your work.
This chain provides the height needed to begin the next row. It does not count toward your 122 stitches.
Lay the short strip on the table and gently smooth it with your hand. A slight curve is normal in the early rows, but the fabric should not be tightly curling into a tube.
Beginner tip: Use a stitch marker to identify the last stitch before turning. This is particularly helpful while the textured pattern is still unfamiliar.
Common mistake to avoid: Adding a single crochet into the turning chain on the following row. Work into the actual edge stitch instead.
Step 4: Work the Second Row
The second row establishes the repeat you’ll use throughout the main panels.
After making your turning chain and turning the work, insert your hook into the first stitch.
Work one single crochet.
Skip the next stitch.
Work two single crochet stitches into the following stitch.
Repeat this sequence across the row until one stitch remains.
Work one single crochet into that final stitch.
You should still have 122 stitches.
Make one chain and turn.
That’s the main body pattern.
Notice how the pairs of single crochet stitches begin to settle into the small spaces created by the previous row.
This creates a textured surface without requiring complicated stitches or special techniques.
Don’t worry if the texture isn’t obvious immediately. It becomes much easier to recognize after several rows.
Beginner tip: Think of the repeat as “skip one, two in the next.” Saying it quietly while crocheting can help you establish a rhythm.
Common mistake to avoid: Forgetting the first or last single crochet. Those edge stitches are important for keeping the panel width consistent.
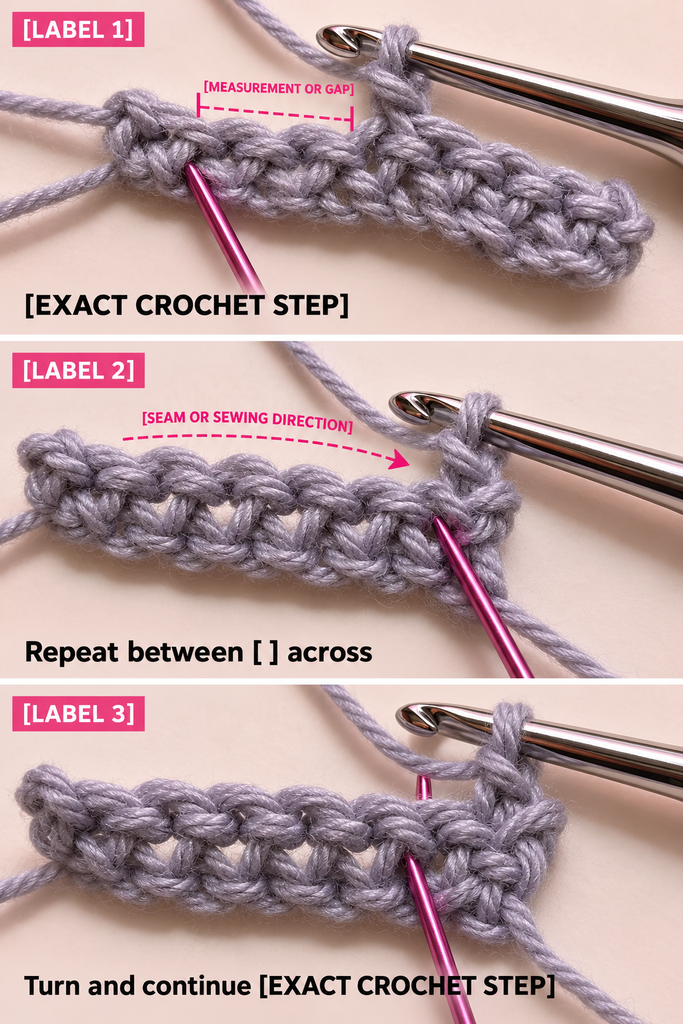
Step 5: Continue the Textured Rectangle
Now you can settle into the repeated stitch pattern.
For every new row, chain one, turn, work one single crochet in the first stitch, then repeat the skip-one-and-two-single-crochet sequence across the row.
Finish with one single crochet in the final stitch.
Keep repeating until your rectangle reaches the desired height.
For our example, the target is approximately 23 inches (58 cm) from the foundation edge to the final row.
At the planning gauge of 20 rows per 4 inches, this would take approximately 115 rows in total.
However, don’t rely only on row count. Different yarns, hooks, and crocheting styles produce different row heights.
Measure your panel regularly and stop when it reaches the correct length.
Every ten rows, check three things: your stitch count, your panel width, and the appearance of the side edges.
If the width begins to change, count your stitches carefully before continuing.
If the fabric looks uneven, gently lay it flat and check whether you’re pulling the yarn more tightly than you did at the beginning.
A comfortable, consistent tension is more important than crocheting quickly.
Beginner tip: Use a row counter or make a small tally mark after every completed row. This will help when making the second rectangle.
Common mistake to avoid: Stretching the panel while measuring. Lay it flat and let the fabric rest naturally before taking measurements.
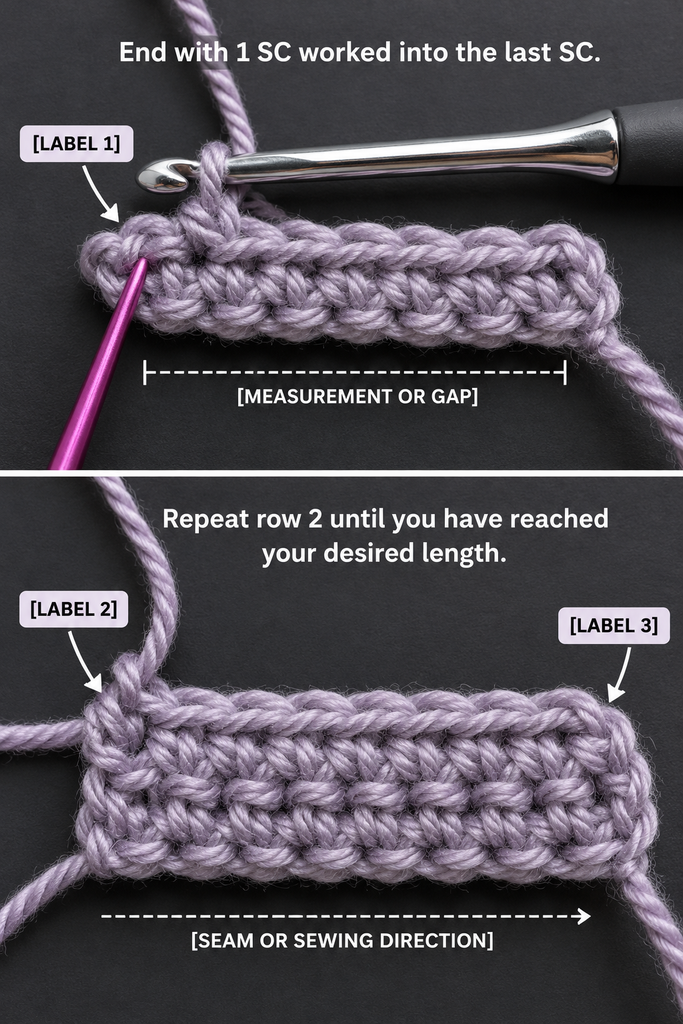
Step 6: Make the Second Matching Rectangle
Once your first panel measures approximately 28 inches wide and 23 inches long, finish the last stitch and cut the yarn, leaving a tail of about 12 inches.
Pull the yarn tail through the final loop to secure your work.
Lay the panel flat and record its measurements. Write down the number of rows you completed, too.
Now make a second rectangle using exactly the same foundation chain and stitch repeat.
For our sample, that means starting with another chain of 125 and maintaining 122 stitches across each row.
Work until the second panel matches the first in both width and length.
When you’ve finished, lay the two rectangles next to each other.
Their edges should line up without needing to stretch either piece.
If one panel is slightly longer, check the row counts. You may have accidentally worked an additional row.
If both have the same number of rows but different lengths, your tension may have changed while crocheting.
Small differences can sometimes be corrected with gentle blocking, but a significant difference should be fixed before joining the panels.
Beginner tip: Make both panels with the same hook, yarn, and working tension. Avoid changing hooks halfway through the project.
Common mistake to avoid: Assuming that equal row counts always produce equal dimensions. Measure both rectangles before assembly.
Step 7: Position the Panels and Mark the Neckline
Now comes the exciting part: turning your two rectangles into a wearable garment.
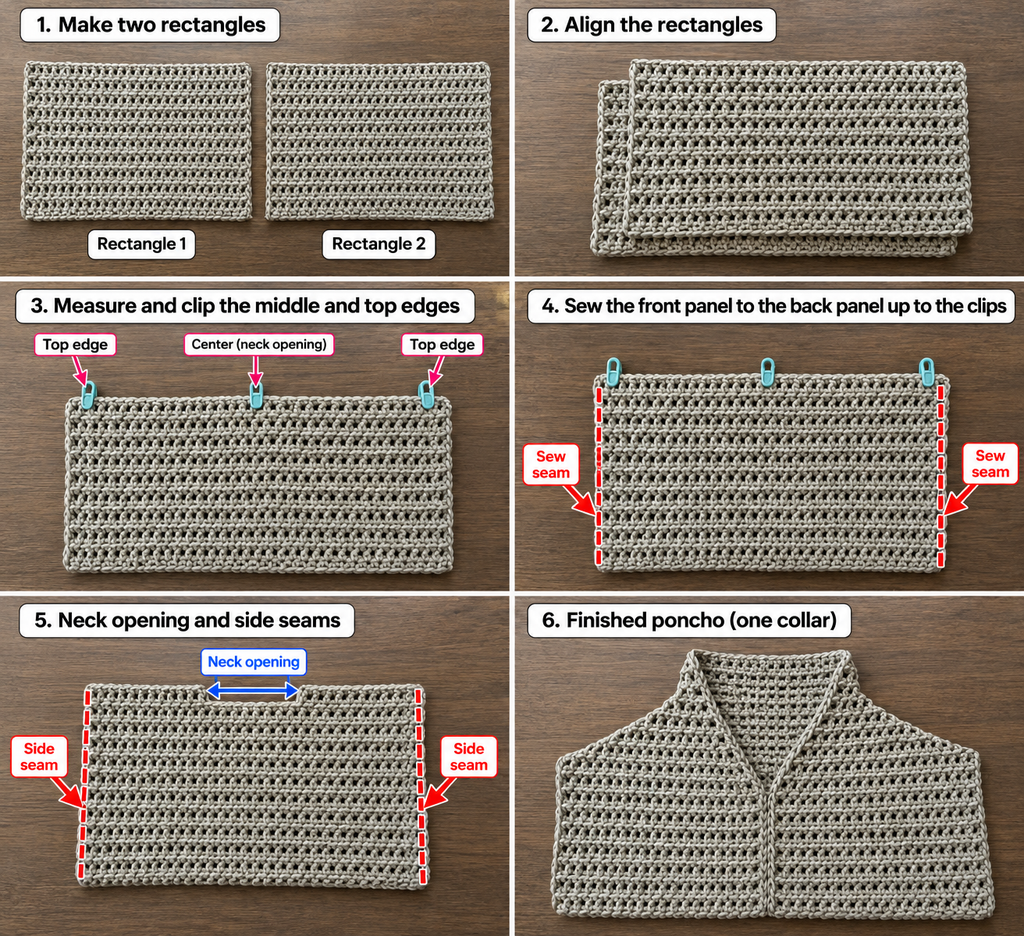
Place the rectangles together with their top edges aligned.
The top edges are the 28-inch edges of the panels.
Decide which surfaces you would like facing outward. This textured stitch is relatively similar on both sides, so you can choose the side you prefer.
Use your measuring tape to find the midpoint of the top edge.
For our sample, the midpoint is approximately 14 inches from either corner.
We’ll leave a centered opening of approximately 12 inches for the neckline.
Measure 6 inches to the left of the midpoint and place a stitch marker through both panels.
Measure 6 inches to the right and place another marker.
You should now have an opening measuring approximately 12 inches between the markers, with about 8 inches of shoulder seam on each side.
Before sewing, carefully hold the panels against your shoulders to check the neckline.
The opening must be large enough to pass comfortably over your head, especially after the collar is added.
If you prefer a wider neckline, move the markers farther apart. If you prefer a narrower neckline, move them closer together, but check that it will still pass over your head.
Beginner tip: Use two different marker colors to distinguish the neckline from the outside shoulder corners.
Common mistake to avoid: Making the neck opening too small before trying the garment on. It’s easier to adjust the markers than to undo finished seams.
Step 8: Sew the Shoulder Seams
Thread your tapestry needle with a length of matching yarn.
Keep the panels aligned, with the surfaces you want facing outward placed together if you prefer the seam to be hidden inside.
Start at one outside shoulder corner.
Insert your needle through the corresponding edge loops of both panels and pull the yarn through.
Continue using a simple whipstitch seam, passing the needle through matching loops and working toward the neckline marker.
Take care to keep the stitches evenly spaced.
When you reach the marker, secure the yarn and weave the tail through several stitches.
Repeat the same process on the opposite shoulder.
You should now have two shoulder seams with an opening in the center for your head.
Turn the poncho right side out and try it on.
The front and back panels should hang comfortably over your body, while the neckline rests naturally around your shoulders.
If one shoulder appears higher than the other, check that both seams are the same length.
Beginner tip: Don’t pull the sewing yarn too tightly. A slightly flexible seam allows the fabric to drape naturally.
Common mistake to avoid: Sewing all the way across the top edge. Remember to stop at the neckline markers.
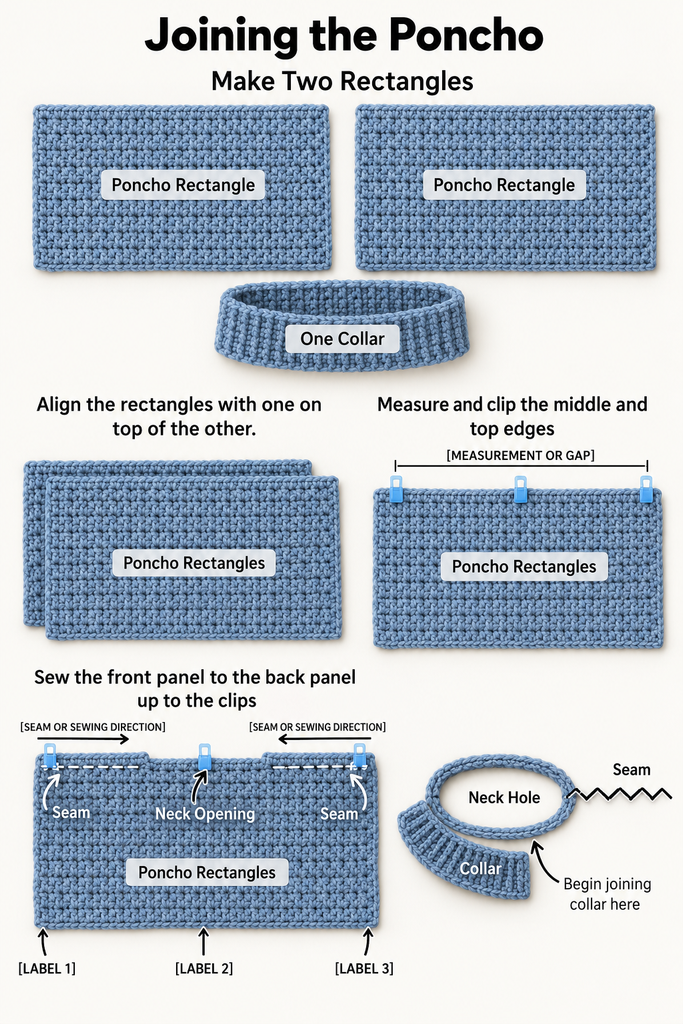
Step 9: Crochet the Optional Decorative Collar
Your poncho is already wearable, but a decorative collar can give the neckline a more finished appearance.
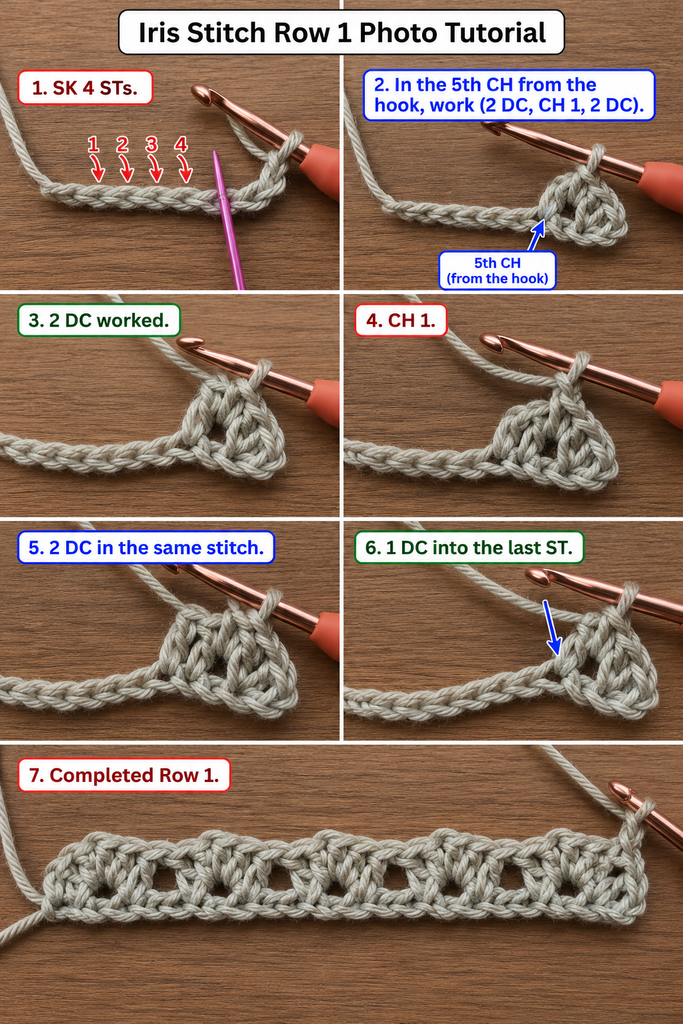
For this version, we’ll use the iris stitch.
The iris stitch creates small openwork clusters that look delicate without requiring difficult crochet techniques.
Switch to your 5.0 mm crochet hook.
For the sample neckline, begin with a foundation chain of 95. This is a starting estimate for a collar strip intended to measure approximately 24 inches around; adjust it after measuring your own stitch gauge.
The iris stitch foundation uses a multiple of four plus three chains, so you can add or subtract four chains at a time while keeping the repeat intact.
Skip the first four chains from your hook.
In the fifth chain, work two double crochet stitches, chain one, and then work two more double crochet stitches into that same chain.
You’ve created your first iris cluster.
Skip the next three chains and work another iris cluster into the following chain.
Continue across the foundation until two chains remain. Skip the next chain and work one double crochet into the final chain.
For a foundation of 95 chains, this creates 23 iris clusters.
The small chain-one opening in the center of each cluster is where you’ll work the stitches in the following row.
Beginner tip: Practice the iris stitch on a short chain before beginning the full collar. It becomes much easier once you’ve completed three or four clusters.
Common mistake to avoid: Working the second pair of double crochet stitches into the next chain instead of the same chain. All four double crochet stitches in a cluster share the same foundation point.
Step 10: Build the Collar Strip
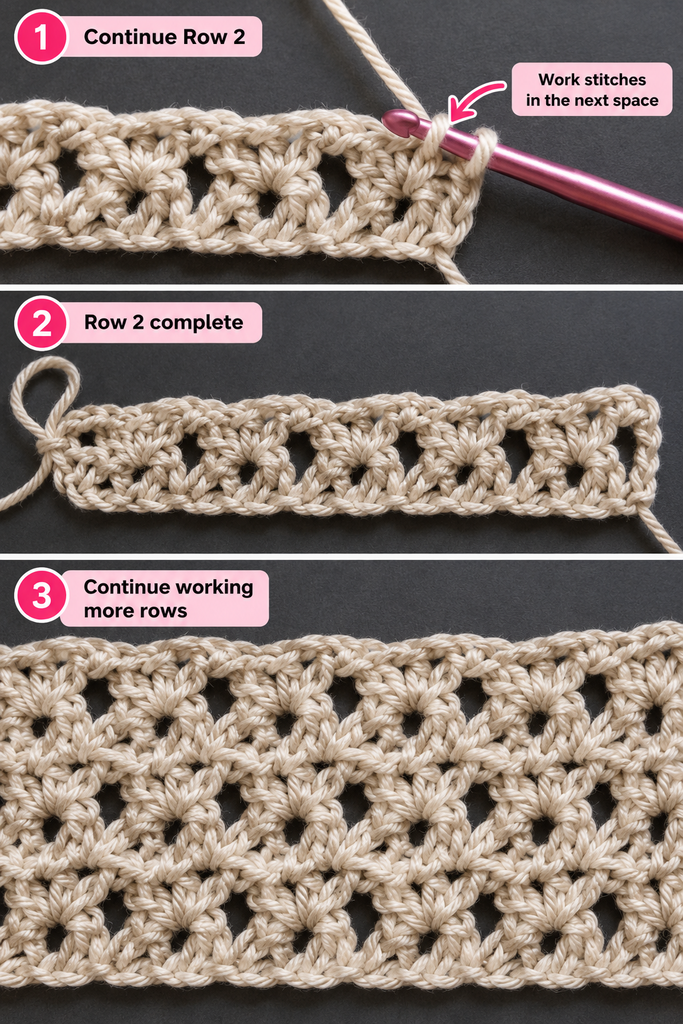
Once you’ve completed the first iris stitch row, chain three and turn your work.
The chain three counts as the first edge double crochet for this collar.
Look for the chain-one space in the center of the first iris cluster.
Work another iris cluster into that space: two double crochet, chain one, and two double crochet.
Move to the next chain-one space and repeat.
Continue working one iris cluster into each chain-one space across the row.
At the end, work one double crochet into the top of the beginning turning-chain edge from the previous row.
Repeat this row until your collar strip reaches the desired height.
For our sample, approximately four rows in total may produce a narrow decorative collar, but you should measure the actual fabric. Aim for around 2.5–3 inches high.
Now measure the length of the collar strip.
It should match the actual circumference of your neckline without needing to stretch excessively.
If the collar is too short, it’s better to remake it with additional iris stitch repeats than to force it around the opening.
Once the dimensions are correct, fasten off, leaving a yarn tail long enough to join the short ends.
Beginner tip: Check that every new iris cluster sits inside the chain-one space of the cluster below it.
Common mistake to avoid: Inserting your hook between two neighboring clusters instead of into the center of the previous cluster.
Step 11: Attach the Collar to the Poncho
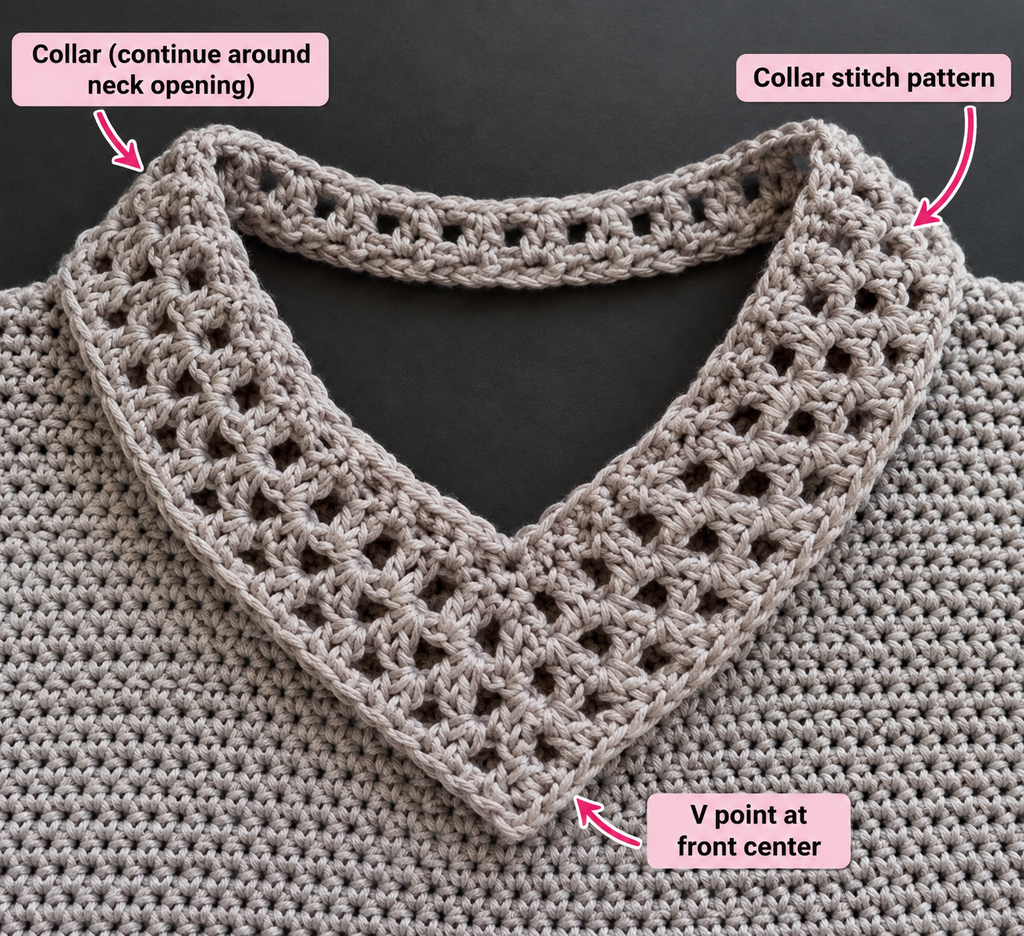
Before attaching the collar, join its two short ends with a neat seam to create a continuous ring.
Check that the ring passes comfortably over your head.
Next, turn the poncho so the neckline is easy to access.
Position the collar around the opening, with the base of the collar touching the neckline edge.
Use stitch markers to hold it in place at the front, back, and both shoulders.
Make sure the collar is distributed evenly. You don’t want all the extra fabric gathered into one section.
Thread your tapestry needle with matching yarn.
Starting at the back neckline, sew the collar to the poncho with small, even stitches.
Work slowly around the entire opening, joining the collar base to the neckline without pulling the yarn too tightly.
If the collar seems to bunch, stop and redistribute it before continuing.
When you reach the starting point, secure the yarn and weave in the end.
Try the poncho on again.
The collar should rest comfortably without pulling the shoulder seams inward.
Beginner tip: Use several stitch markers to divide the neckline into quarters before sewing. This helps keep the collar evenly positioned.
Common mistake to avoid: Attaching a collar that is too small. It can pull the neckline inward and make the garment uncomfortable.
Step 12: Finish the Poncho and Check the Fit
Your poncho is nearly complete.
Put it on and check how the front and back panels hang.
The shoulder seams should sit comfortably, and the neckline should allow you to move your head without pulling.
If you prefer an open, flowing poncho, you can leave the side edges completely unsewn.
If you’d like the panels to stay together more securely, sew approximately 5 inches upward from each bottom side corner, leaving the remaining upper side edges open for your arms.
For our 23-inch panel height, that would leave approximately 18 inches open above each short side seam.
Check this arrangement while wearing the poncho before sewing permanently.
Next, inspect the shoulder seams and collar attachment.
Make sure all yarn tails are securely woven into the fabric and that no loose loops remain.
Finally, gently smooth the garment and check that the front and back hems hang evenly.
Beginner tip: Wear the poncho for a few minutes before deciding whether to add side seams. The weight of the fabric can change how it drapes.
Common mistake to avoid: Sewing the sides too high and accidentally restricting arm movement.
Pattern Notes and Stitch Counts
The following notes summarize the stitch instructions for the sample size.
Body Pattern — Make Two
Foundation: Ch 125.
Row 1: Sc in 3rd ch from hook. *Sk next ch, 2 sc in next ch; rep from * until 2 chains remain. Sk next ch, sc in last ch. (122 sts)
Row 2: Ch 1, turn. Sc in first st. *Sk next st, 2 sc in next st; rep from * until 1 st remains. Sc in last st. (122 sts)
Rows 3 onward: Repeat Row 2 until the panel measures approximately 23 inches high. At the planning row gauge, this is approximately 115 rows total.
Make a second matching panel.
Turning Chain Rules
The body turning chain does not count as a stitch. Always work the first single crochet into the first actual stitch.
For the optional iris collar, the beginning chain three counts as an edge double crochet.
Stitch Counts
The sample body has 122 stitches per row. This count should remain unchanged throughout the rectangle.
Each pair of single crochet stitches compensates for the skipped stitch immediately before it.
If your count changes, check that you haven’t missed the first or last stitch.
Right Side and Wrong Side
The body texture is similar on both surfaces. Choose the appearance you prefer as the outside of the poncho and keep that choice consistent for both panels.
If you’re using a yarn with a noticeable surface texture or color variation, lay both panels in the same orientation before joining.
Adjusting the Size
The width of each rectangle is controlled by the foundation chain.
The height is controlled by the number of rows.
At the illustrative gauge of 17.5 stitches per 4 inches, you can use these approximate starting points:
| Target Panel Width | Starting Chain | Body Stitches |
|---|---|---|
| 24 inches | 109 | 106 |
| 28 inches | 125 | 122 |
| 32 inches | 143 | 140 |
These are measurement examples, not standardized clothing sizes. The foundation must contain an odd number of chains for this particular edge-balanced grit stitch repeat.
For a custom width, calculate the approximate number of stitches from your swatch, round to a suitable even stitch count, and add three chains for the foundation.
Choose the neckline width separately. Always test it over your head before sewing or attaching a collar.
Common Beginner Mistakes and How to Fix Them
1. The Foundation Chain Is Too Tight
A tight foundation can cause the bottom edge to pull inward, even when the rest of the fabric looks even.
Fix: Relax your tension or make the foundation with a hook slightly larger than the one used for the main rows.
2. The Rectangle Becomes Wider
This usually happens when an extra stitch is accidentally worked at the beginning or end of a row.
Fix: Count your stitches every few rows. Use markers to identify the first and last stitches.
3. The Rectangle Becomes Narrower
If the fabric gradually narrows, you’re probably missing a stitch near one of the edges.
Fix: Check the final stitch carefully before turning. Make sure you’re not accidentally working into the turning chain instead of the edge stitch.
4. The Two Panels Have Different Lengths
Even when you use the same yarn and hook, your tension can change as you crochet.
Fix: Compare both row counts and actual measurements. Small differences may improve with blocking, but larger differences are best corrected before assembly.
5. The Neckline Is Too Tight
A narrow neckline can make the poncho difficult to put on and uncomfortable to wear.
Fix: Remove part of the shoulder seams and widen the opening. Test the fit again before attaching the collar.
6. The Shoulder Seams Look Bulky
Pulling the sewing yarn too tightly can create a thick, raised seam.
Fix: Use small, even whipstitches and allow the seam to remain slightly flexible. Avoid joining several thick loops at once.
7. The Collar Doesn’t Sit Flat
An incorrectly sized collar may pull inward or ripple around the neckline.
Fix: Compare the collar circumference with the actual neck opening. Add or remove iris stitch repeats as needed, then distribute the collar evenly with markers before sewing.
8. The Poncho Feels Too Stiff
A stiff poncho often results from tight tension, a dense yarn, or a hook that’s too small for the desired drape.
Fix: Make a larger swatch with a slightly bigger hook and compare the fabric before restarting the garment.
How to Customize This Crochet Poncho
One of the nicest things about a rectangle poncho is how easily you can adapt it to your personal style.
Make a Lightweight Summer Poncho
Choose a breathable cotton or cotton-bamboo yarn and keep the panels relatively short.
A lighter fabric works beautifully over a tank top, simple dress, or casual summer outfit.
You can also omit the collar for a more open neckline.
Make a Warm Autumn Poncho
For a cozier version, choose a soft acrylic or wool-blend yarn.
Consider adding a few extra inches to the panel height so the poncho provides more coverage.
A warm neutral color such as oatmeal, mushroom, or camel gives the finished garment a classic look.
Add Color Blocking
You can make the first half of each panel in one color and the second half in another.
For a beginner-friendly color combination, try dusty rose with cream, sage with oatmeal, or muted blue with light gray.
Keep the color changes at the same row numbers on both panels so they match after assembly.
Change the Length
A cropped poncho can look particularly attractive with high-waisted jeans or a simple skirt.
For a longer garment, continue the body repeat until the panels reach your desired measurement.
Remember that longer panels require additional yarn and may feel heavier.
Add a Simple Border
If you prefer a cleaner finish, work a round of single crochet around the outer edges.
Keep the stitches evenly spaced and avoid placing too many stitches around the corners.
A simple border can help define the hem without making the garment look overly decorative.
Try Fringe or Tassels
For a relaxed bohemian look, add short fringe along the lower edges.
Cut matching lengths of yarn, fold each group in half, pull the folded loop through a stitch along the hem, and pass the loose ends through the loop.
Tighten gently and trim the fringe evenly.
Make It a Handmade Gift
A crochet poncho is a thoughtful gift because its loose-fitting shape allows some flexibility in sizing.
Choose a color that matches the recipient’s wardrobe and measure the neckline carefully.
For someone who prefers understated clothing, keep the collar simple and skip the fringe.
For someone who loves textured accessories, use the decorative collar and a contrasting border.
Finishing Instructions
Fastening Off
After completing the final stitch of each panel, cut the yarn with a tail long enough to weave in securely.
Pull the tail through the last loop and tighten gently.
Avoid pulling so hard that the final stitch becomes distorted.
Weaving in Ends
Thread the yarn tail through a tapestry needle.
On the inside of the poncho, pass the needle through several existing stitches, following the direction of the yarn.
Change direction and weave through another section to help secure the tail.
Avoid pulling the yarn tightly enough to gather the fabric.
Once the tail is secure, trim the excess close to the surface without cutting any working stitches.
Blocking the Poncho
Blocking can help smooth the panels and improve the drape.
First, check the yarn label for suitable washing and blocking instructions.
For a washable cotton-bamboo blend, you may be able to gently dampen the garment and lay it flat on a clean towel or blocking mat.
Smooth the fabric into shape without stretching it excessively.
Make sure the shoulder seams sit evenly and the front and back hems are aligned.
Allow the poncho to dry completely before wearing or storing it.
If you’re using wool or another delicate fiber, follow the yarn manufacturer’s care recommendations.
Washing and Storage
Handwashing in cool water is often a gentle option for handmade crochet garments, provided the yarn label allows it.
Avoid wringing or twisting the wet fabric.
Instead, press out excess water using a towel and dry the poncho flat.
Store it folded rather than hanging it for long periods, especially if the garment is heavy. Hanging can stretch the shoulders and neckline over time.
Quick Printable-Style Crochet Poncho Pattern Summary
Easy Two-Rectangle Crochet Poncho
| Detail | Instructions |
|---|---|
| Skill | Beginner / Confident beginner |
| Yarn | DK/light #3, approximately 1,200–1,500 yards for sample |
| Hook | 5.5 mm body, 5.0 mm optional collar |
| Sample size | Two panels approximately 28 × 23 inches |
| Body foundation | Ch 125 |
| Body stitch count | 122 sts |
| Body Row 1 | Sc in 3rd ch; repeat sk 1, 2 sc in next; finish sk 1, sc in last |
| Body Row 2 | Ch 1, turn; sc first; repeat sk 1, 2 sc in next; sc last |
| Repeat | Row 2 to desired panel height |
| Assembly | Seam shoulders, leaving centered neck opening |
| Optional collar | Iris stitch strip, sized to neckline |
| Finishing | Weave in ends, shape and block if suitable |
Frequently Asked Questions
Is a crochet poncho easy for beginners?
Yes. A poncho made from two rectangles is a good first wearable project because you don’t need complicated garment shaping.
The main skills are making a foundation chain, working straight rows, maintaining stitch counts, and joining the pieces.
If you’re completely new to crochet, practice the single crochet stitch on a small swatch before beginning.
How much yarn do I need for a crochet poncho?
The amount depends on the garment size, yarn weight, stitch pattern, and desired length.
For the sample described here, allow approximately 1,200–1,500 yards of DK yarn as an initial purchasing estimate.
Making a swatch and measuring how much yarn it uses can help you calculate a more personalized estimate.
What is the best yarn for a beginner crochet poncho?
A soft DK-weight yarn is a practical choice because it provides stitch definition without producing an excessively bulky fabric.
Cotton-bamboo blends are useful for lighter garments, while soft acrylic or wool blends can work well for warmer ponchos.
The best choice depends on your climate, comfort preferences, and desired drape.
Can I crochet a poncho using only single crochet?
Yes. You can make a simpler version using plain single crochet rows.
However, plain single crochet can create a denser fabric than the textured stitch used here.
Consider using a slightly larger hook if you want a softer, more flexible result.
How do I make my crochet poncho bigger?
For a wider poncho, increase the foundation chain while preserving the stitch repeat.
For a longer poncho, simply work more rows.
If you change the width substantially, you may also need to adjust the neckline and shoulder seam measurements.
How long does it take to crochet a poncho?
A beginner may need approximately 12–20 hours for a project like this, depending on the size, stitch speed, and amount of finishing.
You don’t have to complete it in one sitting.
Working on one panel at a time makes the project easier to manage.
Do I need to block my crochet poncho?
Blocking isn’t always necessary, but it can help even out the fabric and improve its shape.
It is especially useful when two panels need to match closely.
Always check the yarn’s care instructions before wet blocking, steaming, or applying heat.
Conclusion
Making your first crochet poncho is a satisfying way to move beyond scarves, dishcloths, and small beginner projects.
By starting with two simple rectangles, you can create a comfortable handmade garment without complicated shaping or difficult stitch techniques.
Take your time with the foundation chain, keep your stitches consistent, and measure the panels as you go. Once you’ve joined the shoulders and finished the neckline, you’ll have a poncho you can wear, gift, or customize for another season.
Save this easy crochet poncho pattern so you can return to it whenever you’re ready to make another version.
For your next project, consider trying a beginner crochet shawl, a simple mesh top, or a matching textured scarf.