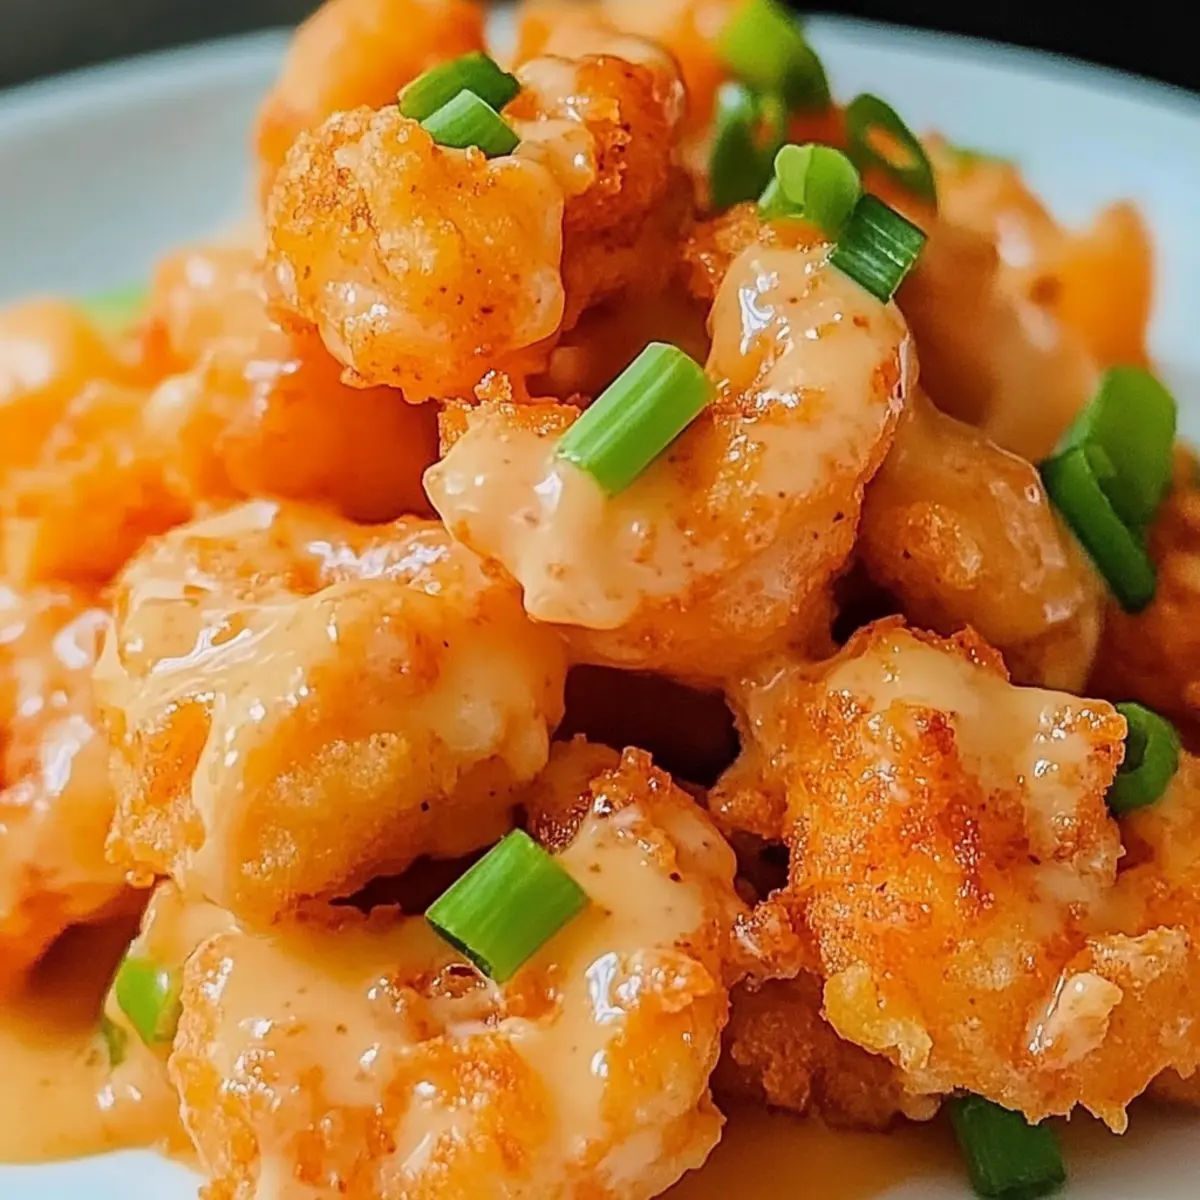
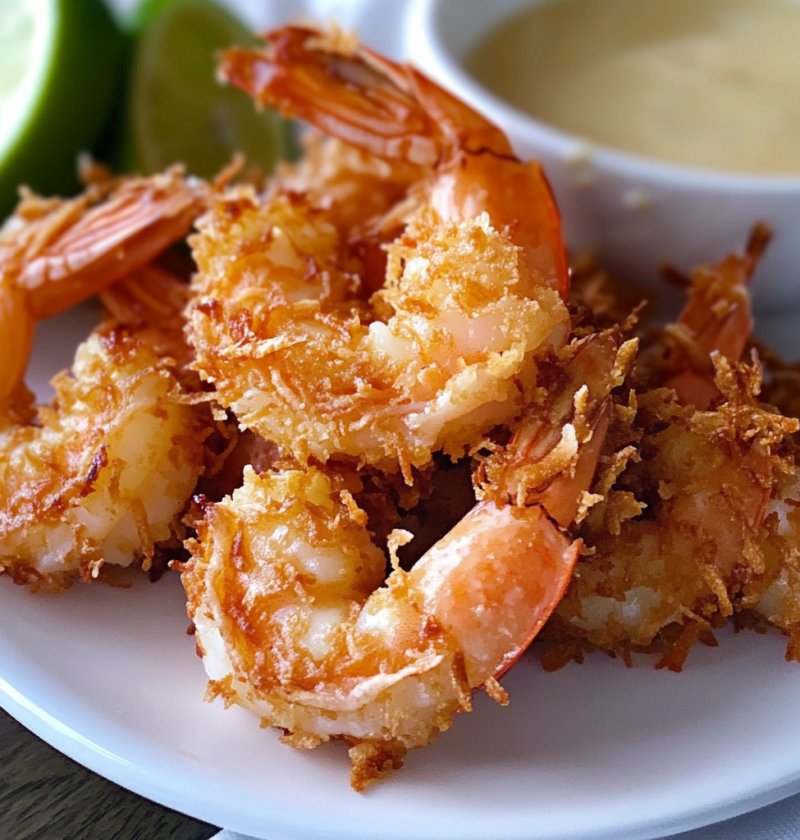
Coconut Shrimp offers a delightful combination of sweet and savory flavors that satisfies any craving for tropical comfort food served at home. This easy to prepare appetizer features tender shrimp coated in a crunchy, golden crust made with fresh coconut flakes and a light batter. It is a crowd-pleasing dish perfect for parties, family dinners, or even a special weeknight treat for seafood lovers. The texture contrast between the crispy exterior and the juicy interior makes every bite a memorable experience.
| Detail | Information |
|---|---|
| Prep Time | 20 minutes |
| Cook Time | 15 minutes |
| Total Time | 35 minutes |
| Servings | 4 to 6 people |
| Difficulty | Easy |
| Cuisine | American Tropical |
| Category | Appetizer or Dinner |
| Method | Deep Frying |
Why This Recipe Works
This Coconut Shrimp recipe works because it balances the simplicity of preparation with the complex flavor profile typically found in restaurants. The key to success lies in the specific ratio of flour to liquid in the batter, ensuring a coating that adheres without becoming too heavy or soggy on your plate. The addition of flaked coconut introduces a sweet, nutty flavor that complements the natural brininess of the shrimp perfectly without overpowering the main ingredient. I have tested this recipe multiple times to guarantee that the crunch remains intact even after draining the oil properly.
Temperature control during the frying process is another critical factor that ensures a superior result every single time. When the oil is heated precisely to 350 degrees Fahrenheit, the batter sets quickly, creating a barrier that locks in moisture while achieving a deep golden brown color. This technique prevents the shrimp from absorbing too much oil, keeping the final dish light and flavorful rather than greasy or dull. The result is a crispy exterior that shatters pleasantly with every bite, revealing soft and succulent meat inside.
Furthermore, the preparation method allows for some advance work, which reduces stress when hosting guests or managing a busy family schedule. You can prepare the shrimp batter and coating stations early in the day, which streamlines the cooking process significantly. The refrigeration step before frying firms up the coconut layer, preventing flakes from falling off into the hot oil. This small but essential step ensures that the breading stays intact during the frying process, delivering a professional result in your own kitchen.
Chef Tips for Perfect Results
Mastering the technique for frying coconut shrimp requires attention to detail and a few specific kitchen habits to ensure consistent quality.
- Monitor Oil Temperature: Use a deep-fry thermometer to keep the oil between 325 and 350 degrees Fahrenheit throughout the cooking process to ensure even browning.
- Pat Shrimp Dry: Ensure the shrimp are thoroughly patted dry with paper towels before dredging to help the flour adhere properly without sliding off during dipping.
- Dredge Thoroughly: Press the flour onto the shrimp gently to create a solid base layer before dipping the coated tail into the wet batter.
- Let Excess Drip: Allow the shrimp to drip over the batter bowl for a few seconds so the coating is not too thick and heavy when placed in the oil.
- Chill the Coated Shrimp: Place the breaded shrimp in the refrigerator for at least 30 minutes before frying to help the coconut stick firmly to the shell.
- Fry in Batches: Do not overcrowd the pot with too many shrimp at once, as this will drop the oil temperature and cause soggy results.
- Turn Gently: Use tongs to turn the shrimp once during frying to ensure both sides achieve an identical deep golden brown color and crispness.
- Drain on Racks: Place the fried shrimp on a wire rack set over a baking sheet to allow airflow underneath, rather than paper towels which can trap steam and soften the crust.
Common Mistakes to Avoid
Making coconut shrimp correctly requires attention to common pitfalls that can ruin the texture and flavor of the dish if not addressed.
| Mistake | Why It Happens | How to Fix It |
|---|---|---|
| Greasy Shrimp | Oil temperature is too low causing absorption | Use a thermometer and let oil return to 350 degrees before adding next batch |
| Batter Sliding Off | Shrimp were wet or flour layer was skipped | Pat shrimp dry and ensure a solid flour dredge before dipping in batter |
| Burnt Coconut | Oven heat too high or frying too long | Reduce cooking time slightly and monitor visual color cues constantly |
| Raw Shrimp Center | Overcrowding the pan lowers oil heat | Fry in smaller batches to maintain steady high temperature in the pot |
| Soggy Coating | Drained on paper towel which traps steam | Use a wire rack to allow air circulation underneath the fried shrimp |
| Overcooked Texture | Leaving shrimp in oil too long | Fry for only 2 to 3 minutes until the breading is golden and firm |
Variations and Substitutions
Customizing this recipe allows you to tailor the flavor profile to suit different tastes or dietary preferences while keeping the core concept intact.
| Ingredient or Element | Substitution or Variation | Impact on Flavor or Texture |
|---|---|---|
| Flour for Batter | Gluten-free flour blend | Similar consistency but check for texture differences in crispness |
| Beer in Batter | Non-alcoholic beer or sparkling water | Provides carbonation for lift without introducing alcohol flavors |
| Coconut Flakes | Toasted coconut flakes | Enhances the nutty aroma and deepens the golden color during frying |
| Shrimp Size | Jumbo or Colossal shrimp | Larger shrimp provide a meatier bite but may require longer frying time |
| Frying Oil | Avocado oil instead of vegetable oil | Higher smoke point ensures stability at high heat but slightly nuttier taste |
| Baking Powder | Self-rising flour | Packages leavening directly into the dry mix for a lighter crust |
| Shrimp Type | Scallops | Scallops offer a sweeter profile but require careful timing to avoid toughness |
| Baking Method | Air Fryer or Oven | Healthier option with reduced oil but the crust may be less crispy than frying |
Serving Suggestions and Pairings
Pairing Coconut Shrimp with the right sides and drinks elevates the entire dining experience from a simple snack to a memorable meal.
- Classic Cocktail Sauce: The tang of horseradish and lemon cuts through the sweetness of the coconut coating perfectly.
- Sweet Chili Dipping Sauce: Offers a sticky, vibrant glaze that pairs well with the fried texture for an Asian fusion twist.
- Tropical Slaw Salad: A crisp cabbage slaw with pineapple adds a fresh and acidic contrast to the rich fried items.
- Fried Green Tomatoes: Provides a similar fried element but with a tart flavor profile to balance the menu.
- Garlic Mashed Potatoes: Creates a comforting base that absorbs any remaining sauces on the plate.
- Crispy Rice Crackers: Adds extra crunch and a savory element to the overall mouthfeel of the dish.
- Lemon Rice Pilaf: Offers a light and aromatic rice variety that is not too heavy alongside the protein.
- Sparkling Lemonade: A refreshing non-alcoholic beverage that cleanses the palate between bites of fried seafood.
- Glass of Iced Tea: Unsweetened iced tea provides a bitter note that balances the sweet coconut elements.
- Baked Corn on the Cob: Adds a sweet vegetable side that complements the tropical theme of the recipe.
- Spicy Mayo Drizzle: Adds a creamy richness and heat that many diners find incredibly satisfying with the shrimp.
For a complete dinner plate, consider arranging the fried coconut shrimp atop a bed of fresh mixed greens with a citrus vinaigrette and a small bowl of garlic mashed potatoes on the side. This combination provides a balanced meal that offers both protein-heavy fried elements and light, fresh vegetables to round out the nutritional profile. It is a fantastic way to enjoy a comfort food favorite without sacrificing the enjoyment of a well-rounded nutritional dinner.
Make Ahead Options
You can prepare most components of this coconut shrimp recipe well in advance to streamline your cooking process on the day of serving. The batter and flour mixtures can be whisked and prepared several hours before you intend to fry, but the coconut coating step should be done shortly before cooking for the best texture. I recommend dredging and breading the shrimp up to two days ahead, keeping the coated items refrigerated in a single layer to prevent sticking. This allows you to skip the prep work on the day of the party and focus on frying and serving.
It is important to note that the fried shrimp are best enjoyed immediately after leaving the hot oil, so do not attempt to store them after frying if you want to maintain the crisp texture. However, you can bread the shrimp the night before and store them in the refrigerator on a baking sheet lined with parchment paper. Cover them loosely with plastic wrap to protect them from absorbing other odors in the fridge, and let them come to room temperature before tossing them into the hot oil. This method ensures that the shrimp fry evenly and the coating adheres perfectly without cold spots slowing down the cooking process.
Storage and Reheating
Storing leftover fried coconut shrimp properly is essential for maintaining food safety and minimizing the loss of texture over time.
| Method | Duration | Instructions |
|---|---|---|
| Room Temperature | 2 hours | Do not leave out indefinitely as bacteria can grow rapidly in warm conditions |
| Refrigerator | 2 to 3 days | Store in an airtight container with paper towels to absorb moisture |
| Freezer | 1 month | Freeze breaded shrimp before frying or cooked shrimp in a single layer |
| Reheating | 350 degrees F | Reheat in an oven or air fryer to restore crispness rather than microwave |
| Make Ahead | 24 hours | Keep raw breaded shrimp refrigerated before the final frying step |
Nutritional Information
Approximate values are based on one serving and may vary depending on exact ingredients and portion size.
| Nutrient | Amount per Serving |
|---|---|
| Calories | 350 |
| Protein | 25 grams |
| Fat | 20 grams |
| Saturated Fat | 12 grams |
| Carbohydrates | 25 grams |
| Fiber | 2 grams |
| Sugar | 3 grams |
| Sodium | 400 milligrams |
Frequently Asked Questions
Can I substitute the non-alcoholic beer?
Yes, you can substitute the liquid in the batter with sparkling water to achieve a similar carbonation effect. This works well if you need to avoid all alcohol or simply prefer a lighter yeast flavor profile. The carbonation helps create bubbles in the batter that result in a lighter and crispier crust during the frying process.
How do I know when the shrimp are fully cooked?
Look for a golden-brown color on the exterior and ensure the shrimp have turned pink and opaque inside. The internal temperature should ideally reach 145 degrees Fahrenheit if you use a meat thermometer. If you cut into the shrimp and the meat is white and flaky, they are done and ready to serve immediately.
Why is my coconut shell falling off?
This usually happens if the batter is too runny or if the shrimp were not dried properly before the frying process. Ensure you pat the shrimp completely dry with paper towels before applying the flour coating. A thick flour layer acts as a glue to hold the batter and coconut in place during the hot oil immersion.
Can I make this recipe ahead of time?
Absolutely, you can bread and coat the coconut shrimp a day before you plan to cook and store them in the refrigerator on a baking sheet. Just ensure they are covered loosely so they do not dry out or absorb odors from other foods in your fridge while you wait.
What are the best sauces to serve with coconut shrimp?
Classic sweet chili sauce, cocktail sauce, and a warm creamy garlic tartar sauce complement the sweetness of the coconut well. You can also try a spicy sriracha mayo for those who enjoy a bit of heat alongside the savory shrimp flavor.
How long do leftovers last in the fridge?
Cooked leftover coconut shrimp can be safely stored in an airtight container in the refrigerator for up to three days. Always ensure the shrimp have cooled completely before refrigerating to prevent moisture buildup which could spoil the texture and safety of the food.
Conclusion
Mastering this Coconut Shrimp recipe brings a touch of the tropics to your kitchen table with minimal effort and maximum flavor payoff. The combination of a crisp coconut crust and tender meat creates a satisfying meal that is sure to impress guests or delight your family. I encourage you to try this easy method to enjoy a delicious seafood dish that feels special and luxurious. Serve it with fresh dipping sauces to complete the experience on your dinner plate.
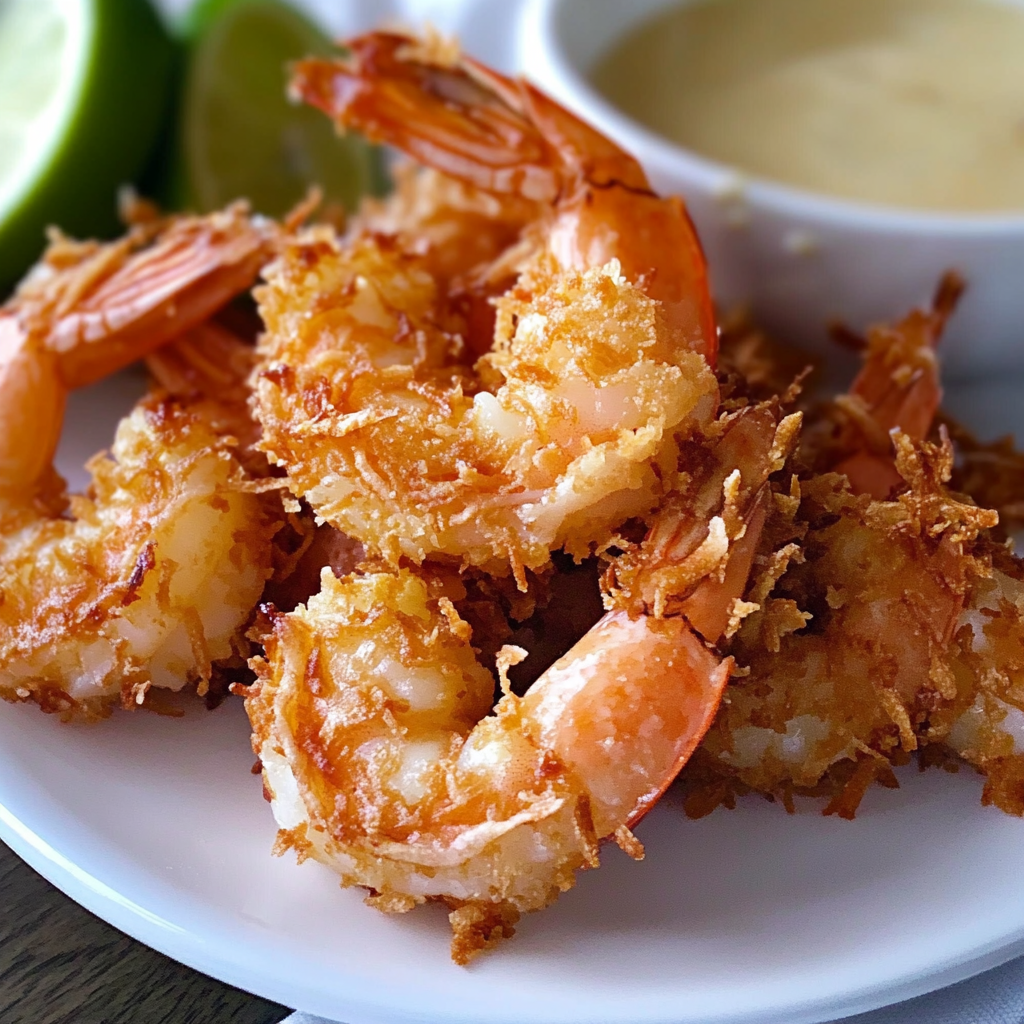
Coconut Shrimp Recipe For Perfect Crispy Dinner
Ingredients
Method
- Marinate shrimp in salt and pepper for 10 minutes
- Combine all-purpose flour, cornstarch, coconut flakes, sugar, and salt in a bowl
- Beat eggs in a separate shallow dish
- Dredge shrimp in the coconut-flour mixture, then dip in beaten eggs
- Place coated shrimp on a baking sheet and refrigerate for 15-30 minutes to set coating
- Heat oil in a deep fryer or large pot to 350°F
- Fry shrimp until golden and crisp, about 2-3 minutes per batch
- Drain on paper towels before serving
Nutrition
Notes
Adjust egg portion for fluffier coating
Avoid overcrowding the fryer to maintain oil temperature
Refrigeration is crucial to retain crispy texture
Serve with a tropical dipping sauce like mango-chili glaze or tartar