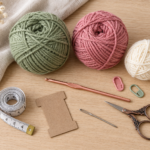
A handmade crochet parandi is a lovely way to add color, movement, and personality to a simple hairstyle. With a few basic stitches and some leftover cotton yarn, you can create a delicate accessory decorated with miniature flowers, crochet leaves, and soft tassels.
A parandi, also spelled paranda or pranda, is a traditional Punjabi hair accessory commonly incorporated into a braid. Traditional styles often feature long strands, vibrant colors, and decorative tassels. Modern crochet versions can include flowers, vines, beads, and other handmade details.
For this beginner tutorial, we’re making a lightweight floral version with a narrow green crocheted cord, small leaves, pink flowers, and three matching tassels. The design works beautifully as a braid decoration, ponytail accessory, or festive handmade gift.
You don’t need to master complicated crochet stitches. If you can make a chain and a single crochet, you already know the most important part. We’ll also practice half double crochet and double crochet while creating the flowers and leaves.
This tutorial is written as an original, customizable project. The measurements and motif placement are adjustable, so you can make a short accessory for a ponytail or a longer decorative piece for a braid.
What You’ll Learn
By the end of this crochet parandi tutorial, you’ll know how to:
- Crochet a lightweight foundation cord that hangs comfortably with your hair.
- Make small pointed leaves using basic crochet stitches.
- Create beginner-friendly five-petal crochet flowers.
- Space and attach decorative motifs neatly along a cord.
- Make soft yarn tassels with matching lengths.
- Assemble and finish a floral hair accessory.
- Adjust the length, color, and decoration to suit different hairstyles.
The finished project combines the simplicity of basic crochet stitches with the lovely details of a botanical accessory.
Crochet Parandi Pattern Details
| Feature | Details |
|---|---|
| Skill level | Confident beginner |
| Finished cord length | Approximately 18–22 inches (46–56 cm), depending on tension |
| Tassel length | Approximately 4–5 inches (10–13 cm) |
| Flowers | 5 small crochet flowers |
| Leaves | 8 pointed crochet leaves |
| Tassels | 3 |
| Hook | 3.5 mm |
| Yarn | DK-weight cotton |
| Construction | Flat cord, separate motifs, sewn assembly |
| Gauge | Not essential |
| Terminology | US crochet terms |
The sample measurements are targets rather than guaranteed results. Measure your actual cord, as cotton thickness and personal tension affect the finished length.
Materials You’ll Need
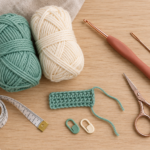
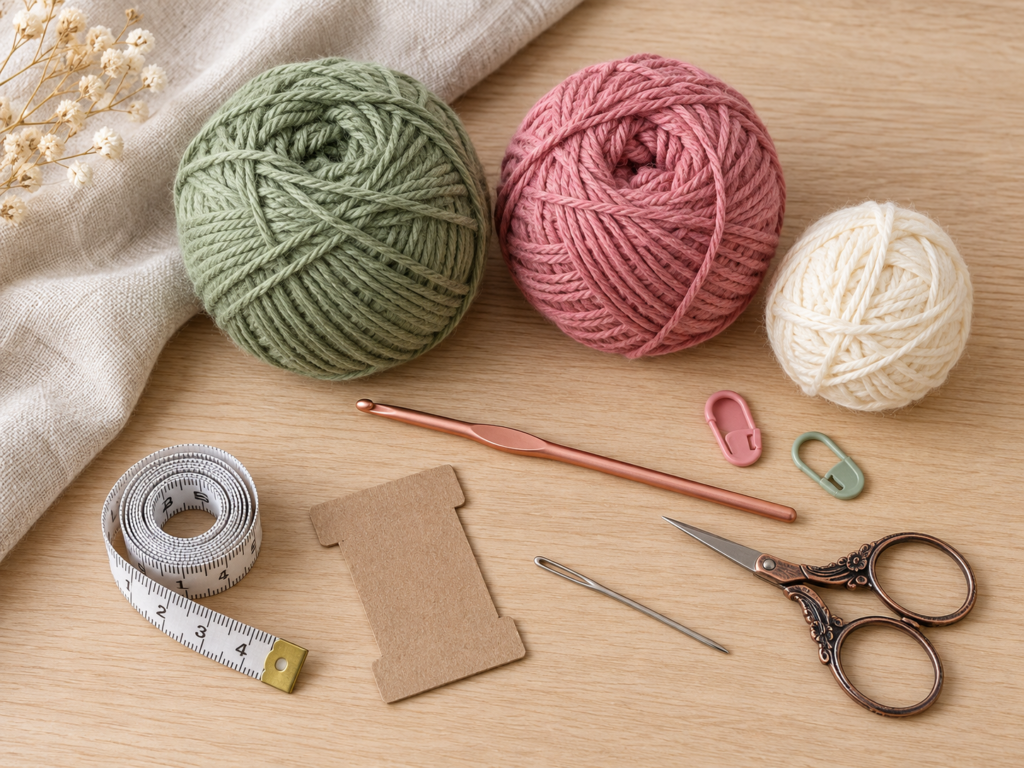
You can make a beautiful crochet parandi without buying a large amount of yarn. This is an excellent project for using small quantities left over from other crochet projects.
Yarn
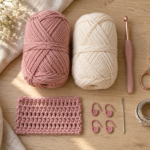
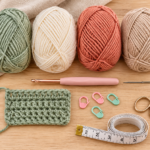
Choose DK-weight cotton in three complementary colors:
- Color A — Sage green: Approximately 30–45 g for the foundation cord, leaves, and green tassel strands.
- Color B — Dusty rose: Approximately 15–25 g for flowers and tassel strands.
- Color C — Cream: A small amount for optional flower-center details.
The quantities are planning estimates, not measured yarn consumption from a tested sample. Longer or fuller designs may need more yarn.
Cotton is a particularly nice choice because it shows stitch definition clearly and usually holds the shape of the flowers well.
Smooth acrylic yarn also works, especially for soft, flexible accessories. Avoid very fuzzy yarn for your first project because it can hide the stitches and make the small leaves harder to crochet.
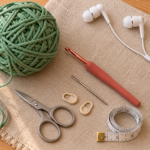
Tools and accessories
- 3.5 mm crochet hook
- Sharp scissors
- Blunt tapestry needle
- Two stitch markers
- Measuring tape
- Small cardboard rectangle for tassels
- Hair elastic or matching thread for optional attachment
- Small beads or charms, optional
If you prefer a finer and more delicate crochet parandi, use a lighter yarn and a compatible smaller hook. Remember that thinner yarn takes longer to work and will change the final size.
Crochet Abbreviations Used
This tutorial uses US crochet terminology.
| Abbreviation | Meaning |
|---|---|
| ch | Chain |
| sc | Single crochet |
| hdc | Half double crochet |
| dc | Double crochet |
| sl st | Slip stitch |
| st / sts | Stitch / stitches |
| rep | Repeat |
| rnd | Round |
| RS | Right side |
| WS | Wrong side |
In UK crochet terminology, US single crochet is called double crochet, US half double crochet is half treble crochet, and US double crochet is treble crochet.
If you’re following this written tutorial, use the US instructions consistently.
Before You Start
Choose the length of your parandi
There isn’t one perfect crochet parandi length. The right size depends on your hairstyle and how much of the accessory you want to hang below your braid.
For a lightweight floral piece, an 18–22 inch decorative cord is a practical starting point. If you want something longer, you can increase the foundation chain before adding leaves and flowers.
A useful way to check the length is to hold a measuring tape beside your hair, starting where you intend to secure the parandi.
Remember that the tassels will add several inches below the crocheted cord.
Check your yarn tension
Try to keep your stitches even, but don’t make them extremely tight.
A cord that is too stiff will not hang naturally. A cord that is too loose may stretch or twist under the weight of the flowers and tassels.
Make a short chain of approximately 15 stitches, work one row of single crochet, and hold it vertically.
If it hangs comfortably without becoming floppy, your hook and tension are suitable.
Learn how to count stitches
When you make the main cord, the chain you skip at the beginning of the row does not count as a single crochet.
For example, if you chain 91 and make your first single crochet in the second chain from the hook, you should finish the row with 90 single crochet stitches.
This becomes important when you’re working a long narrow foundation.
Keep both ends comfortable
The upper end of your parandi will sit near the hair, so it should be smooth and secure.
The lower end supports the tassels. Make sure the joining stitches are strong enough to support their weight without pulling the cord out of shape.
Don’t add heavy decorations until you’ve checked how the basic accessory hangs.
Step-by-Step Crochet Parandi Tutorial
We’re going to crochet the cord first, make the leaves and flowers separately, and assemble everything before attaching the tassels.
This approach is beginner-friendly because the small motifs are easier to crochet and adjust individually.
Step 1: Crochet the foundation chain
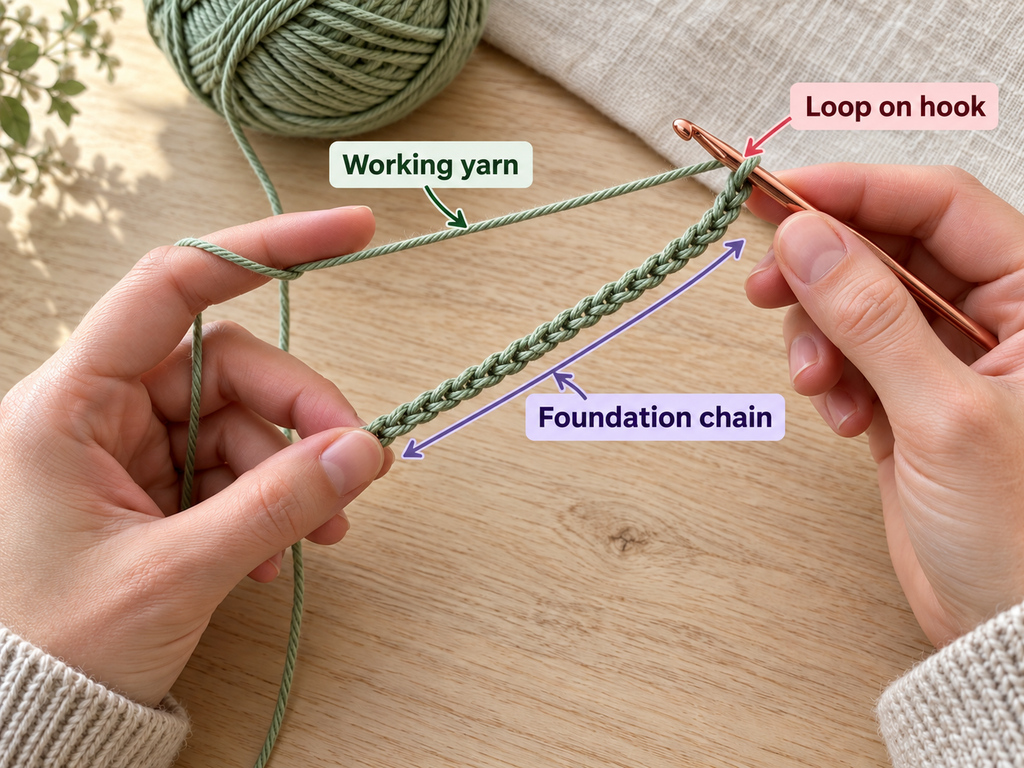
Using sage-green yarn and your 3.5 mm crochet hook, make a slip knot.
Leave a yarn tail approximately 8 inches long. You can use this later when finishing the upper attachment point.
Foundation: Ch 91.
Try to make each chain approximately the same size.
Hold your hook comfortably and let the yarn glide through your fingers without pulling hard. If you notice some chains becoming extremely small, relax your grip and try again.
After finishing the chain, place it flat on your table.
Check that the chain isn’t twisted and measure its relaxed length.
This becomes the base of the parandi.
Beginner tip: Don’t worry if your first chain looks slightly uneven. The next row will help stabilize the shape.
Common mistake to avoid: Crocheting a very tight foundation chain can make it difficult to work into individual stitches. If the chain feels stiff, remake it with slightly looser tension.
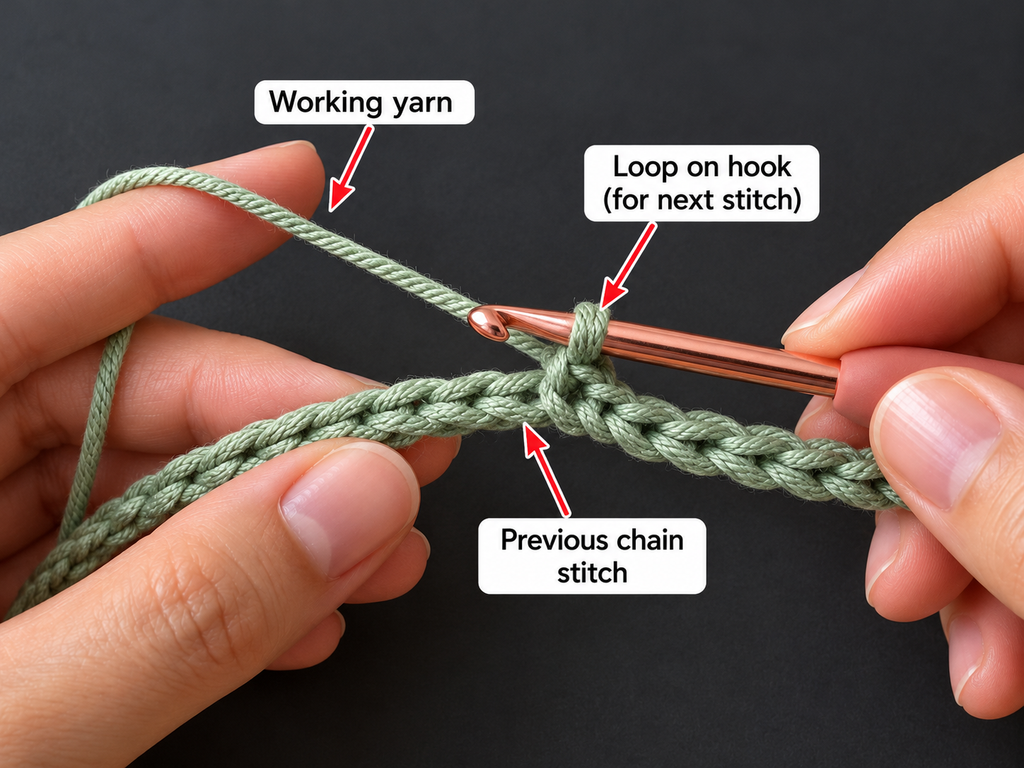
Step 2: Make the main crochet cord
Now we’ll strengthen the foundation chain with a row of single crochet.
Row 1: Insert your hook into the second chain from the hook.
Yarn over and pull up a loop. You should now have two loops on your hook.
Yarn over again and pull through both loops.
You’ve completed one single crochet stitch.
Continue making one sc in each chain across.
At the end of the row, you should have 90 sc.
Fasten off, leaving an approximately 8-inch tail at the lower end for assembly.
The finished piece should be a long, flat, narrow crochet cord.
Because it has only one row of single crochet, it remains lightweight and flexible, making it suitable for a decorative hair accessory.
Beginner tip: Use your thumb and index finger to hold the chain close to the stitch you’re making. This helps control the yarn without tightening it too much.
Common mistake to avoid: Don’t accidentally skip a chain in the middle of the row. Work slowly and check the cord if you notice an unexpected gap.
Step 3: Crochet the small leaves
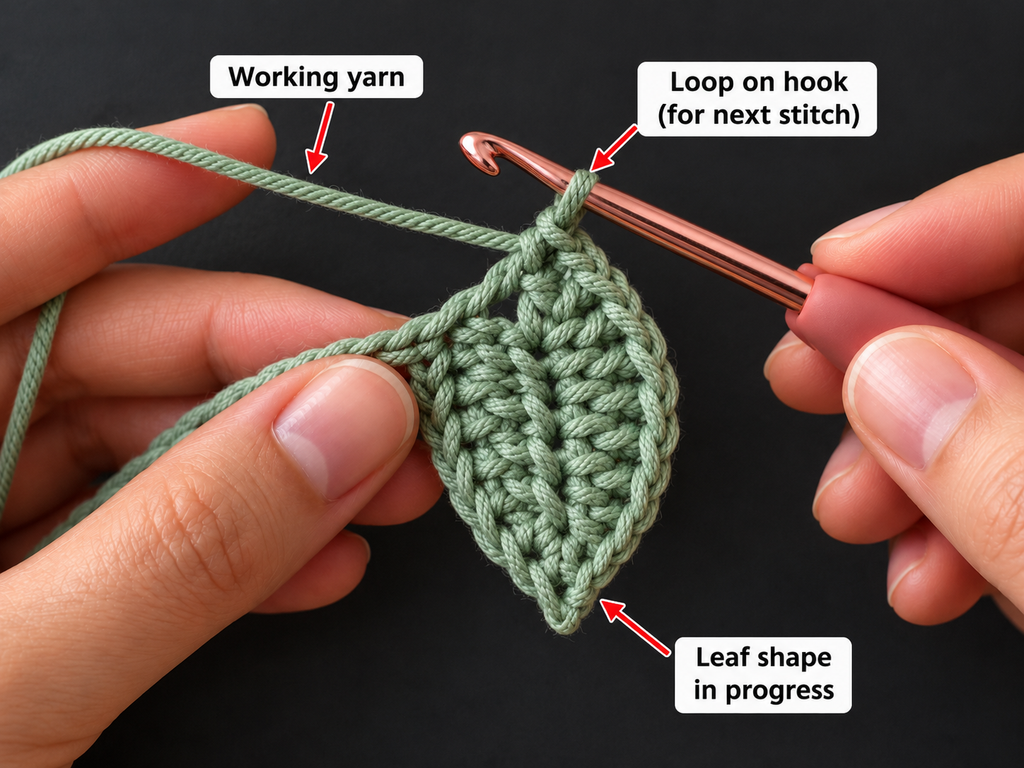
The green leaves give this crochet parandi its delicate, botanical appearance.
We’ll make each leaf separately, then sew it onto the cord after all the motifs are finished.
Using sage-green yarn:
Leaf foundation: Ch 7.
Work the following stitches along the chain:
- Sl st in the second chain from the hook.
- Sc in the next chain.
- Hdc in the next chain.
- Dc in the next chain.
- Hdc in the next chain.
- Work 3 sc in the final chain.
You have now reached the opposite end of your small leaf.
Turn the work so you can crochet along the unused loops on the other side of the foundation chain.
Working back toward the pointed tip:
- Hdc in the next available foundation-chain loop.
- Dc in the next.
- Hdc in the next.
- Sc in the next.
- Sl st in the final available loop.
Sl st to the beginning if needed to close the shape neatly, then fasten off.
Leave a 5–6 inch yarn tail for sewing.
You should now have a small pointed leaf with fuller sides and a rounded base.
Make 8 leaves in total.
Don’t worry if they aren’t perfectly identical. Handmade leaves often have slight variations that look lovely together.
Beginner tip: If you are having trouble finding the unused chain loops on the second side, turn your work slowly and look for the small loops immediately opposite the stitches you just made.
Common mistake to avoid: Don’t insert the hook into the stitches along the first side when making the second side. Work into the remaining foundation-chain loops to create a balanced oval shape.
Step 4: Arrange the crochet leaves
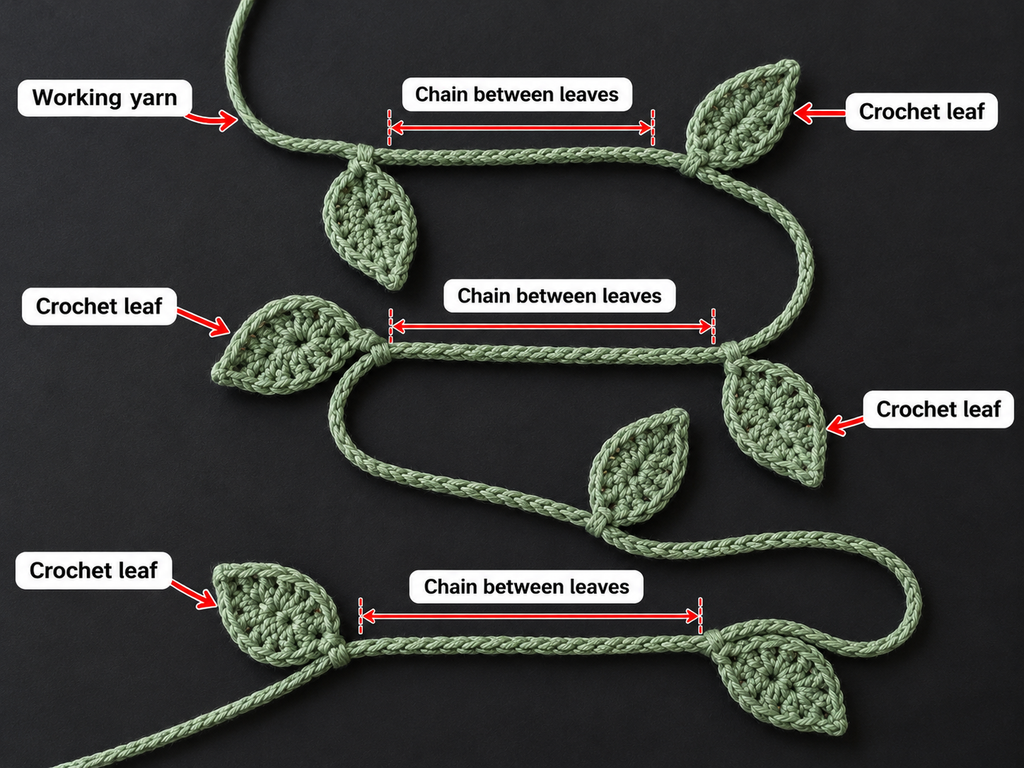
Once your eight leaves are ready, lay the long green cord on your table.
Don’t sew the leaves down immediately.
First, decide where you want each leaf to sit.
For a balanced design, position the leaves at alternating intervals along the cord.
You might place the first leaf approximately 3 inches from the top and continue spacing the leaves at roughly 2-inch intervals, adjusting the gaps to suit the actual cord length.
Alternate their direction so one leaf points to the left and the next points to the right.
For a more natural botanical effect, some leaves can angle slightly downward.
When you’re satisfied with the layout, begin stitching the leaves into place with the yarn tails you left during construction.
Pass your tapestry needle through the base of a leaf, then through the crochet cord.
Repeat two or three times, keeping the stitches small and secure.
Weave the yarn tail into the back of the leaf and trim.
Continue until all eight leaves are attached.
Beginner tip: Take a photograph of your planned layout before sewing. This makes it easier to remember the spacing if your pieces move.
Common mistake to avoid: Avoid pulling your sewing yarn so tightly that the main cord puckers. The leaves should feel secure but the cord should still hang freely.
Step 5: Make the mini crochet flowers
Now we’re ready to add a little color.
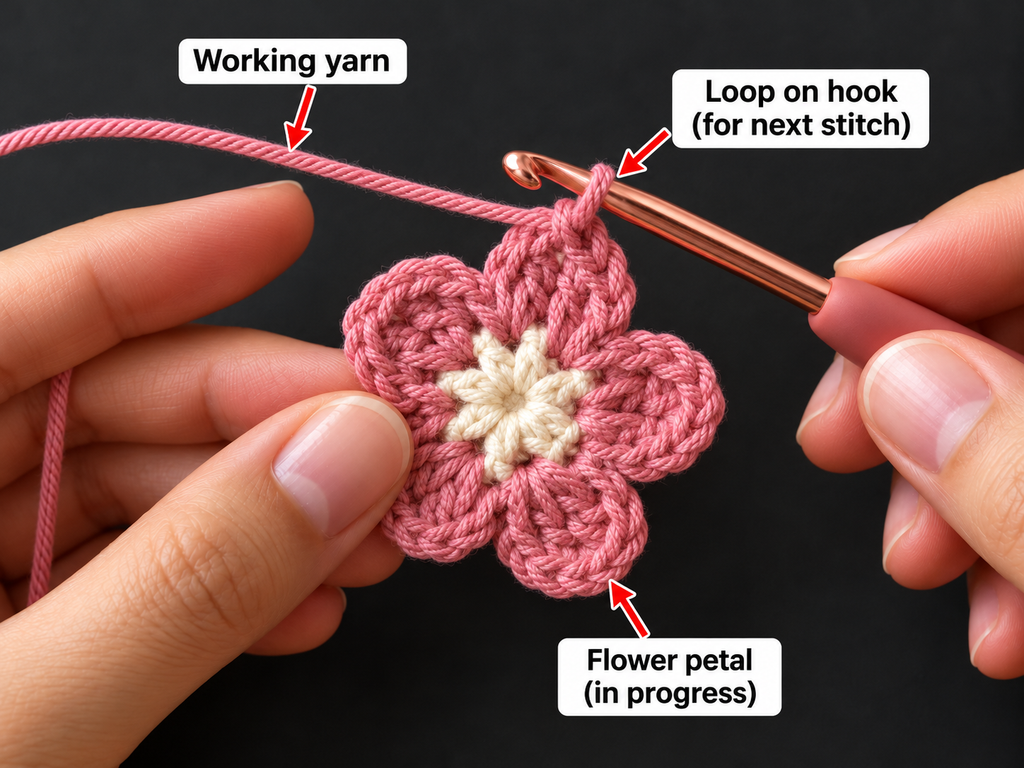
These miniature five-petal flowers use basic double crochet stitches and are small enough to sit comfortably on a narrow parandi cord.
Using dusty-rose yarn, make a magic ring.
If you’re unfamiliar with the magic ring, you can instead chain 4 and join with a slip stitch to make a small ring.
Flower center round: Work 5 sc into the ring.
If using a magic ring, pull the yarn tail gently to tighten the center.
Sl st into the first sc to close the round.
You should have five single crochet stitches.
Each of these five stitches will become the foundation for one flower petal.
Petal repeat:
Into the next available sc stitch, work:
- Sl st
- Ch 2
- 2 dc
- Ch 2
- Sl st into the same sc stitch
Repeat the same sequence in each of the remaining four sc stitches.
At the end, you should have five small petals.
Fasten off and leave a yarn tail for sewing.
Make five matching flowers.
For the cream-colored centers, you can either crochet the central ring in cream and switch to dusty rose for the petals, or use a tapestry needle to make two or three tiny cream stitches across the center after finishing.
The second method is especially simple if you don’t want to manage multiple yarn strands while crocheting.
Beginner tip: The petals may look slightly crowded while you’re crocheting. Gently spread them apart with your fingers after fastening off.
Common mistake to avoid: Don’t accidentally crochet the petal clusters into the spaces between the base stitches. Work one complete petal into each of the five sc stitches.
Step 6: Attach the crochet flowers
With all five flowers complete, return to your green cord.
Place the flowers between selected leaves, allowing the leafy structure to remain visible.
For the sample layout, position the first flower approximately 4–5 inches below the top attachment point.
Space the remaining flowers down the cord, with the final flower sitting a little above the tassel section.
Try to avoid placing every flower at exactly the same angle.
Some can face straight outward, while others can tilt slightly toward the side of the vine.
This gives the finished parandi a softer, more natural appearance.
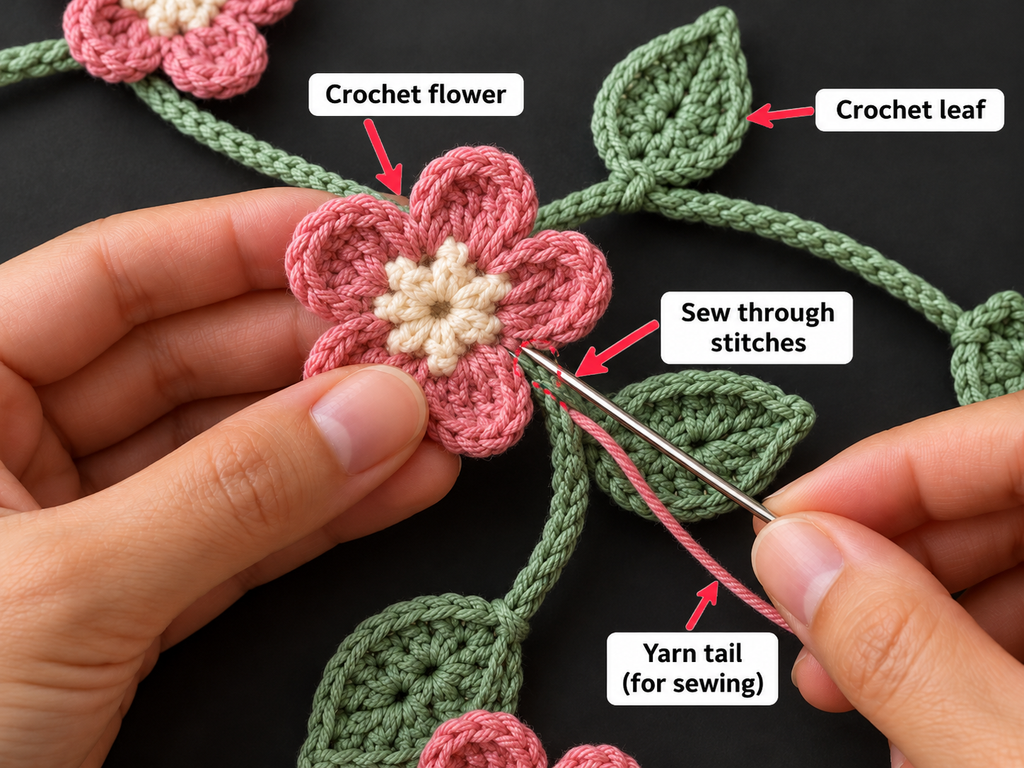
To attach each flower, thread the sewing tail onto your tapestry needle.
Place the flower against the front of the cord.
Pass the needle through the back of the flower center, catch a stitch from the cord, and bring the needle back through the flower.
Repeat several times until the flower sits securely.
Avoid stitching through the outer tips of the petals. Keeping the petals free helps them retain their shape.
Weave in the remaining yarn tail.
Repeat with the remaining four flowers.
Beginner tip: After attaching the first flower, hold the cord vertically. If the flower droops or twists dramatically, add one more small securing stitch through its center.
Common mistake to avoid: Don’t overcrowd the cord with flowers. Leaving visible green sections creates a more delicate result and keeps the accessory lighter.
Step 7: Prepare the yarn tassels
The tassels are one of the most recognizable features of a parandi.
For this design, we’re making three medium-sized tassels in matching sage-green and dusty-rose yarn.
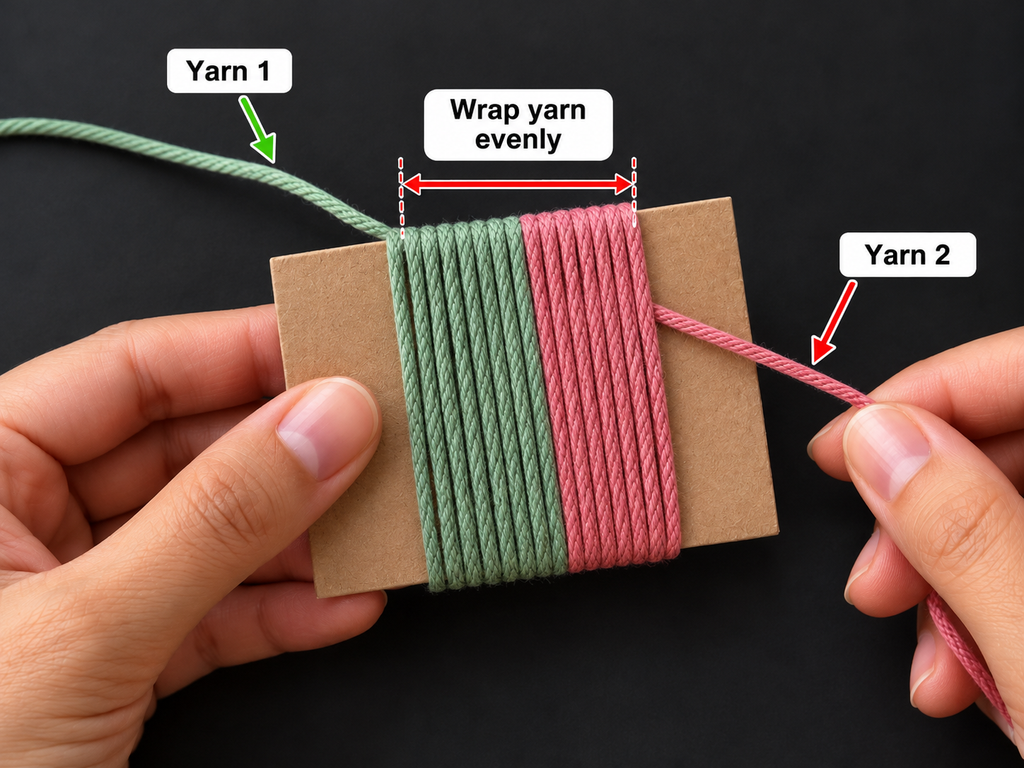
Cut a rectangle of cardboard approximately 5 inches tall.
Hold the green and pink yarn together if you’d like a blended two-color tassel, or wrap each color separately to make layered color sections.
Wrap the yarn around the cardboard approximately 20–30 times per tassel.
Use fewer wraps for a thin, delicate tassel or more for a fuller look.
When the bundle looks thick enough, cut a separate strand of green yarn approximately 10 inches long.
Slide this strand beneath the wrapped loops at one end of the cardboard and tie it securely.
Now slide the bundle off the cardboard carefully.
Cut through the loops at the opposite end.
You’ll have a loose tassel bundle attached at the top.
Make three matching bundles.
Beginner tip: Use the same cardboard template and number of wraps for all three tassels. This makes their lengths and fullness more consistent.
Common mistake to avoid: Don’t pull the yarn tightly around the cardboard. Excessive tension can cause the cut strands to shrink back unevenly.
Step 8: Shape and secure the tassels
Now we’ll give each tassel its finished shape.
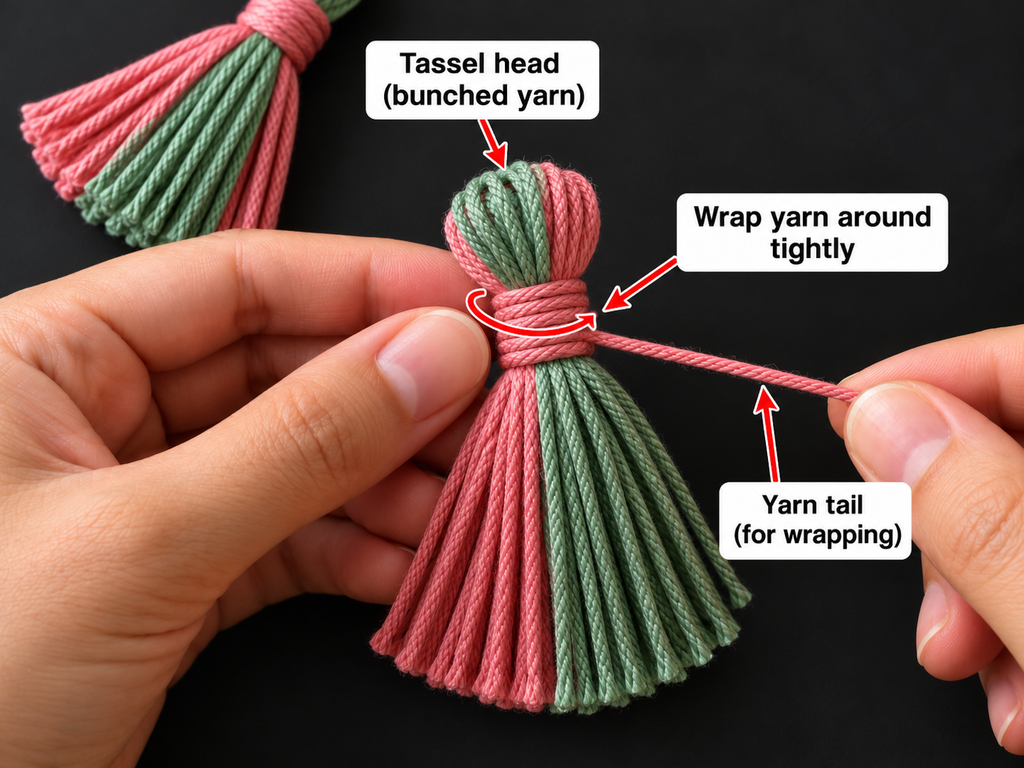
Take one of your prepared tassel bundles and hold it by its top knot.
Smooth the strands downward with your fingers.
Cut another piece of matching yarn approximately 12 inches long.
Wrap it around the bundle about ½ inch below the top knot.
Bring the ends around the tassel several times, keeping the wraps neat.
Tie a secure knot and thread the ends onto a tapestry needle.
Pass the needle through the wrapped section and down into the tassel to conceal the tails.
Repeat with the other tassels.
Lay all three tassels side by side.
Use sharp scissors to trim their ends until they are approximately the same length.
Don’t cut too much at once. Trim a little, compare the lengths, and make small adjustments.
Beginner tip: For very neat tassels, lightly smooth the strands with your fingers before trimming. A wide-tooth comb may help with some smooth yarns, but test it first to avoid fraying.
Common mistake to avoid: Don’t secure the tassel neck with a single loose knot. The strands can gradually work free, especially if the accessory is handled frequently.
Step 9: Attach the tassels to your crochet parandi
Lay your decorated cord flat with the lower end pointing toward you.
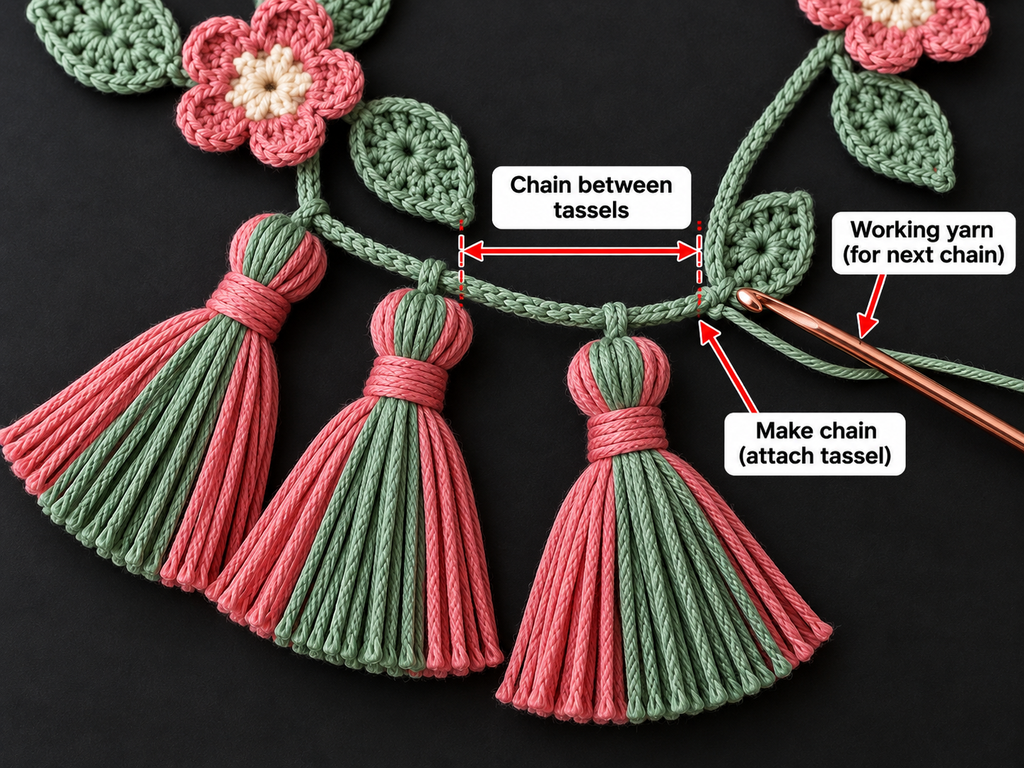
Take the three finished tassels and position them just below the end of the cord.
You can gather all three tassels at one joining point or space them across a small crocheted connector.
For this beginner design, we’ll use one reinforced connection point.
Thread the top tying strands of the first tassel through the last two or three stitches of the cord.
Tie a secure knot on the back.
Repeat with the second and third tassels.
Arrange the tassels so their tops sit close together, rather than hanging from widely separated stitches.
Using the long yarn tail left at the end of the cord, stitch around the attachment area several times.
Catch the tops of all three tassels to help stabilize the bundle.
Tuck in any remaining ends with the tapestry needle.
Finally, hold the parandi vertically to check how the tassels hang.
They should fall naturally without pulling the base sharply to one side.
Beginner tip: If the tassel bundle feels too heavy, remove one tassel or reduce the number of yarn strands.
Common mistake to avoid: Don’t attach heavy tassels to only one loose stitch. Reinforce the connection through several adjacent stitches so the weight is distributed more evenly.
Step 10: Create the upper attachment loop
The parandi needs a comfortable and secure way to attach to the hair.
For this lightweight version, we’ll make a simple crochet loop at the top of the cord.
Reattach sage-green yarn to the first stitch of the foundation cord.
Ch 20.
Check the size of the loop against the hair elastic or attachment method you plan to use.
Sl st into the same upper joining point, forming a loop.
Fasten off, leaving a short tail.
Thread this tail onto your tapestry needle and stitch through the join a few times to reinforce it.
Weave in the end.
The loop can be secured around a small hair elastic, while the decorated length hangs beside the braid.
If you intend to incorporate the parandi directly into a plait, you can attach the upper loop near the braid’s starting point and position the vine along the braid as you work.
Because this design uses one narrow cord rather than a full set of long braid-extension strands, it is best treated as a decorative braid accent, not a direct substitute for a traditional multi-strand parandi.
Beginner tip: Make sure the loop is large enough to pass comfortably around your intended attachment without stretching the stitches.
Common mistake to avoid: Don’t leave a loose knot at the top. The joining area may rub against the hair, so the finish should feel smooth.
Step 11: Check the finished parandi
You’re almost finished!
Place the entire project flat on your table.
Look carefully at the position of the flowers, leaves, and tassels.
Check whether any flower has turned sideways or any leaf is folded beneath the cord.
Gently adjust the motifs with your fingers.
Hold the parandi by its upper loop and let the entire accessory hang vertically.
This is an important final check because a design can look balanced on a table but behave differently when hanging.
Notice whether the tassels pull the cord too tightly or whether any section twists.
If a leaf or flower appears uneven, add or reposition a small securing stitch.
Trim any remaining loose threads only after you’ve checked that all ends are properly woven in.
Pattern Notes and Stitch Notes
Main cord
The foundation chain contains 91 chains.
The single crochet row contains 90 stitches because the first working stitch is made in the second chain from the hook.
You do not need a turning chain after that row because the cord is fastened off.
Leaf construction
Each leaf is crocheted around both sides of a short foundation chain.
The taller stitches create fuller sides, while the shorter stitches help shape the pointed tip.
The leaf can be made larger by increasing the foundation-chain length and adjusting the stitch sequence.
Flower construction
Each flower starts with a ring of five single crochet stitches.
One petal is created in each of those five stitches.
There are five petals per flower.
The chain-2 sections help shape the petals, while the double crochet stitches give them height.
Right side and wrong side
Both sides of the foundation cord are visible, so choose whichever side looks neater as the front.
When attaching motifs, position the most attractive side of each flower facing outward.
Try to keep securing knots and woven-in ends toward the back.
Adjusting the size
To make the parandi longer, add foundation chains before working the single crochet row.
To shorten it, use fewer chains.
Make a measured test section first rather than assuming that a fixed number of chains equals a particular length.
The number of leaves and flowers can also change with the length.
As a starting guide, a shorter 12–15 inch cord may look balanced with four or five leaves and three flowers, while a longer 24–30 inch design can support more decoration.
The exact quantity depends on motif size and spacing.
Common Beginner Mistakes and How to Fix Them
Even a relatively simple crochet hair accessory can present a few challenges, particularly when you’re working with narrow cords and small motifs.
1. The foundation cord curls or twists
Why it happens: Your foundation chain may be tighter than the single crochet row, or your tension may change during the project.
How to fix it: Try a slightly larger hook for the foundation chain or remake the cord with more even tension. Gently straighten the finished cord and let it relax before attaching motifs.
2. The crochet leaves look uneven
Why it happens: Some foundation-chain loops may have been skipped, or the stitches on one side of the leaf may be tighter than the other side.
How to fix it: Count the stitches carefully and identify the center turning point. Practice one or two leaves before making the complete set.
3. The mini flowers look too bulky
Why it happens: The hook may be too large for the yarn, or the petals are crowded together.
How to fix it: Try a slightly smaller hook, use lighter yarn, or gently shape the petals with your fingers. Check that you made exactly five petals.
4. The yarn tassels have different lengths
Why it happens: The yarn was wrapped with uneven tension, or the bundles were cut differently.
How to fix it: Use the same cardboard template for every tassel and trim them together after they are attached.
5. The tassels detach too easily
Why it happens: They may be secured with only one weak knot or attached to an unsupported stitch.
How to fix it: Use strong knots combined with several reinforcing stitches through the cord. Test each connection with a gentle tug.
6. The flowers rotate around the cord
Why it happens: Attaching each flower at only one small point allows it to turn as the parandi moves.
How to fix it: Add one or two additional stitches through the back of the flower near its center. Avoid stitching through the petal edges.
7. The finished accessory feels too heavy
Why it happens: Too many flowers, thick yarn, bulky tassels, or heavy embellishments may place extra weight on a narrow cord.
How to fix it: Reduce the tassel fullness, space the flowers farther apart, or choose a lighter yarn. Comfort matters more than adding every possible decoration.
How to Customize Your Crochet Parandi
One of the nicest things about this crochet project is how easy it is to personalize.
Change the yarn colors
For a soft everyday look, use sage green with blush pink, cream, or lavender flowers.
For festive styling, brighter shades such as red, fuchsia, royal blue, or mustard can make the accessory more noticeable.
You can also use one solid color for the entire parandi and let the crochet texture provide the detail.
Make a longer parandi
For a longer braid accessory, work a longer starting cord.
Add extra leaves and flowers after the foundation is complete so you can judge the spacing.
When making a very long design, consider adding more than one cord if you want greater fullness or a more traditional braid-extension appearance.
Try different flower styles
You don’t have to use five-petal flowers for every version.
Small daisies, miniature roses, or tiny puff flowers can be beautiful alternatives.
For your first parandi, however, keep all the flowers similar in size. This creates a consistent look and makes attachment easier.
Add decorative beads
Small beads can be sewn into the flower centers or attached near the tassel heads.
Choose lightweight beads with smooth edges so they don’t snag the hair.
Beads are optional, and the project looks complete without them.
Change the texture
If you enjoy making crochet cords, you can replace the flat foundation strip with a narrow crocheted tube or a Romanian-style crochet cord.
Just remember that a thicker cord will affect how the accessory moves and how the flowers sit.
Make a matching set
A matching crochet flower hair clip, small scrunchie, or floral bracelet would coordinate beautifully with the parandi.
This could also make a thoughtful handmade gift set.
Finishing Instructions
Taking a few extra minutes to finish your crochet parandi neatly will help it stay attractive and comfortable to wear.
Fastening off
Check that every flower, leaf, and tassel is securely attached.
For any unfinished crochet section, cut the working yarn with a sufficient tail, draw it through the final loop, and tighten gently.
Weaving in ends
Use a tapestry needle to pass loose tails through several stitches on the back of the work.
Change direction once if there is enough space to do so.
Avoid leaving bulky knots on the side that will touch the hair.
Shaping the flowers and leaves
Lay the parandi flat and gently arrange the motifs.
If the cotton flowers need reshaping, lightly dampen them with water and use your fingers to spread the petals into their preferred position.
Allow everything to dry completely before wearing.
Blocking
Heavy blocking is usually unnecessary for this project.
A gentle damp shaping is enough for most cotton yarns.
If you’re using acrylic, avoid direct high heat because it can damage or permanently alter the fibers.
Washing and care
Hand wash gently in cool water with a small amount of mild detergent if required.
Avoid strong rubbing, especially around the flower centers and tassel heads.
Press excess moisture out with a towel without wringing.
Lay the accessory flat, arrange the flowers and tassels, and allow it to air dry.
Always follow the care instructions for your particular yarn.
Safety and comfort
Keep any beads, knots, and decorative metal pieces smooth so they don’t catch in the hair.
Avoid very tight attachment near the scalp.
Do not wear a long parandi while sleeping or near machinery where loose strands could catch.
For accessories intended for young children, omit small detachable decorations and use only with appropriate supervision.
How to Wear Your Crochet Parandi
Once your accessory is finished, you can style it in several ways.
For a simple everyday hairstyle, attach the upper loop around a hair elastic near the beginning of a braid. Let the decorative vine follow the braid and position the tassels toward the lower end.
You can use a few discreet hairpins or matching thread ties if needed to keep the vine in place.
For a ponytail, secure the parandi near the elastic and let the flowers and tassels hang down beside the hair.
For a festive look, make two matching accessories and wear one alongside each braid.
The lightweight version in this tutorial works particularly well when you want delicate decoration without covering the whole hairstyle.
Always check that the accessory moves comfortably before wearing it for several hours.
Quick Printable-Style Summary
Easy Floral Crochet Parandi
Skill: Confident beginner
US terminology
Materials: DK cotton in sage green, dusty rose and cream; 3.5 mm hook; scissors; tapestry needle; measuring tape; cardboard.
Main cord: Ch 91. Sc in second ch from hook and each remaining chain (90 sc). Fasten off with an assembly tail.
Leaves: Make 8. Ch 7, work sl st, sc, hdc, dc, hdc, 3 sc at end; continue on opposite side with hdc, dc, hdc, sc, sl st.
Flowers: Make 5. Create ring with 5 sc. Work one petal in each stitch: sl st, ch 2, 2 dc, ch 2, sl st.
Tassels: Make 3 using a 5-inch cardboard template, 20–30 wraps per tassel. Tie, wrap necks and trim.
Assembly: Sew leaves alternately along cord; space flowers between leaves; attach tassels to lower end; make upper attachment loop with ch 20.
Finishing: Reinforce joining points, weave in ends, gently shape motifs and check hanging balance.
Frequently Asked Questions About Crochet Parandi
1. Is a crochet parandi suitable for beginners?
Yes. A simple crochet parandi can be an enjoyable project for confident beginners who already know the chain and single crochet stitches.
The flowers and leaves in this tutorial add half double crochet and double crochet practice.
If you’re completely new to crochet, make a few practice leaves and flowers before starting the full accessory.
2. What yarn is best for making a crochet parandi?
Smooth cotton yarn is a good option because it creates clear stitches and holds small decorative shapes well.
DK-weight cotton is especially convenient for a beginner floral version.
For a lighter, more traditional thread-like appearance, you can use finer cotton or silky yarn with a smaller hook.
3. How long should a crochet parandi be?
The best length depends on your hairstyle and the type of parandi you’re making.
A short floral accent may only need a 12–15 inch decorative cord, while longer accessories can extend 24–30 inches or more.
Measure your intended hairstyle before deciding on a length, and remember to account for the tassels.
4. Can I make a crochet parandi without flowers?
Absolutely.
You can create a simple cord-and-tassel design using only chains, single crochet stitches, and yarn tassels.
A plain parandi is a good option for someone who prefers minimal decoration or wants to practice the basic construction before making a floral version.
5. Can I make the parandi with leftover yarn?
Yes. This is an excellent stash-busting project.
The small leaves and flowers require relatively little yarn, making them useful for finishing leftover cotton yarn balls.
Try to use yarns of similar thickness so the decorative motifs remain proportional.
6. How do I keep the parandi from slipping out of my hair?
Use the upper crochet loop to secure the accessory around a hair elastic, or attach it carefully near the start of the braid.
For longer accessories, additional discreet attachment points can help prevent the vine from twisting.
The parandi should sit securely without pulling tightly on the scalp.
7. Can I sell handmade crochet parandis?
You can generally sell items made from your own original design, subject to applicable rules and any third-party design or licensing restrictions.
If you use someone else’s specific pattern, check its stated conditions before selling items made from it.
Use your own product photographs rather than copying another creator’s tutorial images.
Conclusion
Making a crochet parandi is a lovely way to combine basic crochet skills with traditional hair-accessory inspiration.
With a simple foundation cord, a few handmade leaves, miniature flowers, and flowing tassels, you can turn small amounts of yarn into something beautiful and wearable.
The most enjoyable part is making the design your own. You can create a soft everyday accessory in muted colors, a bright festive parandi, or a matching handmade gift for someone special.
If you enjoyed this tutorial, save it to your crochet Pinterest board so you can return to the flower, leaf, and tassel instructions whenever you’re ready to make another one.