A handmade crochet play mat is one of those projects that feels special long after you’ve finished the last stitch. It’s cozy, practical, and a lovely way to add handmade texture to a nursery or children’s play space.
The best part? You don’t need complicated crochet skills to make one.
This easy crochet play mat pattern begins with a small circle and grows gradually into a larger, flat mat. You’ll use half double crochet stitches, simple increases, and a neat single crochet border. Once you understand how the circle grows, the process becomes a relaxing repetition.
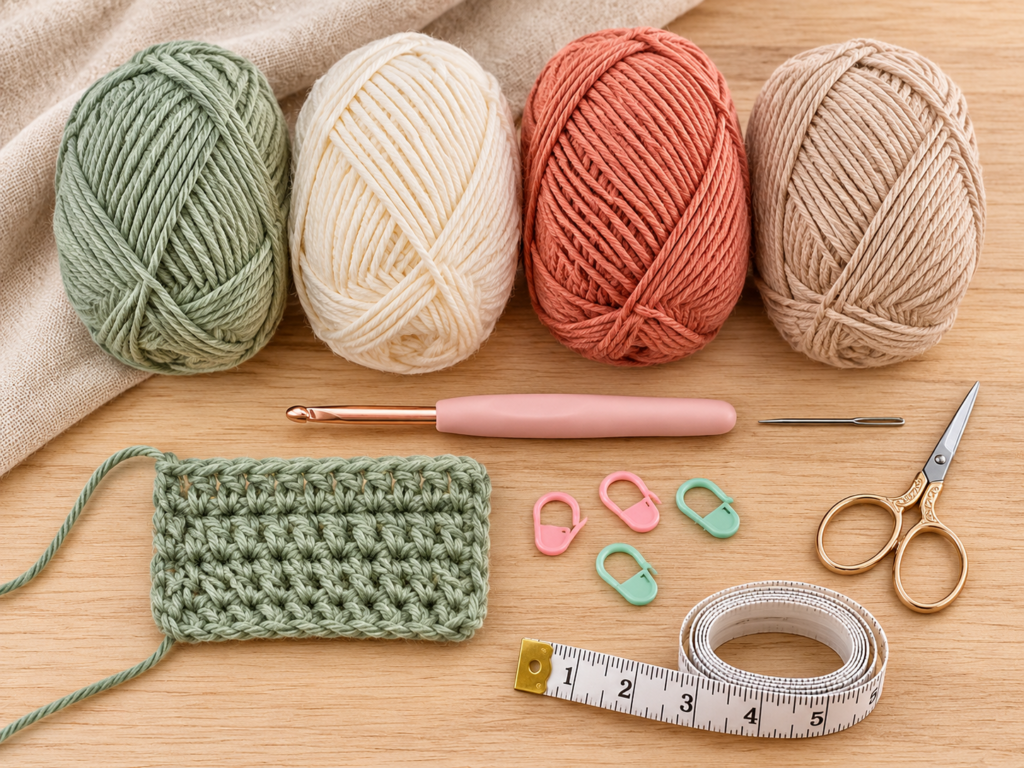
I’ve chosen a soft combination of dusty sage, warm cream, muted terracotta, and oatmeal beige for this tutorial. It’s a beautiful palette for a modern nursery, but you can easily replace these colors with your favorites.
You’ll learn how to start the center, count your stitches, increase without accidentally creating a bowl shape, change yarn colors, and finish your crochet mat neatly.
This tutorial also includes suggested step-by-step photography placements, so you can follow the construction process visually from beginning to end.
What You’ll Learn
By making this round crochet play mat, you’ll practice:
- Creating an adjustable magic ring.
- Working half double crochet stitches in rounds.
- Increasing stitches to make a flat circle.
- Counting stitches and following a simple repeat.
- Changing colors without large knots.
- Recognizing curling or ruffling before it becomes a problem.
- Adding a simple single crochet border.
- Fastening off and weaving in ends securely.
If you’ve made a crochet dishcloth or a small granny square before, you’ll already have many of the skills you need.
Project Details
| Detail | Information |
|---|---|
| Pattern | Easy Round Crochet Play Mat |
| Skill | Confident beginner |
| Shape | Circular |
| Construction | Joined rounds, worked from center outward |
| Main stitch | Half double crochet |
| Border | Single crochet |
| Yarn | Bulky weight #5 |
| Hook | 6.5 mm |
| Target diameter | 30–36 inches |
| Time | Approximately 6–12 hours |
| Seamless? | Yes, apart from yarn-end finishing |
| Terminology | US crochet terms |
The estimated size is a planning target, not a verified finished measurement. Different bulky yarns and crochet tensions produce different round heights. Measure your own mat as you work and adjust the number of rounds.
Materials You’ll Need
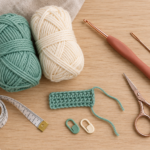
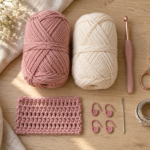
Choosing the right yarn makes a noticeable difference to a floor mat. For this project, look for a smooth, washable bulky yarn that feels comfortable against the skin and has a reasonably stable structure.
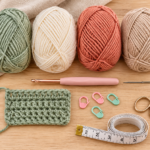
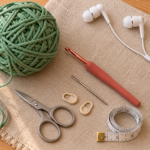
You’ll need:
- Approximately 800–1,200 yards (730–1,100 meters) of bulky (#5) yarn as an initial purchasing allowance; actual consumption varies substantially with diameter and gauge.
- A 6.5 mm ergonomic crochet hook.
- A blunt yarn needle with an eye large enough for bulky yarn.
- Sharp embroidery scissors.
- Two locking stitch markers.
- A flexible measuring tape.
- Optional blocking mats and rust-resistant pins.
For the example color palette, divide your yarn approximately into 30% dusty sage, 25% warm cream, 20% muted terracotta, and 25% oatmeal beige. These are color-planning proportions, not exact yardages.
Smooth acrylic or washable cotton-blend yarn usually makes counting stitches easier than very fluffy chenille yarn. Choose a durable yarn with good stitch definition, and avoid shedding fibers or decorative strands for a mat intended for young children.
Crochet Abbreviations Used
This pattern uses US crochet terminology.
| Abbreviation | Meaning |
|---|---|
| ch | Chain |
| sc | Single crochet |
| hdc | Half double crochet |
| sl st | Slip stitch |
| st / sts | Stitch / stitches |
| rnd | Round |
| rep | Repeat |
| inc | Increase: two hdc in the same stitch |
| RS | Right side |
| WS | Wrong side |
If you’re more familiar with UK crochet terms, remember that US half double crochet is UK half treble crochet, and US single crochet is UK double crochet.
How to make a half double crochet
A half double crochet is a useful stitch for mats because it creates a fairly dense surface without being excessively stiff.
First, wrap your yarn over the hook. Insert your hook under the two top loops of the next stitch. Yarn over again and pull up a loop.
You should now have three loops on your hook.
Yarn over one final time and pull through all three loops together.
That’s one half double crochet.
To make an increase, work a second complete half double crochet into the same stitch. One old stitch then becomes two new stitches.
Before You Start
Make a small practice swatch
Before starting the full mat, crochet a sample using your chosen hook and yarn.
For example, work 12 half double crochet stitches across and continue for about 10 rows. Check whether the fabric feels substantial but still flexible.
For a mat, you want stitches that sit relatively close together. An overly loose fabric can stretch and may create openings that are not ideal for this use.
If your stitches are extremely tight and your hook is difficult to insert, increase your hook size slightly.
If the fabric feels floppy or the holes are unusually large, try a smaller hook or a more structured yarn.
There is no single mandatory gauge for this design, because the mat is worked to a measured diameter. What matters most is maintaining a consistent fabric as the circle grows.
Understanding the increase system
Unlike a scarf, which grows in straight rows, a round mat needs more stitches as it gets wider.
Think of the first few rounds as concentric rings.
Every new ring has a greater circumference, so it needs additional stitches to stay flat.
For this original pattern, you’ll start with 10 half double crochet stitches and add 10 stitches per round.
That gives you a straightforward count to follow:
| Round | Total stitches |
|---|---|
| 1 | 10 |
| 2 | 20 |
| 3 | 30 |
| 4 | 40 |
| 5 | 50 |
| 6 | 60 |
| 7 | 70 |
| 8 | 80 |
| 10 | 100 |
| 15 | 150 |
| 20 | 200 |
| 25 | 250 |
| 30 | 300 |
These counts are based on 10 increases per round. They’re your starting framework; actual yarn and tension may require adjustment to keep the fabric flat.
For a large play mat, it’s helpful to check the shape every three or four rounds rather than waiting until the very end.
How joined rounds work
We’ll use joined rounds for this project, instead of an uninterrupted spiral.
At the beginning of each new round, chain 1. This chain does not count as a stitch.
Work the first half double crochet into the first stitch of the previous round, then follow the increase instructions.
When you finish the round, join with a slip stitch into the top of the first half double crochet of that same round.
Do not work into the joining slip stitch or the beginning chain on the next round.
Use a removable stitch marker to identify the first actual half double crochet. This helps avoid accidental extra stitches at the join.
Step-by-Step Crochet Play Mat Tutorial
Step 1: Create the magic ring
Start with your dusty sage yarn.
Leave a yarn tail approximately 6 inches long. Cross the working yarn over itself to form a loop, then insert your hook through the loop.
Catch the working yarn and pull up a loop.
Chain 1 to secure your adjustable ring. Do not count this chain as a stitch.
Now you have a starting circle ready for your first half double crochet stitches.
Hold the ring comfortably between your thumb and forefinger, keeping the tail accessible because you’ll use it to close the center.
Beginner tip: If a magic ring feels difficult, practice it a few times using smooth, light-colored yarn. The exact way you hold the yarn is less important than keeping the ring adjustable.
Common mistake to avoid: Don’t pull the center closed before working your first round. You need enough room to insert your hook into the loop.
Step 2: Work the first round
Now you’ll create the first complete round of your mat.
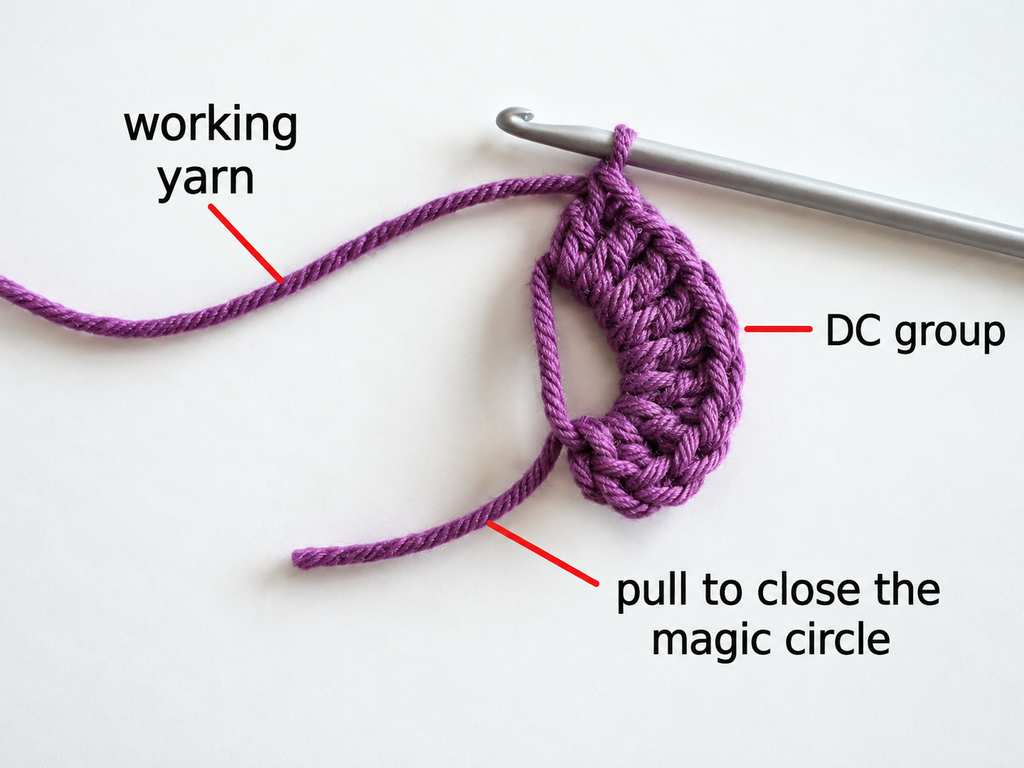
Work 10 half double crochet stitches directly into the magic ring.
To do this, yarn over, insert your hook into the center opening, catch the yarn, and pull up a loop. Yarn over and pull through all three loops.
Repeat until you have 10 half double crochet stitches around the ring.
Count them carefully.
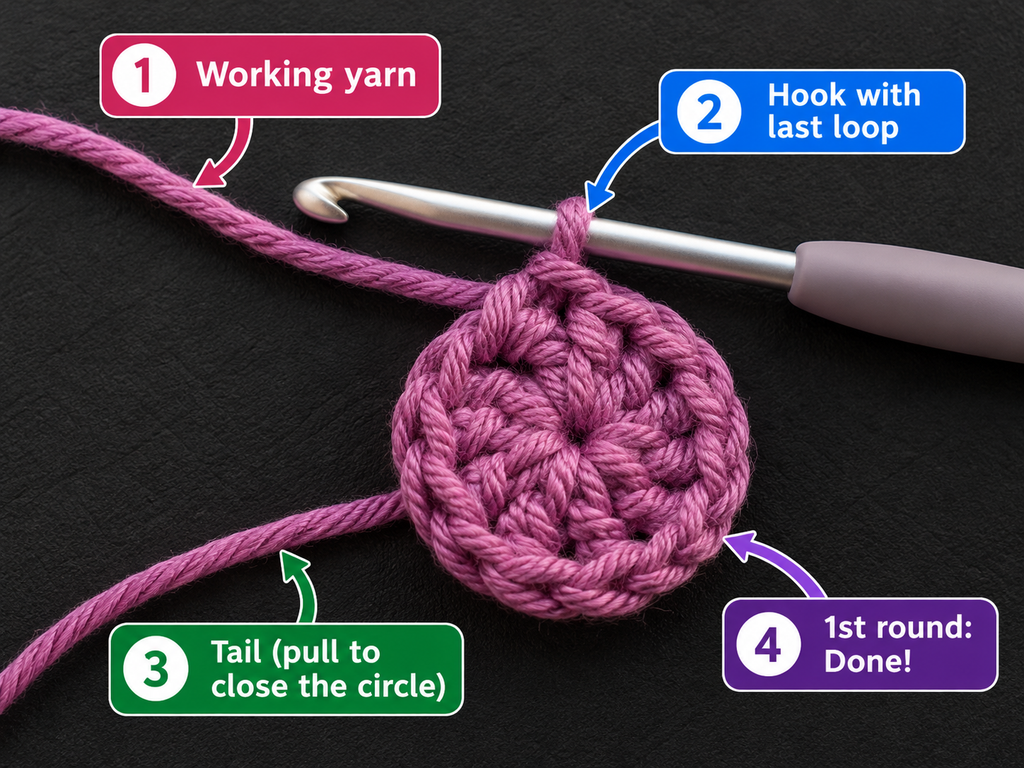
Once you’re certain there are 10, gently pull the beginning yarn tail. Watch as the center opening becomes smaller and the stitches move closer together.
Continue pulling until the center is securely closed, without distorting the stitches.
Join with a slip stitch into the first half double crochet.
Round 1 total: 10 hdc.
Beginner tip: You can place a marker into the first half double crochet as soon as you make it. This makes joining much easier.
Common mistake to avoid: Don’t join into the chain that secured the magic ring. The slip stitch belongs in the first actual half double crochet.
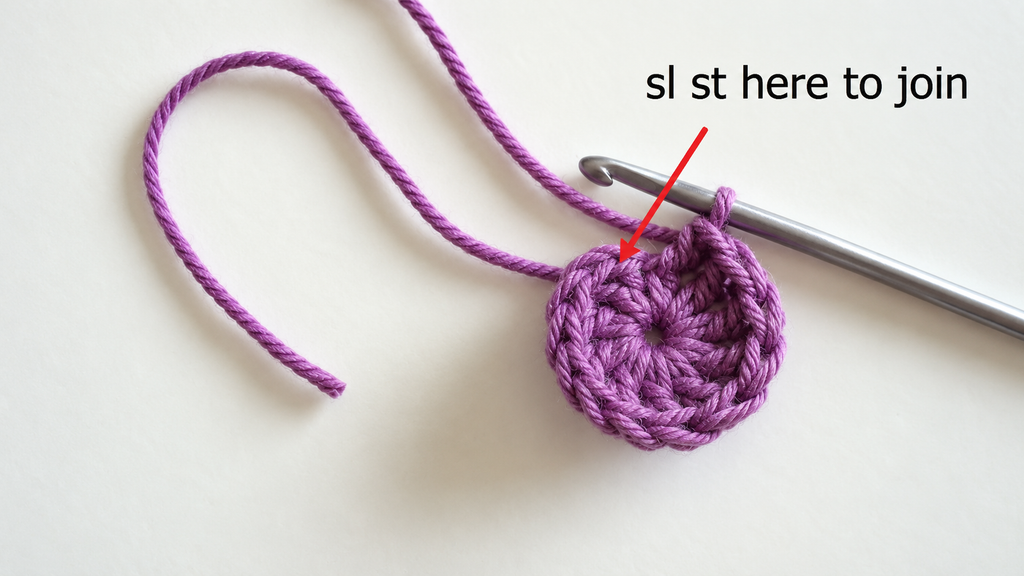
Step 3: Check the center before increasing
Set the little circle on your table with the working side facing up.
Your center should look relatively even, with 10 identifiable stitches around the outside and a small closed opening in the middle.
If the center is loose, gently tighten the beginning tail again.
If the stitches are tightly packed or slightly raised, don’t assume something is wrong. A small amount of crowding in the very first round can settle as the next rounds are worked.
Now check the working loop and make sure your hook is still the correct size.
You are ready to begin increasing.
Beginner tip: Count the V-shaped tops of your stitches rather than trying to identify each post from the side.
Common mistake to avoid: Don’t confuse the joining slip stitch with an extra working stitch. If you accidentally crochet into it, your count can gradually become incorrect.
Step 4: Make round 2 with increases
For round 2, you’ll double the number of stitches.
Chain 1 without counting it as a stitch.
Work two half double crochet stitches into the first stitch of the previous round.
Then work two half double crochet stitches into the next stitch.
Continue putting two half double crochet stitches into every stitch around.
When you reach the end, you should have 20 stitches.
Join into the top of your first half double crochet with a slip stitch.
Round 2: 2 hdc in each stitch around — 20 hdc.
You may already notice that the project is becoming flatter and wider.
The most important thing here is to understand an increase: both new stitches use the same underlying stitch.
Beginner tip: Put your finger behind the stitch you’re working into and check that both new stitches emerge from the same point.
Common mistake to avoid: After completing the first half double crochet of an increase, don’t automatically move to the next stitch. Work the second half double crochet into that same stitch first.
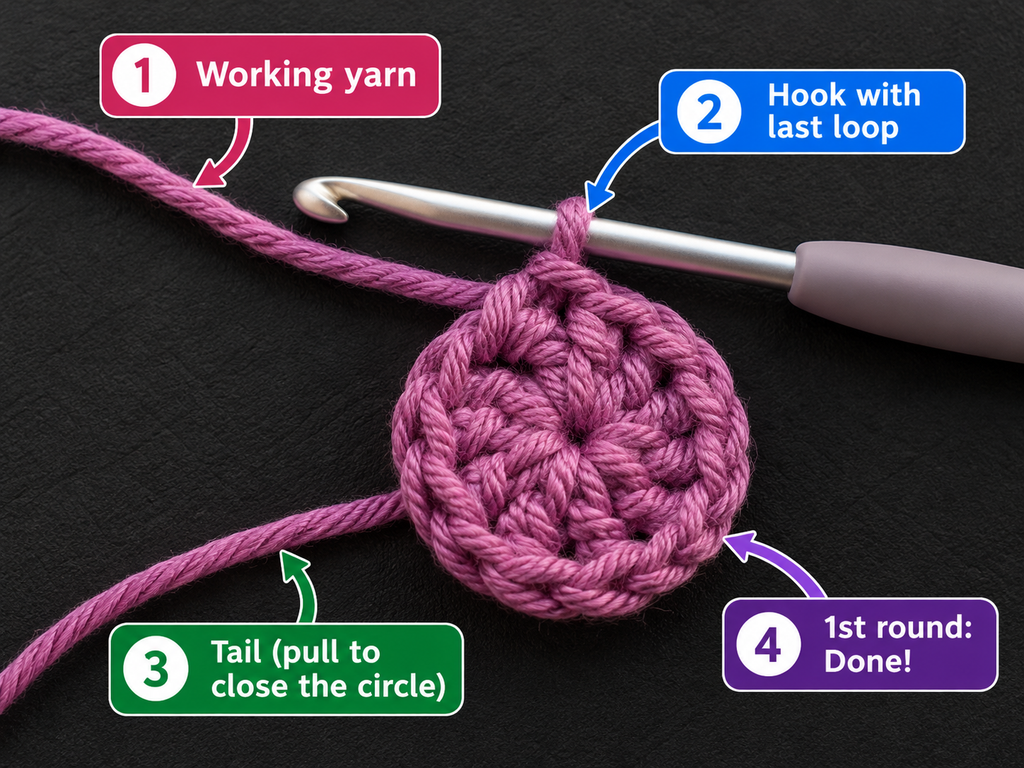
Step 5: Continue with rounds 3, 4, and 5
Now the increase pattern becomes more interesting.
Instead of working two stitches into every stitch, you’ll gradually place more regular stitches between increases.
This prevents the circle from expanding too quickly.
For round 3, chain 1. Repeat the following sequence around:
Work one half double crochet into the next stitch, then two half double crochet stitches into the following stitch.
Repeat the sequence 10 times.
Join into the first half double crochet.
You should have 30 stitches.
For round 4, chain 1. Repeat:
One half double crochet in each of the next two stitches, followed by two half double crochet stitches into the next stitch.
Repeat 10 times, then join.
You should have 40 stitches.
For round 5, chain 1. Repeat:
One half double crochet into each of the next three stitches, then two half double crochet stitches into the next stitch.
Repeat 10 times and join.
You should now have 50 stitches.
Notice how the pattern grows: each round adds one additional plain stitch between increases.
After round 5, lay your work on a flat surface and smooth it gently with your hands.
It should resemble a widening disc rather than a deep bowl.
Beginner tip: Move your starting marker to the first real half double crochet of every new round. Count your stitches at the end of the round, before joining.
Common mistake to avoid: If the mat forms ten obvious corners, your increases may be lining up too visibly. In later rounds, you can stagger their placement while maintaining exactly ten increases per round.
Step 6: Continue to round 8 and change colors
Keep working your increase pattern.
For round 6, work one half double crochet into each of the next four stitches, then work two half double crochet stitches into the following stitch. Repeat 10 times to reach 60 stitches.
For round 7, work one half double crochet in each of the next five stitches, then make an increase. Repeat 10 times for 70 stitches.
For round 8, work one half double crochet in each of the next six stitches, followed by an increase. Repeat 10 times for 80 stitches.
You now have a small, growing circular mat.
This is a good opportunity to introduce warm cream yarn.
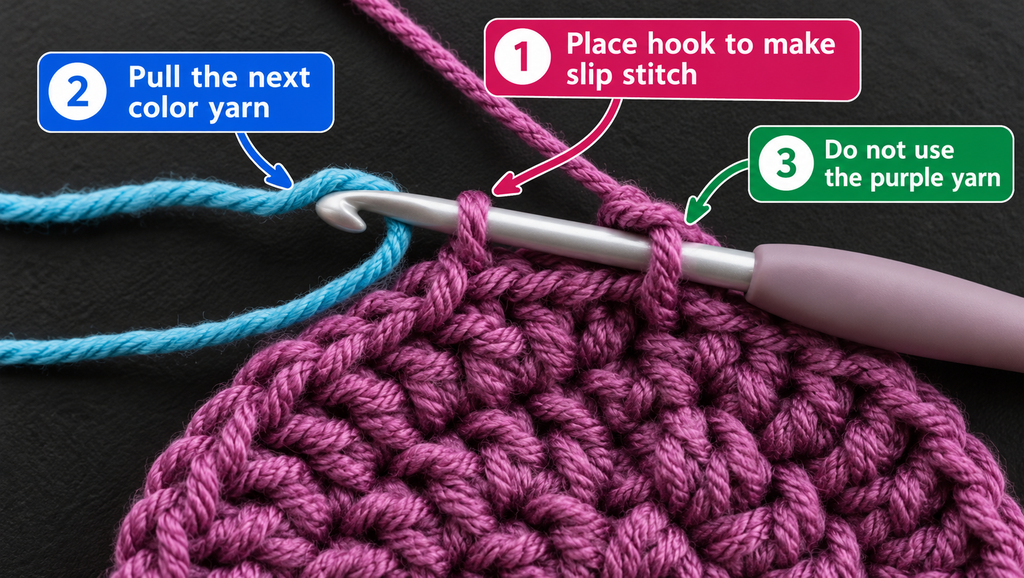
To change colors at the end of round 8, complete your final half double crochet using dusty sage.
When making the joining slip stitch, insert your hook into the first stitch as usual, but use the new cream yarn to pull through and complete the join.
Leave a generous tail of both colors for weaving in later. Do not use a bulky knot.
Begin the next round with cream yarn.
If you prefer a single-color play mat, simply continue with your original yarn.
Beginner tip: Keep the unused yarn tails toward the wrong side of the project.
Common mistake to avoid: Don’t trim a new color tail too short. A short loose end is much harder to secure and can work itself free during use or washing.
Step 7: Build the larger circle
Once you’ve completed eight rounds, the basic process is familiar.
Continue with joined rounds of half double crochet, using 10 increases in each round.
For round 9, work seven plain half double crochet stitches before each increase. That produces 90 stitches.
For round 10, work eight plain stitches before each increase. That produces 100 stitches.
Keep extending the repeat by one plain stitch per new round.
The general repeat for round \(n\), beginning with round 3, is:
Work one half double crochet in each of the next \(n-2\) stitches, then make one half double crochet increase in the next stitch. Repeat that sequence 10 times.
Your total stitch count at the end of round \(n\) will be \(10n\), provided the round is worked as written.
You can continue with cream for several rounds, then move to muted terracotta, and finally oatmeal.
One suggested arrangement is:
| Rounds | Yarn color |
|---|---|
| 1–8 | Dusty sage |
| 9–15 | Warm cream |
| 16–22 | Muted terracotta |
| 23 onward | Oatmeal beige |
This creates broad, soft color bands without lots of frequent joins.
If you want more than one ring of each color, alternate them again as the mat gets larger.
Every few rounds, put the mat on the floor or another flat surface and check its shape.
You should be able to smooth the fabric flat without pulling hard.
A little natural texture is fine, but significant upward curling or repeated ripples deserve attention before you continue.
Beginner tip: To reduce the appearance of a ten-sided shape, shift your increase locations in alternating rounds. You can do this by placing some plain stitches before the first increase and the remaining plain stitches after the final increase, while retaining exactly ten increases and the correct total count.
Common mistake to avoid: Don’t assume that a mathematically correct increase count guarantees a perfectly flat fabric for every yarn. Yarn elasticity, stitch height, and your tension all influence the result.
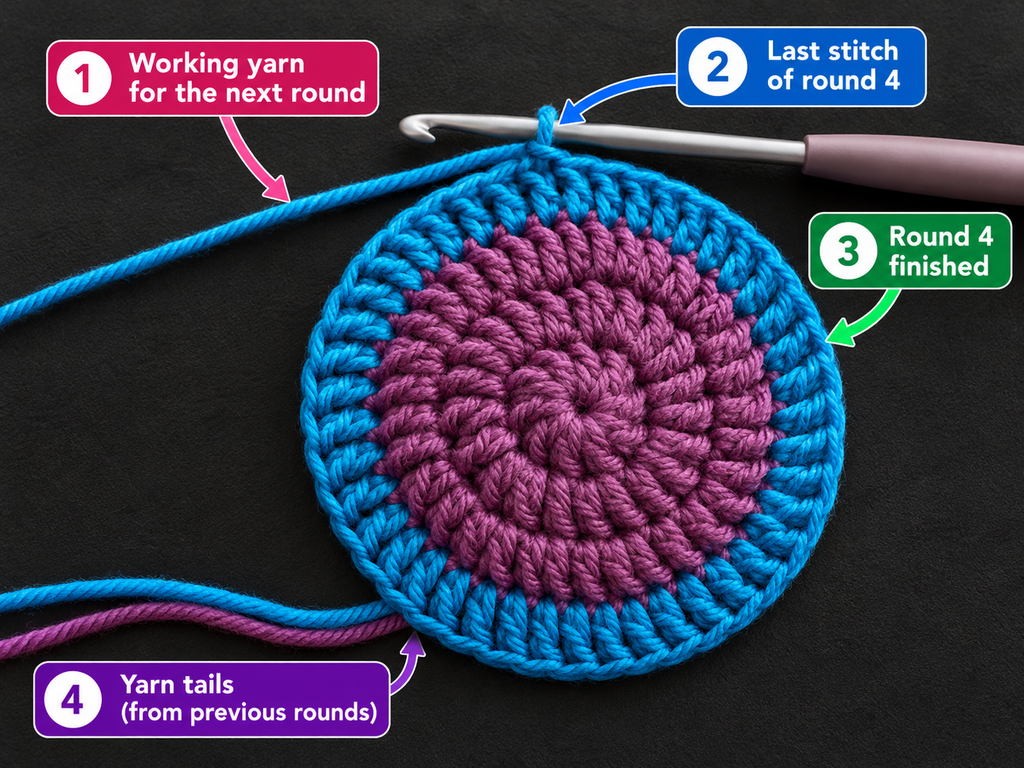
Step 8: Work until the mat reaches your chosen size
Continue crocheting until the mat measures approximately 30–36 inches across, or whatever diameter works for your intended space.
Measure across the widest point, passing through the center of the circle.
The stitch count increases predictably, but the actual width depends on your yarn and tension.
If you want a small floor mat for a cozy corner, you might stop earlier.
For a larger children’s play-space mat, continue adding rounds, checking yarn quantity and fabric flatness as you go.
As the mat grows, the outer rounds require much more yarn than the early rounds. If you’re changing colors, make sure you have enough yarn to finish each planned band.
Remember to leave enough of your final yarn color for the border.
Beginner tip: Measure after laying the fabric flat for several minutes. Don’t stretch the mat to reach your target diameter.
Common mistake to avoid: Don’t make the fabric wider by deliberately pulling it during measuring. A mat should reach its finished size naturally, without tension.
Step 9: Add a simple border
When you’re satisfied with the diameter, it’s time to finish the outside edge.
A simple round of single crochet creates a tidy border without overwhelming the stitch texture.
Join your last half double crochet round as usual.
Chain 1.
Now work one single crochet into each stitch around the outer edge. Do not work additional increases into this border unless the edge genuinely needs them.
Join into the first single crochet with a slip stitch.
Because single crochet stitches are shorter than half double crochet stitches, this finishing round can sometimes pull the edge inward.
If you notice that happening, undo the border and try a hook 0.5–1 mm larger, or work more loosely.
If the border creates noticeable ripples instead, return to your previous hook size and check for accidental extra stitches.
Beginner tip: A plain single crochet border is easier to clean and maintain than loose fringe or dangling decorative elements.
Common mistake to avoid: Avoid adding tassels, pom-poms, beads, or long decorative ties to a mat intended for a baby or young child.
Pattern Notes and Stitch Counts
This project is worked in joined rounds with the right side facing you throughout.
The beginning chain 1 does not count as a stitch. The joining slip stitch does not count as a stitch.
Each increase adds one stitch above the number of stitches worked into the previous round, resulting in 10 additional stitches overall.
Here’s a quick reference for the first 12 rounds:
| Round | Stitch instructions | Total |
|---|---|---|
| 1 | 10 hdc into magic ring | 10 |
| 2 | Inc in every stitch | 20 |
| 3 | (1 hdc, inc) × 10 | 30 |
| 4 | (2 hdc, inc) × 10 | 40 |
| 5 | (3 hdc, inc) × 10 | 50 |
| 6 | (4 hdc, inc) × 10 | 60 |
| 7 | (5 hdc, inc) × 10 | 70 |
| 8 | (6 hdc, inc) × 10 | 80 |
| 9 | (7 hdc, inc) × 10 | 90 |
| 10 | (8 hdc, inc) × 10 | 100 |
| 11 | (9 hdc, inc) × 10 | 110 |
| 12 | (10 hdc, inc) × 10 | 120 |
Continue using the same mathematical repeat, adjusting increase placement to prevent pronounced corners.
If the work does not lie flat, correct the fabric rather than forcing the written count to fit every yarn. A test sample of several rounds is especially helpful when substituting yarn.
Common Beginner Mistakes and How to Fix Them
Even a simple crochet circle can cause a few surprises. The good news is that most problems are easy to spot early.
1. The play mat starts curling upward
If your crochet circle begins to look like a shallow bowl, there may not be enough circumference for the number of rounds you’ve worked.
First, check your stitch counts and make sure you didn’t skip an increase.
If the counts are correct, your stitches may be particularly tall or your yarn may be working tightly. Try a small adjustment to the increase distribution on the next round, adding evenly spaced increases if necessary.
Don’t add too many at once. Test and reassess.
2. The outer edge becomes wavy
Waves or ruffles often mean the outer circumference has too many stitches for the fabric.
Check whether you’ve accidentally made extra increases.
If the counts are correct, try reducing the number of increases slightly in the next round. You can also test a smaller hook, but changing hook size may affect the fabric texture.
A gently textured edge can be normal. Large repeated ripples should be corrected.
3. The center has a visible hole
This usually happens when the beginning magic ring hasn’t been pulled closed securely.
Before weaving in the center tail, gently pull it to tighten the opening.
Use your yarn needle to weave the tail through the surrounding stitches in more than one direction.
For a child’s mat, always inspect the center after washing.
4. The stitch count changes unexpectedly
If you finish a round with an extra stitch, the likely culprit is the chain or slip stitch at the joining point.
Remember that neither counts as a working stitch in this pattern.
Mark the first proper half double crochet, and join directly into it every time.
5. The mat looks slightly polygonal instead of round
This happens when all increases are positioned in the same radial lines round after round.
To soften the shape, stagger increases across alternating rounds while preserving the overall count.
For example, in a round with six plain stitches per increase repeat, you can work three plain stitches before the first increase, repeat the main seven-stitch grouping, and place the remaining three plain stitches at the end.
6. A color-change seam looks bulky
Color joins can stand out if several yarn tails are tied into one large knot.
Instead, leave separate yarn tails and weave them individually into the wrong side.
Change colors at the joining point and keep the join consistent around the mat.
7. The edge curls after adding the border
The border might be too tight.
Try a slightly larger hook for the single crochet border, or adjust your tension.
Be careful not to fix a curling border by adding excessive stitches, which can produce a ruffle instead.
How to Customize This Crochet Play Mat
One of the nicest things about crocheting a simple circle is the freedom to make it your own.
Change the color palette
For a soft woodland nursery, try sage green, cream, mushroom, and warm brown.
For a brighter playroom, try mustard yellow, coral, teal, and ivory.
A one-color crochet mat is also beautiful, especially when the stitches are neat and the yarn has a gentle heathered texture.
Make it larger or smaller
Because this play mat grows from the center, changing the size is relatively straightforward.
For a smaller mat, stop once you’ve reached your desired diameter and add the border.
For a larger one, continue the increase sequence, checking flatness and yarn supply.
A larger mat will also be heavier, so consider how easily you’ll be able to lift, wash, and dry it.
Experiment with yarn texture
Smooth yarn shows half double crochet stitches especially well.
A cotton blend creates a more structured feel, while many acrylic yarns offer lighter weight and easier care.
Very fluffy yarn can look cozy, but it makes stitch counting and inspection more difficult. For a baby-oriented project, favor washable, low-shedding yarn with a secure structure.
Try a different border
A plain single crochet border is the most practical beginner option.
If you’re making a decorative mat for older children or general household use, you could experiment with a narrow reverse single crochet edge or a second border round.
Keep the finished edge firm, smooth, and free of detachable decorations.
Turn it into a handmade gift
A crochet play mat can make a thoughtful baby shower or new-home gift.
Include a small care card with the yarn fiber, washing instructions, and guidance about supervised floor use.
You might also create a matching crochet basket or a small storage pouch using the same yarn palette.
Finishing Instructions
A beautiful crochet mat deserves careful finishing. Because it will rest on the floor and may be handled frequently, secure every yarn end thoroughly.
Fasten off
After completing the border, cut the working yarn, leaving a tail approximately 6–8 inches long.
Pull the cut end fully through the last loop and tighten gently.
Avoid tugging so hard that the outer edge becomes puckered.
Weave in every yarn end
Thread a yarn tail through your blunt yarn needle.
Turn the mat over so the wrong side is facing you.
Weave the tail through the backs of several stitches, following the crochet structure rather than pulling straight across a large empty space.
Change direction and weave through another section of stitches.
Do this for every yarn tail, including those created by color changes.
Trim carefully after each end is secure.
Check the center
Inspect the starting magic ring.
Make sure it hasn’t loosened and that the center tail has been woven securely through the surrounding fabric.
If the center opens during washing, it can affect the structure of the mat, so this check is particularly important.
Shape the mat
Lay your play mat flat.
Smooth outward gently from the center with your hands. Check whether the outer edge lies evenly.
If necessary, lightly dampen the mat or use the care-approved blocking method for your yarn fiber.
Avoid stretching the fabric aggressively or using heat that could damage synthetic yarn.
Allow it to dry completely before placing it on the floor.
Washing and caring for your crochet mat
Check the washing instructions on your specific yarn label before cleaning.
If machine washing is permitted, use an appropriate gentle cycle and avoid harsh agitation that could stretch the crochet fabric.
Dry according to the yarn label, reshaping the mat while it is damp if necessary.
Make sure it is completely dry before storage or use.
Inspect the fabric regularly for loose ends, unraveling, holes, excessive stretching, or fiber shedding.
A damaged mat should be repaired before reuse.
A safety note for baby play mats
A crocheted mat is a handmade textile, not a certified protective floor pad or infant sleep surface. It should not be relied on to provide impact protection from falls.
For baby floor time, use the mat only while an adult is actively supervising and while the baby is awake. Place it on a clean, stable, dry floor away from hazards. Do not place it under an infant for sleep, in a crib, bassinet, or other sleep space.
Keep loose yarn, detachable items, long loops, and hanging decorations away from the mat. Stop using it if stitches or yarn ends become loose.
For very young babies, check with your pediatric healthcare professional about appropriate floor and tummy-time activities.
Quick Printable-Style Pattern Summary
Easy Round Crochet Play Mat
Original beginner pattern · US crochet terms
Skill: Confident beginner
Yarn: Bulky #5, washable cotton blend or acrylic
Hook: 6.5 mm
Stitches: Magic ring, hdc, sc, sl st
Starting method: Adjustable magic ring with 10 hdc
Increase rule: Add 10 hdc per round, increasing the number of plain stitches between each increase
Joining: Slip stitch into first hdc; ch 1 before each new round, not counted as a stitch
Color changes: Optional, at round joins
Size: Crochet to desired diameter, checking flatness regularly
Border: 1 sc in each stitch around, adjusting hook size as needed
Finish: Secure every end, shape gently, wash and dry following the yarn label
Copy pattern summary
Crochet Play Mat Pattern FAQ
1. Is a crochet play mat pattern suitable for beginners?
Yes, this design is suitable for confident beginners who know how to make half double crochet stitches and are ready to learn simple increases.
The first few rounds require the most concentration. Once you understand the increase pattern and how to count stitches, the larger rounds become repetitive.
Using stitch markers and checking the circle frequently will make the project easier.
2. What is the best yarn for a crochet baby play mat?
A smooth, low-shedding, machine-washable bulky yarn is a sensible choice.
Cotton blends offer structure and clear stitch definition, while many acrylic options are lighter and easier to maintain.
Avoid yarns that shed heavily, have loose decorative fibers, or are difficult to wash.
Always check the yarn label for care instructions and suitability for the intended use.
3. How much yarn do I need for a round crochet play mat?
The amount depends on the finished diameter, yarn thickness, stitch density, and hook size.
For a large bulky-yarn mat, 800–1,200 yards is a preliminary planning range, not a guaranteed requirement.
For a more accurate estimate, weigh or measure your working swatch and compare it with the planned finished area, allowing additional yarn for your border and weaving in ends.
Buying an extra matching skein can be helpful, especially when working with a specific dye lot.
4. Why does my crochet circle curl?
The most common causes are missing increases, tension differences, or an increase system that doesn’t suit your chosen yarn.
Check your count first.
If the count is accurate but the circle still curls, test a small adjustment to the number or spacing of increases.
Correct the problem before continuing several more rounds.
5. Can I make this crochet play mat without a magic ring?
Yes. You can chain four stitches and join them with a slip stitch to form a small ring.
Then work your first round of half double crochet stitches into the center opening.
This creates a fixed ring rather than an adjustable one, so it may leave a slightly larger center opening.
For a child’s mat, ensure the center is secure and the opening does not become loose.
6. Can I make a crochet play mat with different stitches?
You can, but changing stitch height will usually affect the way a circular pattern grows.
For example, using double crochet instead of half double crochet may require a different starting stitch count and increase rate.
It’s best to follow a pattern designed specifically for the stitch you want rather than swapping stitches without adjusting the circle.
7. Is a crochet play mat safe for tummy time?
A crocheted mat can be used as a textile during supervised, awake floor activities when its condition and the surrounding environment are appropriate.
However, homemade crochet fabric is not safety-certified as an infant play mat, and it should not be treated as protective padding.
Keep the surface flat, free of loose decorations and yarn ends, and away from hazards. Never use a crochet play mat as a sleep surface or leave an infant unattended on it.
The Finished Crochet Play Mat
Once the final border is complete, lay your mat flat and take a look at how far it has come.
What began as a small ring has become a beautiful circle of handmade texture. The repeated stitches create a calm, even surface, while the soft stripes make the project feel personal.
The most satisfying part of a crochet play mat is that it can be customized so easily. Change the colors, experiment with the size, or choose one simple shade for a modern look.
Whether you’re making this as nursery décor, a gift, or a handmade addition to a family play space, keep the pattern notes so you can return to them for future projects.
Conclusion
Making a round crochet play mat is a wonderful way to become more comfortable crocheting in the round. You’ll learn practical increases, improve stitch consistency, and see how a simple repeated stitch can create a beautiful finished project.
Start with your magic ring, take your time with the first rounds, and don’t be afraid to check the shape as you go.
Save this free crochet play mat pattern for your next crochet project, or share it with a friend who loves handmade baby gifts and nursery projects.
For another beginner-friendly project, try making a matching crochet storage basket or simple baby blanket using the same yarn colors.