Want to crochet a cute pair of summer shorts without tackling complicated sewing patterns or difficult crochet stitches? These handmade crochet micro shorts are a fun way to turn basic crochet skills into something you can actually wear.
The design starts with a soft ribbed waistband, followed by a simple half double crochet body. Once the fabric reaches the correct length, you’ll divide it into two leg openings, crochet a short edge around each leg, and finish everything neatly.
The best part is that you can adjust the pattern to your own measurements. Instead of depending on a fixed starting-chain number that might be too loose or too tight, you’ll learn how to build the shorts around your waist, hips, and preferred length.
For this tutorial, we’ll use warm ivory and dusty rose yarn to create soft horizontal stripes. You can keep the shorts one color, try a colorful festival-inspired version, or make the legs slightly longer for more coverage.
This is a beginner-friendly, made-to-measure crochet pattern. It does require careful measuring and a little simple stitch-count math, especially when shaping the hips. The instructions below are an original construction method, not a tested reproduction of the reference source, so try the garment on as you work.
What You’ll Learn
By the end of this tutorial, you’ll know how to:
- Crochet a stretchy ribbed waistband using half double crochet.
- Join a flat crochet strip into a comfortable waistband.
- Crochet the body of the shorts in joined rounds.
- Add increases so the shorts have room for your hips.
- Measure the rise and adjust the length.
- Create a crotch bridge to form separate leg openings.
- Crochet neat, matching leg borders.
- Finish the project, weave in the ends, and customize the fit.
Crochet Micro Shorts Pattern at a Glance
| Pattern detail | Description |
|---|---|
| Difficulty | Adventurous beginner |
| Construction | Top down, mostly in joined rounds |
| Main stitch | Half double crochet |
| Waistband | Half double crochet BLO ribbing |
| Sizing | Made to measure |
| Fit | Fitted to gently relaxed |
| Rise | Adjustable |
| Inseam | Approximately 1–3 in (2.5–7.5 cm), adjustable |
| Yarn | DK/lightweight #3 cotton blend |
| Hook | 4.5 mm, or size needed for gauge |
| Color palette | Warm ivory and dusty rose |
| Finishing | Simple single crochet hem |
Materials You’ll Need
Choose yarn that feels comfortable against your skin and produces a fabric that isn’t too stiff. Since shorts move with your body, a cotton blend with some elasticity is often easier to wear than a very rigid cotton yarn.
Recommended materials
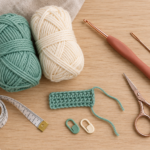
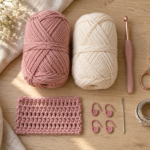
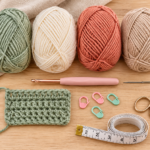
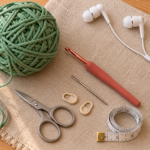
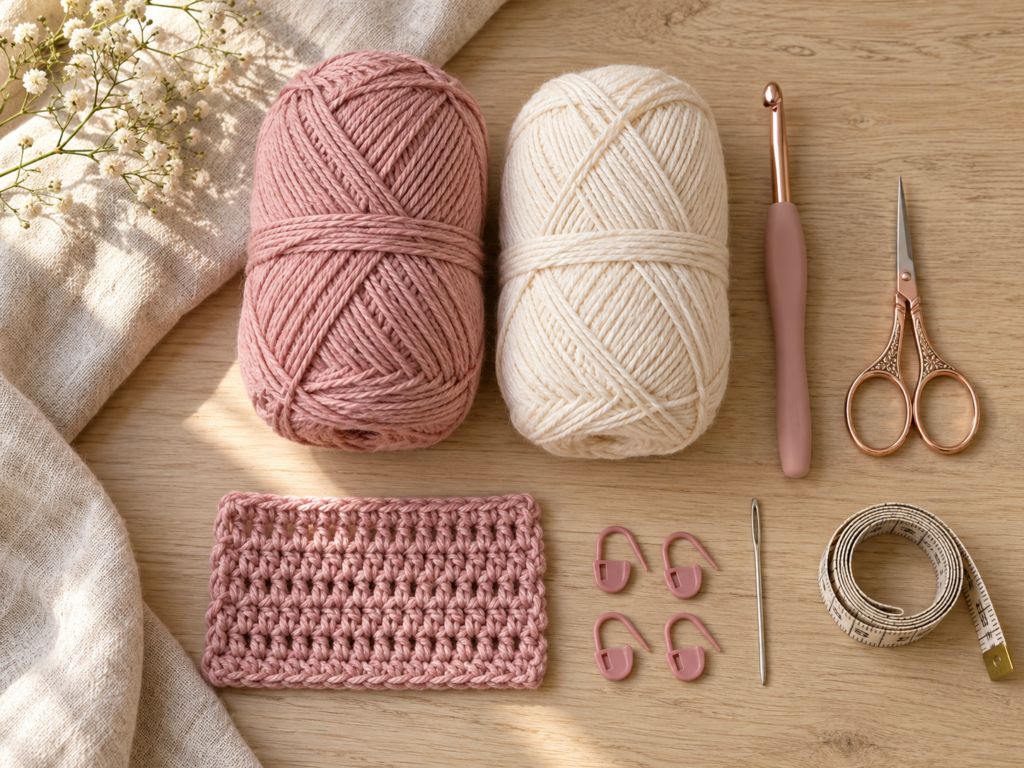
ChecklistDK/lightweight #3 cotton or cotton-blend yarn in warm ivory and dusty rose4.5 mm ergonomic crochet hookScissorsBlunt tapestry needleAt least four locking stitch markersFlexible measuring tapeNotebook or phone for recording measurementsOptional lightweight lining fabric and sewing supplies
For yarn quantity, plan approximately 300–700 yards for many adult-size pairs, but treat that as a shopping estimate rather than a tested yardage chart. Larger sizes, taller rises, longer legs, and dense stitches may require substantially more.
If possible, purchase an extra ball in your main color. Having enough yarn from the same dye lot is useful when making wearable crochet clothing.
Crochet Abbreviations Used
This pattern uses US crochet terminology.
| Abbreviation | Meaning |
|---|---|
| ch | Chain |
| hdc | Half double crochet |
| sc | Single crochet |
| sl st | Slip stitch |
| st / sts | Stitch / stitches |
| BLO | Back loop only |
| inc | Increase |
| rep | Repeat |
| rnd | Round |
| RS / WS | Right side / wrong side |
US/UK terminology note: A US half double crochet is called a half treble crochet in UK terminology, and a US single crochet is a UK double crochet.
How to make a half double crochet
Yarn over, insert your hook into the indicated stitch, yarn over again, and pull up a loop. You should have three loops on your hook. Yarn over once more and pull through all three loops.
How to make an increase
Work two half double crochet stitches into the same stitch. This changes one stitch into two and increases your total count by one.
Before You Start
1. Take your measurements
You’ll get a better fit if you measure before crocheting rather than relying only on clothing sizes.
Record these five measurements:
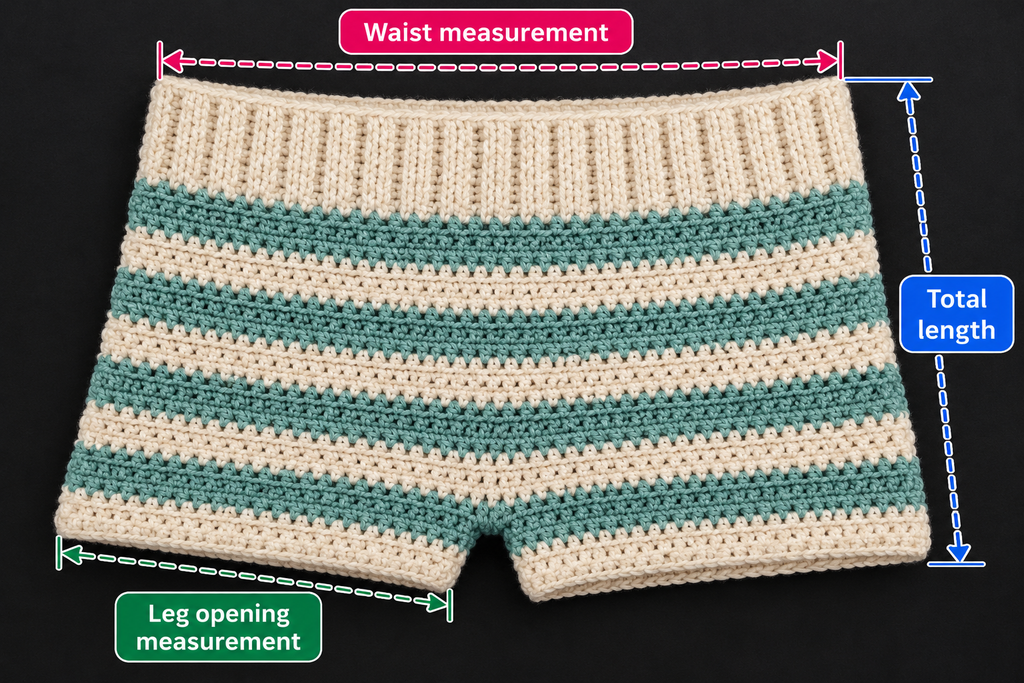
- Waist: Around the area where you want your waistband to sit.
- Hips: Around the fullest part of your hips and seat.
- Rise: From the top of your desired waistband down to the crotch level, measured while seated or using a comfortable pair of shorts as a guide.
- Inseam: From the crotch down to the desired leg opening.
- Upper thigh: Around the fullest part of your upper thigh where the shorts leg will sit.
Also check that your finished waistband can stretch over your hips. A waistband that fits your waist but cannot pass over your hips will make the shorts impossible to put on.
2. Make a gauge swatch
Crochet a small half double crochet swatch at least 5 inches (12.5 cm) square. Wash or block it the way you intend to care for the shorts, allow it to dry, and then count stitches and rows across the center 4 inches (10 cm).
For the worked example in this tutorial, we’ll assume:
- 16 hdc = 4 in (10 cm)
- 14 hdc rounds = 4 in (10 cm)
These are example gauge figures, not guaranteed results for every yarn and hook.
If you have more stitches than this over 4 inches, your fabric is tighter. If you have fewer, the fabric is looser. You can adjust the hook size or simply calculate your stitch counts using your actual gauge.
3. Understand the pattern’s fit
These micro shorts are intended to be short but not painfully tight. Aim for approximately 1–2 inches (2.5–5 cm) of positive ease around the widest hip measurement for a non-stretchy yarn, adjusting after trying them on.
To calculate an approximate body stitch count:
\[ \text{Target stitches}= \frac{\text{Desired circumference in cm}\times\text{stitches per 10 cm}}{10} \]
For example, if your intended finished hip circumference is 100 cm and your gauge is 16 stitches per 10 cm:
\[ 100\times16\div10=160\text{ stitches} \]
That means your body should eventually have about 160 stitches around the hips.
For the easiest leg division, make the final stitch count even.
4. Decide your stripe sequence
This tutorial uses ivory for the waistband, then repeating stripes of dusty rose and ivory.
You might choose three rounds of dusty rose followed by three rounds of ivory. Repeat that sequence until your body reaches the correct length.
A simple stripe pattern makes it easier to see your progress, and using the same stripe depth on both legs produces a polished look.
Step-by-Step Crochet Tutorial
Step 1: Crochet the waistband foundation
Begin with your ivory yarn and 4.5 mm crochet hook.
Make a slip knot, leaving a tail long enough to weave in later.
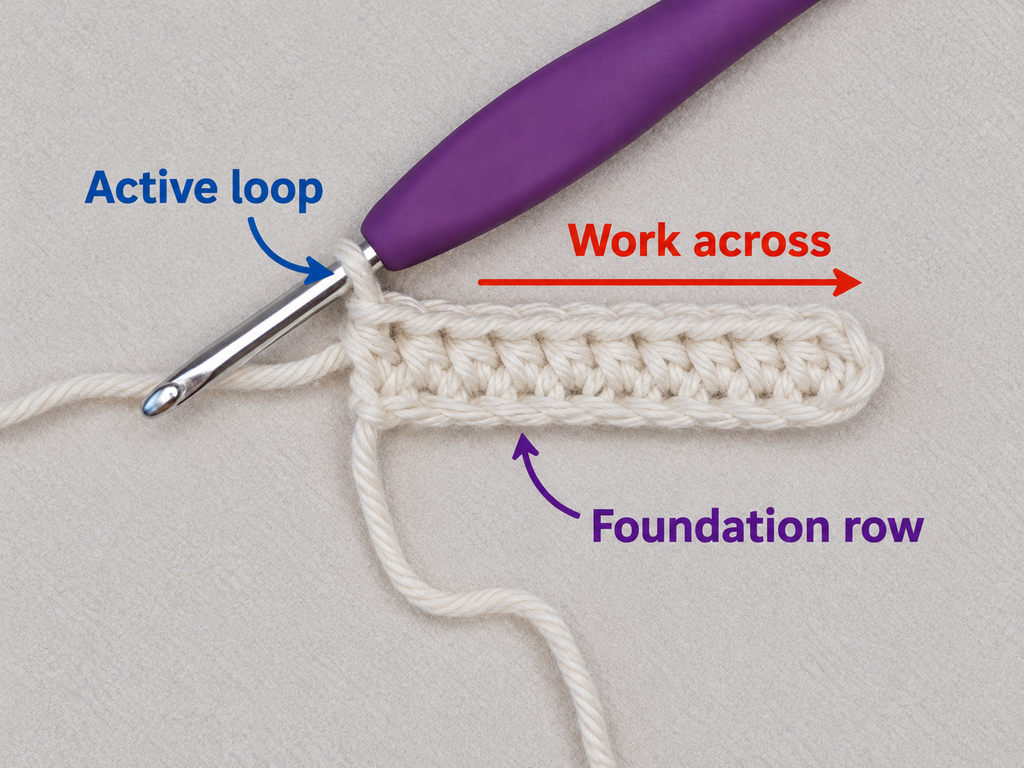
Foundation: Chain 11.
Row 1: Work one half double crochet into the second chain from the hook. Continue making one hdc into each remaining chain.
You should have 10 hdc stitches.
This short row determines the depth of your waistband. At a typical DK gauge, it creates a comfortable ribbed band, but the exact width depends on your yarn and tension.
If you want a wider waistband, begin with more chains. For a narrower band, use fewer chains.
Beginner tip: Count the little V shapes along the top of your foundation row. Your working loop doesn’t count as a stitch.
Common mistake to avoid: Working into the first chain from your hook makes the edge too tight and can affect your stitch count.
Step 2: Crochet the stretchy ribbing
Now you’ll work back and forth across the short end of the waistband.
Row 2: Chain 1, turn, and work one hdc in the back loop only of each stitch across. You should still have 10 stitches.
Repeat Row 2 until your band is long enough to fit comfortably around your waist with slight stretch.
When you look at the tops of your stitches, you’ll see two loops forming a V. Insert your hook into the loop farthest away from you when working in the back loop only.
This creates raised ridges that behave like ribbing.
Test the length by wrapping the band around your waist. It should sit securely without digging into your skin.
For a yarn with good recovery, the relaxed band may be slightly smaller than your actual waist measurement. Avoid pulling it so tight that the ribbing becomes distorted.
Before joining, stretch the band carefully enough to check that it will pass over your hips.
Beginner tip: Keep the same number of stitches in every row. One missing stitch can gradually turn your rectangular waistband into a triangle.
Common mistake to avoid: Measuring the ribbing only while it is stretched. Always check its relaxed length and comfortable stretch.
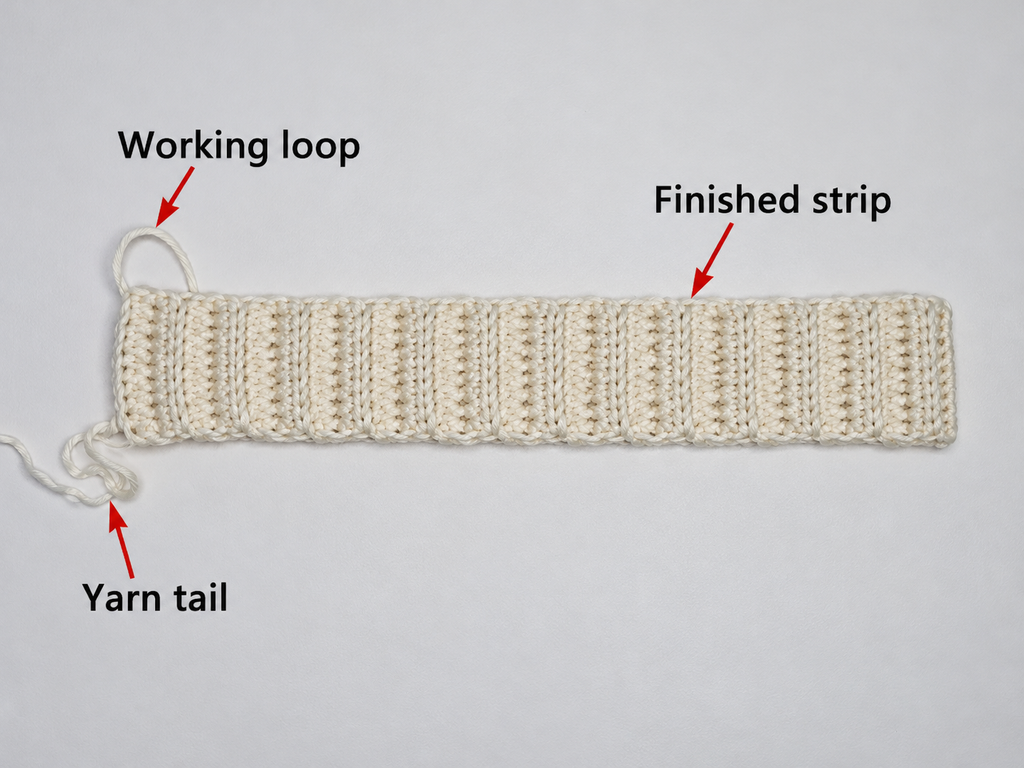
Step 3: Join the waistband into a circle
Lay your waistband flat.
Bring the first and last short edges together, making sure the strip isn’t twisted.
You can join the two ends using slip stitches or sew them together with a tapestry needle.
For a crochet join, insert your hook through corresponding stitches from each short edge, yarn over, and pull through both edges and the loop on your hook to create a slip stitch. Repeat across the 10 stitches.
The joining seam should be reasonably flat.
Once connected, turn the waistband so the seam is on the inside.
Place a stitch marker at the seam. This will help you locate the back center later.
Beginner tip: Before joining, place the waistband around your waist one final time.
Common mistake to avoid: Twisting one end of the band before joining. This creates a permanent twist that is difficult to fix without undoing the seam.
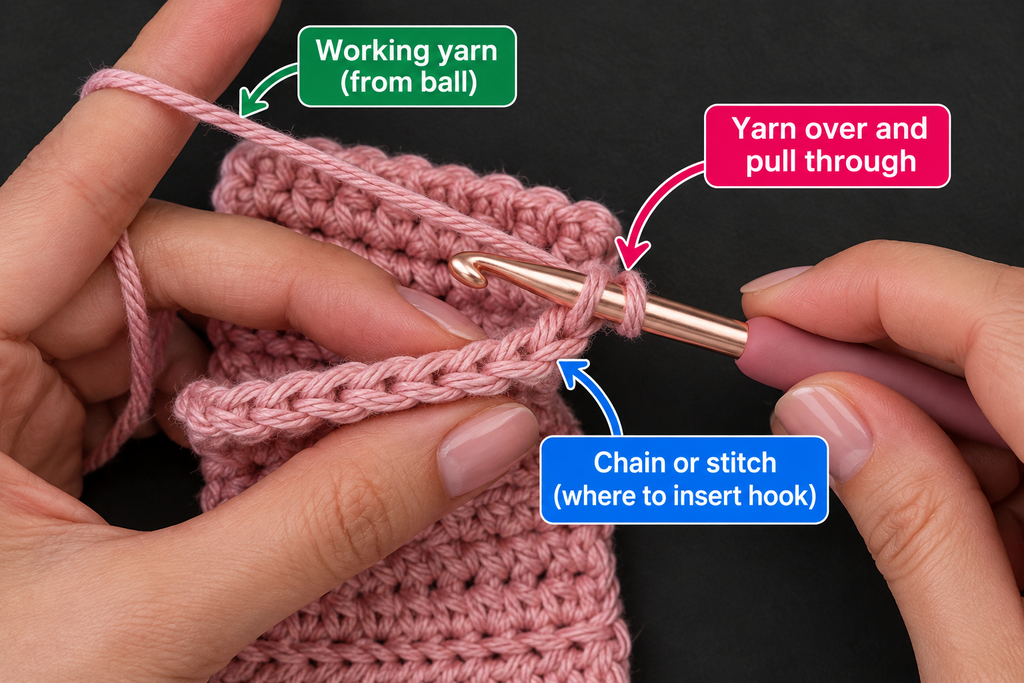
Step 4: Start the body of the shorts
Your waistband is now a closed ring. Next, you’ll begin crocheting the body along its lower edge.
Rotate the waistband so you can work into the long side of the ribbing rows.
Attach dusty rose yarn near the back seam.
Body Round 1: Chain 1. Work approximately one hdc into the edge of each ribbing row around the entire waistband. Adjust the spacing so the edge lies flat rather than bunching or flaring. Join with a slip stitch to the first hdc.
Count the stitches and write down the result.
For our worked example, we’ll assume you have 100 hdc stitches after this round. Your count may be different.
Try on the waistband and newly attached fabric. If the body begins with substantial gathering, you’ve placed too many stitches into the ribbing. If it pulls inward, you may need more.
Beginner tip: Place a marker every 20–25 stitches during this round. Dividing a large round into smaller sections makes counting much easier.
Common mistake to avoid: Mistaking the starting chain for a real hdc stitch. In this original pattern, the chain 1 at the beginning of a round does not count as a stitch.
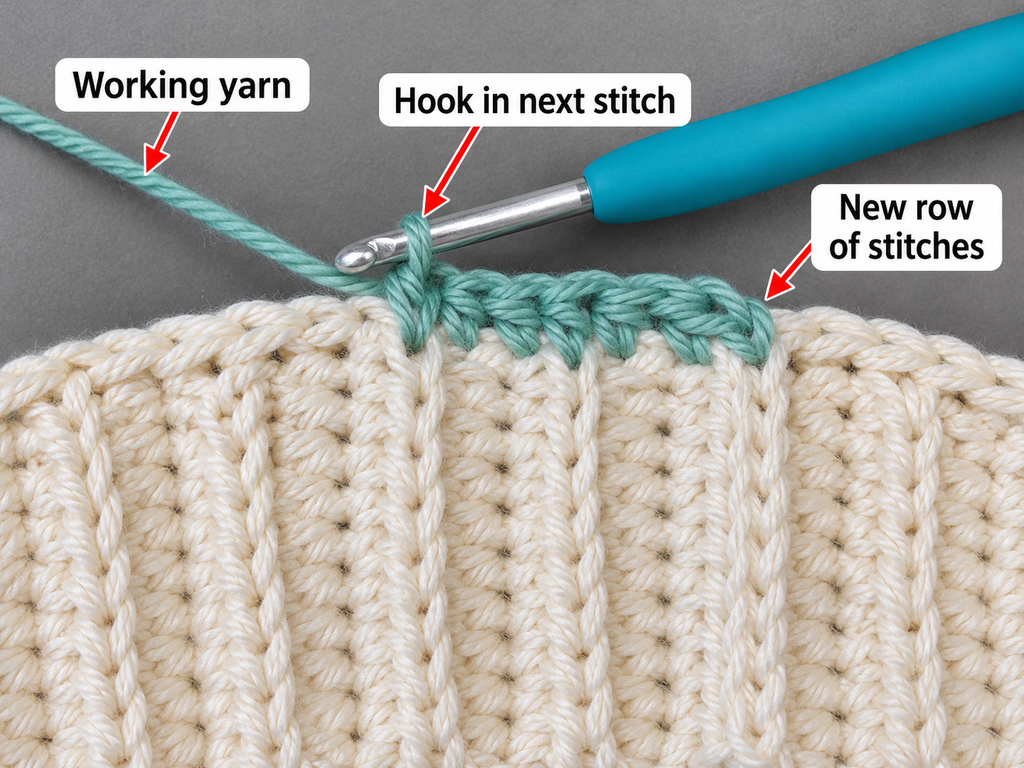
Step 5: Shape the shorts around your hips
Now you need to widen the body so it can comfortably fit around your hips and seat.
This is the step that makes crochet shorts different from a simple crochet tube.
Take your desired finished hip circumference and calculate the approximate number of stitches using your gauge.
Suppose you began with 100 stitches and need 160 stitches around the hips.
That means you need 60 additional stitches.
Instead of adding them all in a single round, distribute the increases over several rounds.
For example, make four evenly spaced increases in each of 15 shaping rounds. That adds 60 stitches altogether.
To increase evenly in any round, divide your current stitch count into approximately four equal sections. Work two hdc into one stitch near each quarter point, and one hdc into all remaining stitches. Use markers to spread the increases evenly, shifting their locations slightly between rounds.
Example shaping instructions:
- Next round: Ch 1, hdc around with four evenly distributed increases, sl st to join.
- Subsequent shaping rounds: Repeat, working four evenly distributed increases in each round.
- Stop increasing once the body reaches the target stitch count.
- Continue in plain hdc rounds whenever additional length is needed.
If your hips are much larger than your waist, you may need more increases or additional shaping rounds. The goal is a smooth transition rather than an obvious flare.
Try the shorts on regularly. The body should move comfortably over your hips without pulling the waistband down.
Beginner tip: Use stitch markers to identify the four approximate quarter points. Move them as you work so increases stay balanced.
Common mistake to avoid: Always placing increases at exactly the same side seam. This can form a visible ridge and cause uneven shaping.
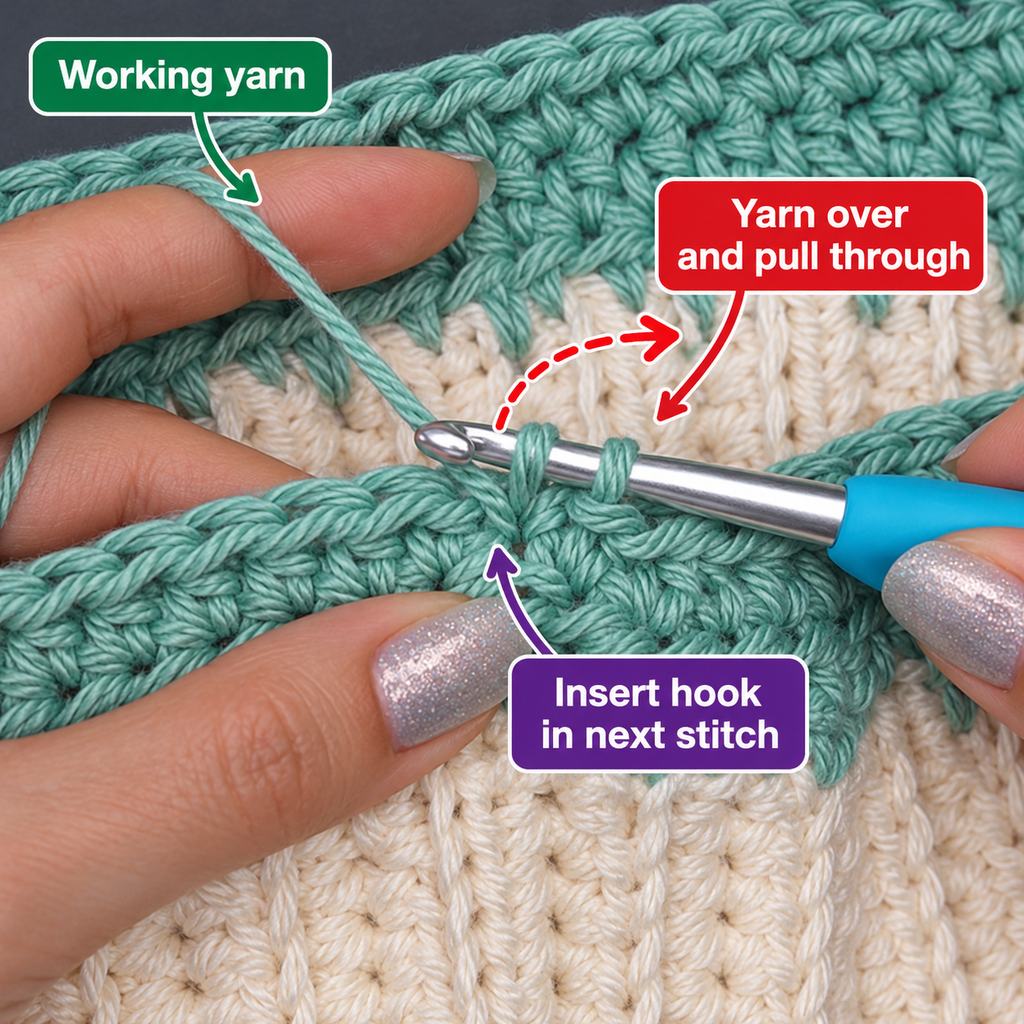
Step 6: Continue the body and measure the rise
Once your shorts fit comfortably around your hips, continue working even rounds without increases.
For each round:
- Chain 1.
- Work one hdc into every stitch.
- Join to the first hdc with a slip stitch.
- Turn the work before starting the next round, if you’re using the alternating-round method described here.
Turning after each round helps balance the stitch texture and can reduce the visible slant in the fabric.
Now is a good time to begin your stripe pattern.
Work three rounds in dusty rose, followed by three rounds in warm ivory. Continue alternating the two colors.
When changing yarn colors, use the new color to complete the final pull-through of the last stitch before the next round, so the transition appears cleaner.
Keep both yarn strands organized inside the garment. If you carry yarn over several rounds, avoid pulling the unused strand tightly enough to distort the shorts.
Measuring the rise
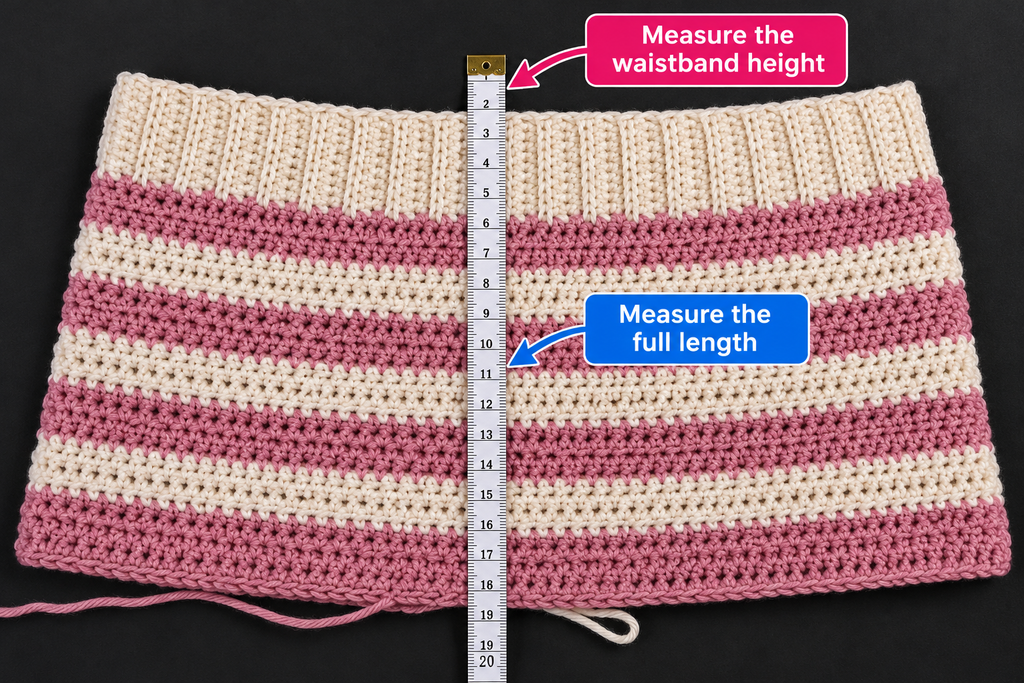
Lay the unfinished shorts flat and measure from the upper waistband edge to the bottom working edge.
Compare this measurement with a comfortable pair of shorts that fits you well.
The body needs to be long enough to reach the intended crotch level without riding upward. A micro-shorts silhouette comes primarily from the short inseam, not from making the rise too shallow.
Try on the garment before separating the legs. If the fabric pulls uncomfortably over the seat or the back is too short, continue the body or adjust the shaping before proceeding.
Beginner tip: Keep the shorts inside out during some fittings so you can inspect joins and yarn tails.
Common mistake to avoid: Starting the leg division too early. If the body is too short, the crotch will pull upward when you sit or move.
Step 7: Mark the front and back for the leg openings
With the body complete, it’s time to separate the shorts into two leg openings.
This part can feel confusing the first time you make crochet shorts, but the construction is quite simple once you identify the front and back.
First, count the stitches in your last body round. If the total is odd, make one adjustment so you have an even number of stitches.
Locate the center front and center back of the garment.
Use the back seam as an approximate starting reference, then check the placement while wearing the shorts. The side-to-side division should leave equal stitch counts for both leg sections.
Place one stitch marker at the center front and another at the center back.
For example, if your final body round contains 160 stitches, each half of the shorts contains 80 stitches.
Do not confuse these halfway stitch counts with the finished leg circumferences. Each leg will also receive additional stitches from the crotch bridge.
Beginner tip: Lay the shorts flat with the front facing upward and check whether the marked centers line up.
Common mistake to avoid: Dividing the body unevenly. That can make one leg larger than the other.
Step 8: Create the crotch bridge
The crotch bridge is a short chain section that connects the front and back of the shorts.
This little section makes the difference between a simple tube and an actual pair of shorts.
Before crocheting it, estimate the needed bridge width from the fit of the unfinished shorts and your gauge. A bridge of roughly 2–3 inches (5–7.5 cm) can be a starting point for many adult sizes, but the correct width varies with body measurements and fabric stretch.
For a worked example, suppose you choose a chain of 8 stitches.
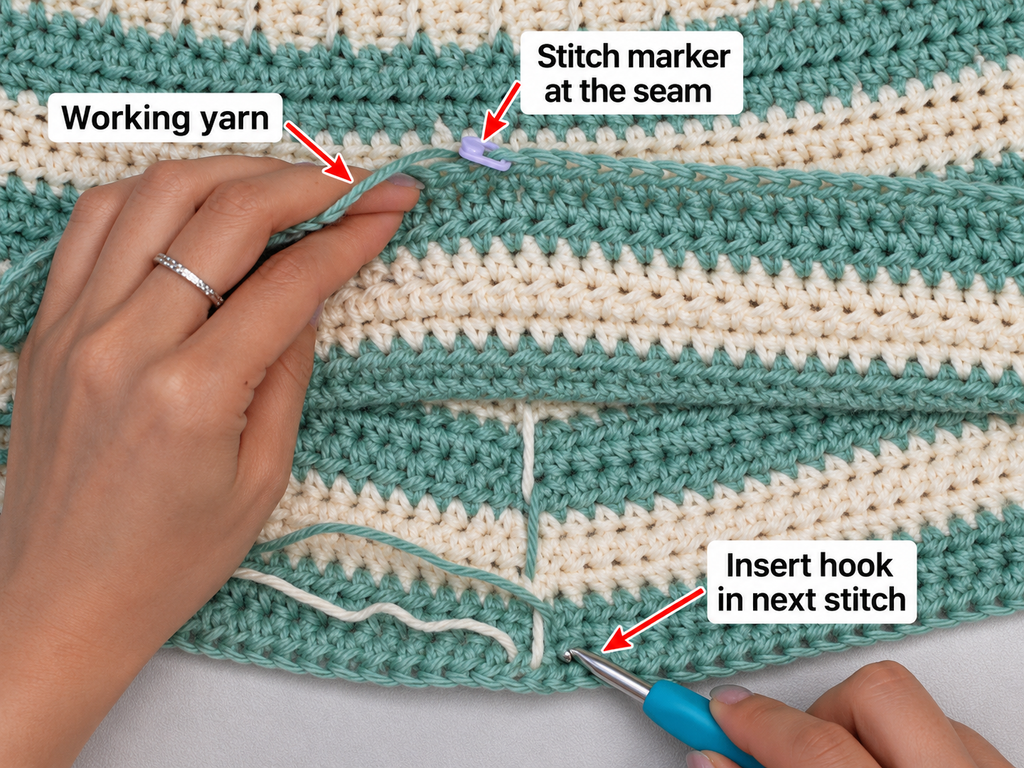
Start at the marked center back, with your hook positioned to work around one half of the body toward the center front.
Work one hdc into each stitch along that half until you reach the center front marker.
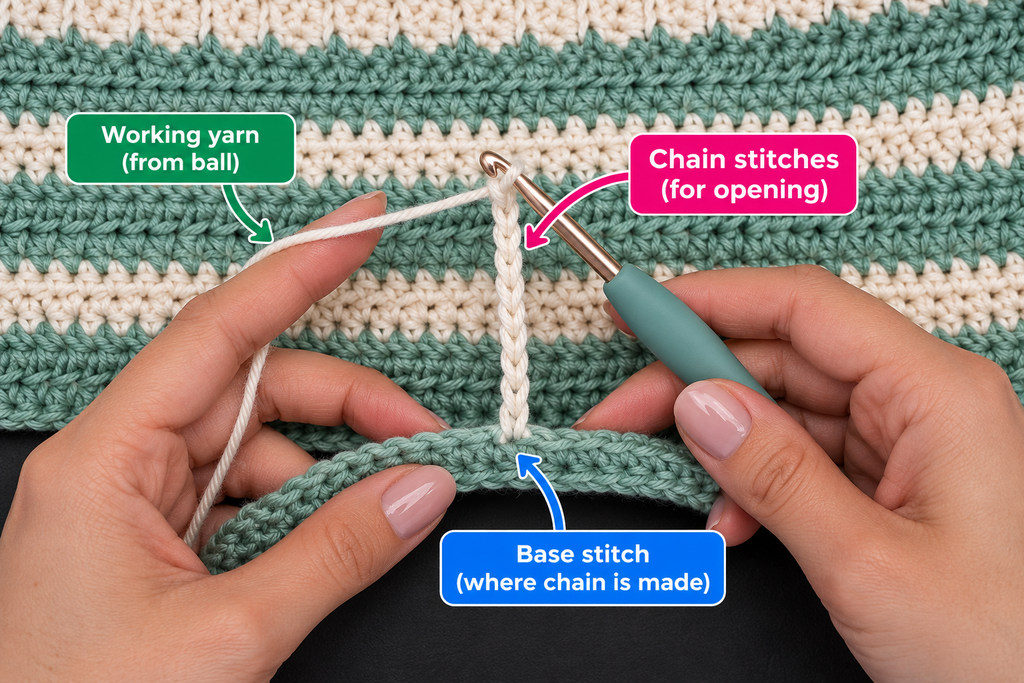
Now chain 8, or the number you calculated for your required bridge.
Bring the chain across to the center back and slip stitch into the first hdc of this leg round, without twisting the bridge.
You have now created a loop for the first leg.
The remaining half of the shorts body will become the second leg opening, using the opposite side of this chain as its inner bridge.
Beginner tip: Before tightening the join, spread the shorts flat and verify that the chain runs straight between the center front and back.
Common mistake to avoid: Making the bridge too narrow. A narrow crotch bridge can pull uncomfortably and distort both leg openings. Make a wider bridge if your fit test requires it.
Step 9: Crochet the first leg
Now that one leg loop is established, you can work around it.
Leg Round 1: Chain 1. Work one hdc into each stitch around the body section for the first leg, including the stitches along the crotch bridge. Join with a slip stitch to the first hdc.
If your body had 160 stitches before separation and your bridge contains 8 chains, this leg will contain approximately:
\[ 80+8=88\text{ stitches} \]
Make sure your stitch count is correct before continuing.
Leg Round 2: Chain 1, turn, work one hdc in each stitch around, and join to the first hdc.
Repeat this round until the leg reaches your desired length.
For a micro-shorts style, one to three inches of inseam length is a useful starting range, but there is no universal required measurement.
Try on the shorts, sit down, and check that the leg opening doesn’t pull too tightly around your thigh.
If the opening is too snug, undo the leg rounds and add evenly spaced increases. If the leg has too much room, you can adjust the stitch count cautiously while maintaining the desired drape.
Avoid crocheting the leg opening so tightly that it creates a harsh horizontal line across your thigh.
Beginner tip: Keep the stitch count the same in every plain leg round unless you’re intentionally adjusting the fit.
Common mistake to avoid: Accidentally adding a stitch in the slip stitch join. This can make the leg gradually wider.
Step 10: Complete the second leg
Once the first leg is finished, fasten off that section or keep your yarn attached only if it can be carried neatly without creating long floats.
Turn the shorts so the remaining opening is easy to access.
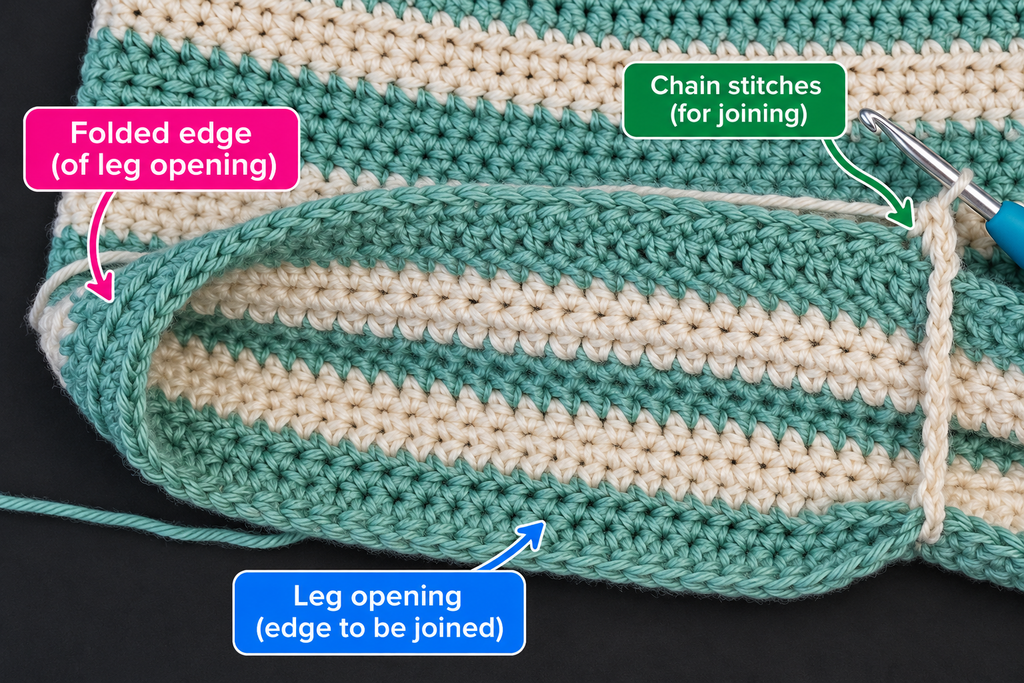
Attach the correct yarn color at the unworked body stitches near the center front.
Work one hdc into each unused body stitch around the second leg section toward the center back.
Then work one hdc into each unused loop on the opposite side of the crotch bridge chain. Join to the first hdc of the second leg round.
This creates a second leg circle with the same stitch count as the first, provided both body halves were divided evenly.
Continue in hdc rounds for the same number of rounds as the first leg.
If you’re using stripes, continue the same color sequence so the horizontal stripes align as closely as possible.
Lay the shorts flat and compare both leg openings. They should be similar in length and circumference.
Minor differences in yarn tension can usually be corrected during gentle blocking, but noticeably different stitch counts should be corrected before finishing.
Beginner tip: Write down exactly how many rounds you crocheted for the first leg. Use the same number for the second.
Common mistake to avoid: Crocheting into the same side of the crotch chain for both legs. The second leg should use the opposite, unused side.
Step 11: Add neat leg edging
A simple finishing border makes the legs look more polished.
Attach ivory yarn to the edge of one leg opening.
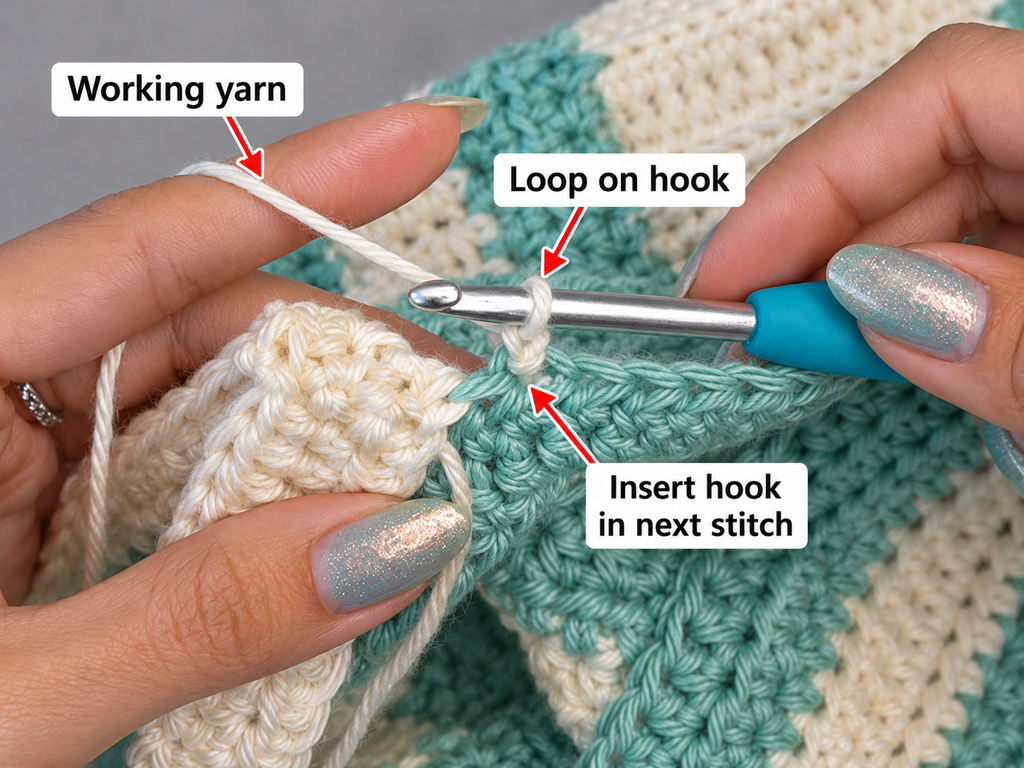
Edging Round: Chain 1, work one single crochet into every stitch around the opening, and join to the first sc with a slip stitch.
Fasten off and repeat on the other leg.
If you want a softer edge, keep the single crochet tension slightly relaxed. If the edge curls inward, use a slightly larger hook or work more loosely.
You can also skip the border entirely if the final round of half double crochet looks tidy and has enough stretch.
For a decorative alternative, use a small scalloped border, but check how it sits when worn. Bulky edging can make very short shorts feel stiff around the upper thighs.
Step 12: Weave in the ends and check the fit
Turn the shorts inside out.
Using a tapestry needle, weave every loose yarn tail through several nearby stitches. Change direction at least once to help secure the ends.
Trim any excess yarn after the tails are secured.
Inspect the crotch bridge and the joins at the base of each leg. If you notice a small gap where the bridge meets the body, close it neatly with a few matching yarn stitches rather than pulling the surrounding fabric tight.
Try the shorts on again.
Walk, sit, bend, and move normally. They should stay in place without excessive pulling at the crotch, waist, or thighs.
If you plan to wear them outside the house or as regular shorts, check how opaque the fabric becomes when stretched. Some stitch patterns may require a lining or suitable underlayer.
If the shorts feel comfortable and both legs hang evenly, your crochet micro shorts are complete!
Pattern Notes and Stitch Counts
Turning chain rules
For this original pattern, chain 1 at the beginning of an hdc or sc round does not count as a stitch. Join into the first actual stitch, not into the beginning chain.
For the ribbed waistband, chain 1 before turning each row and keep the same stitch count.
Round and stitch count notes
Your precise counts depend on your measurements and gauge.
Here is an illustrative calculation for a pair of shorts that starts with 100 body stitches and reaches 160 stitches at the hips:
| Section | Example stitch count |
|---|---|
| First body round | 100 |
| After 5 rounds with 4 increases each | 120 |
| After 10 rounds with 4 increases each | 140 |
| After 15 rounds with 4 increases each | 160 |
| Each body half before leg division | 80 |
| Crotch bridge chain | 8 |
| Each first leg round | 88 |
This is a calculation example, not a tested standard-size grading chart. The increases must be distributed across sufficient body length for your particular waist-to-hip difference.
Right side and wrong side
The right side is the side you want facing outward when you wear your shorts. Keep your join tails and any carried yarn on the wrong side.
How to adjust the size
Adjust the waistband length to fit your waist. Then shape the body to accommodate the fullest hip measurement, using the actual gauge of your fabric.
If a large waist-to-hip difference makes gradual shaping difficult, add more shaping rounds and check the rise carefully, rather than forcing many increases into a short section.
How to keep edges straight
Count each round and mark the first stitch. When using joined, turned rounds, turn consistently after every round and do not work into the slip stitch join.
Common Beginner Mistakes and Easy Fixes
1. The waistband is too loose. This usually happens when the ribbing is measured without considering its stretch. Shorten the ribbed strip before joining, or use a carefully fitted sewn-in elastic if the waist needs extra support.
2. The shorts are tight around the hips. The body hasn’t reached a wide enough circumference. Undo the most recent rounds and introduce additional increases gradually. Check the finished hip circumference against your measurement.
3. One side becomes wider than the other. Increases may be concentrated in one location, or you may have forgotten to turn consistently. Move increase positions around the round and keep a clear count.
4. The crotch feels too tight. The rise may be too short, the crotch bridge too narrow, or the leg openings too snug. Check all three before making a permanent adjustment. Adding leg length alone won’t correct a rise that is too short.
5. The leg openings don’t match. Count the stitches in both legs and compare their completed rounds. If one is larger, correct the stitch count or undo the extra round before finishing.
6. The fabric is too transparent. Crochet stitches can open when stretched. Choose a denser fabric, use a more appropriate hook-to-yarn combination, or add a lining.
7. The yarn feels rough against the skin. A stiff yarn or very tight gauge can make fitted shorts uncomfortable. Make a washed swatch first and choose a soft cotton blend with good drape.
8. The waistband rolls over. The ribbing may be too tall, too loose, or insufficiently elastic. Try a shorter waistband, adjust the hook size, or reinforce the band with an elastic insert.
How to Customize Your Crochet Micro Shorts
Change the yarn colors
The dusty rose and ivory palette gives these shorts a soft, romantic summer look, but there are plenty of alternatives.
Try sage green and cream for a fresh, natural style, chocolate and beige for a neutral outfit, or alternating bright colors for a playful festival look.
For an especially simple first project, use just one color. Fewer yarn changes mean fewer ends to weave in.
Change the length
The easiest way to customize these shorts is to adjust the leg rounds.
For very short micro shorts, use a shallow inseam while checking that the back remains adequately covered. For a sporty style, add a few rounds. For lounge shorts, work a longer inseam and use a softer yarn.
You can even continue the legs to create longer crochet shorts, although significantly longer legs may need additional thigh shaping.
Try different borders
A plain single crochet hem creates a clean, simple finish. A reverse single crochet border creates a firmer decorative edge, while a small scalloped edge gives a softer, more romantic appearance.
Always test your chosen border on a swatch before using it on both leg openings, especially if your shorts are close-fitting.
Add a lining
A lightweight stretch lining can make your crochet shorts more comfortable and give better coverage.
Choose a lining compatible with the stretch and drape of your crochet fabric. Sew it carefully at the waistband and finish the leg openings so the lining doesn’t bunch or show unexpectedly.
Create a matching set
Use leftover yarn to crochet a matching halter top, simple tank top, beach bag, or hair accessory.
A matching set is a fun way to make the project feel coordinated without needing a complicated new stitch pattern.
Finishing Instructions
For a handmade garment, finishing is just as important as the crocheting itself.
After fastening off and weaving in all ends, gently reshape the shorts with your hands. Lay them flat and compare the two sides.
If the stitches appear uneven, a light wet block may help. Follow the yarn manufacturer’s care instructions and avoid stretching the garment beyond its intended measurements.
Wash the garment gently, support its weight when wet, and dry flat. Hanging a wet crochet garment may stretch the waist or legs.
Check that all seams and joins are secure after washing, particularly where the crotch bridge connects to the body.
Quick Printable-Style Crochet Pattern Summary
Crochet Micro Shorts — Quick Pattern Copy
Skill Level: Adventurous beginner
Materials: Lightweight cotton yarn, 4.5 mm hook, needle, scissors, markers, measuring tape.
Stitches: Chain, half double crochet, BLO ribbing, slip stitch, single crochet edging.
Starting method: Chain 11 and work 10 hdc across. Repeat hdc BLO rows until the ribbing fits.
Body repeat: Joined hdc rounds, with evenly spaced increases as required for hip shaping.
Leg method: Divide body evenly, make a fitted crotch bridge, and crochet each leg around its own opening.
Finishing: Optional sc edging, weave in ends, check fit, gently wash, and dry flat.
Frequently Asked Questions
1. Are crochet micro shorts beginner-friendly?
Yes, if you already know how to chain and make half double crochet stitches. The body stitches are simple, while the crotch division and sizing require more attention. Beginners should make a gauge swatch and check the fit often.
2. What yarn is best for crochet micro shorts?
A lightweight cotton blend is a good starting choice because it can feel comfortable in warm weather and offers clear stitch definition. Yarn with some stretch and recovery may be especially useful for fitted shorts. Always check your gauge and the fabric after washing.
3. How much yarn do I need?
Yarn requirements depend on the size, yarn thickness, gauge, rise, and inseam. A rough planning range is 300–700 yards for many adult projects, with more needed for larger or longer garments. Purchasing extra yarn is safer than running short halfway through.
4. Can I make crochet micro shorts without a sewing machine?
Yes. This design is worked mostly with a crochet hook. The waistband can be joined with slip stitches, and the crotch bridge is crocheted directly into the shorts. A tapestry needle is useful for weaving in ends or securing small gaps.
5. How do I stop my crochet shorts from stretching out?
Choose yarn with good recovery, avoid excessively loose stitches, and check the waistband fit before completing the body. If the yarn is not sufficiently elastic, a properly fitted elastic insert can improve support. Wash and dry according to the yarn label.
6. Can I make these crochet shorts longer?
Absolutely. Continue crocheting additional leg rounds until they reach your preferred inseam. Try them on periodically so the shorts don’t become tight around the thighs. For substantially longer shorts, you may need to adjust the leg shaping.
7. Do crochet micro shorts need a lining?
Not always. Some dense crochet fabrics provide enough coverage, while looser stitches may become see-through when stretched. A lining or suitable underlayer is recommended when greater opacity and comfort are desired, especially for everyday wear.
Conclusion
Crocheting your own micro shorts is a fun way to practice making clothing that fits your body instead of simply following a fixed stitch count.
Once you’ve made the ribbed waistband, the rest of the project becomes easier to understand: shape the body, measure the rise, separate the legs, and finish the edges.
Start with simple stripes or a single color, and make your first pair with the fit and comfort you prefer. When you’re happy with the result, save your measurements and stitch counts so your next pair is even easier.
Save this crochet micro shorts pattern to your favorite Pinterest crochet board, or try a matching summer crochet top for your next handmade project.