A handmade necklace doesn’t have to involve tiny metal findings, complicated jewelry tools or difficult crochet stitches. Sometimes, a little cotton yarn and a crochet hook are enough to make something you’ll actually want to wear.
This easy crochet necklace pattern is a lovely project for anyone who enjoys delicate handmade accessories. It features five miniature daisies arranged along a soft crocheted cord, with adjustable ties that make the necklace comfortable to wear.
The best part? You don’t need to crochet a large piece of fabric or learn complicated shaping techniques.
You’ll make a simple chain cord, crochet five little flowers, arrange them in the center and attach them securely. Each flower has a warm cream center and five rounded sage green petals, giving the necklace a fresh, botanical look.
It’s a wonderful way to use small amounts of leftover yarn, practice basic stitches and create a thoughtful handmade gift.
In this step-by-step crochet necklace tutorial, I’ll guide you through the entire project, from making the first chain to weaving in the final yarn ends.
What You’ll Learn
By the end of this crochet necklace pattern, you’ll know how to:
- Make a smooth crochet chain cord that sits comfortably around your neck.
- Crochet a small flower center using basic stitches.
- Shape five rounded petals with simple double crochet stitches.
- Repeat flower motifs so they look similar in size.
- Measure and arrange flowers for balanced necklace spacing.
- Attach crochet flowers neatly without bulky knots.
- Make adjustable ties and finish your necklace professionally.
You can also use the flower-making skills from this tutorial for crochet bracelets, bag decorations, bookmarks and other handmade accessories.
Crochet Necklace Pattern Overview
| Pattern Detail | Description |
|---|---|
| Skill level | Beginner |
| Project style | Five-flower daisy necklace |
| Finished length | Adjustable, approximately 45–55 cm (18–22 in) before tying, depending on your tension |
| Flower diameter | Approximately 2.5–3.5 cm (1–1.4 in) |
| Estimated time | 45–90 minutes |
| Construction | Chain cord + five separate flowers |
| Yarn | Smooth DK cotton |
| Hook | 3.5 mm |
| Main stitches | ch, sl st, sc, dc |
| Closure | Adjustable yarn ties |
| Terminology | US crochet terms |
Finished measurements are approximate, not a tested fixed gauge. Measure your own work as you go.
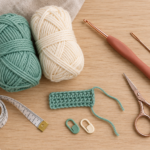
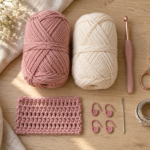
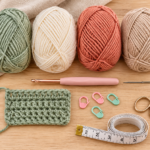
Materials You’ll Need
You don’t need an entire basket of supplies to make this necklace.
Here’s what I recommend for the sample version.
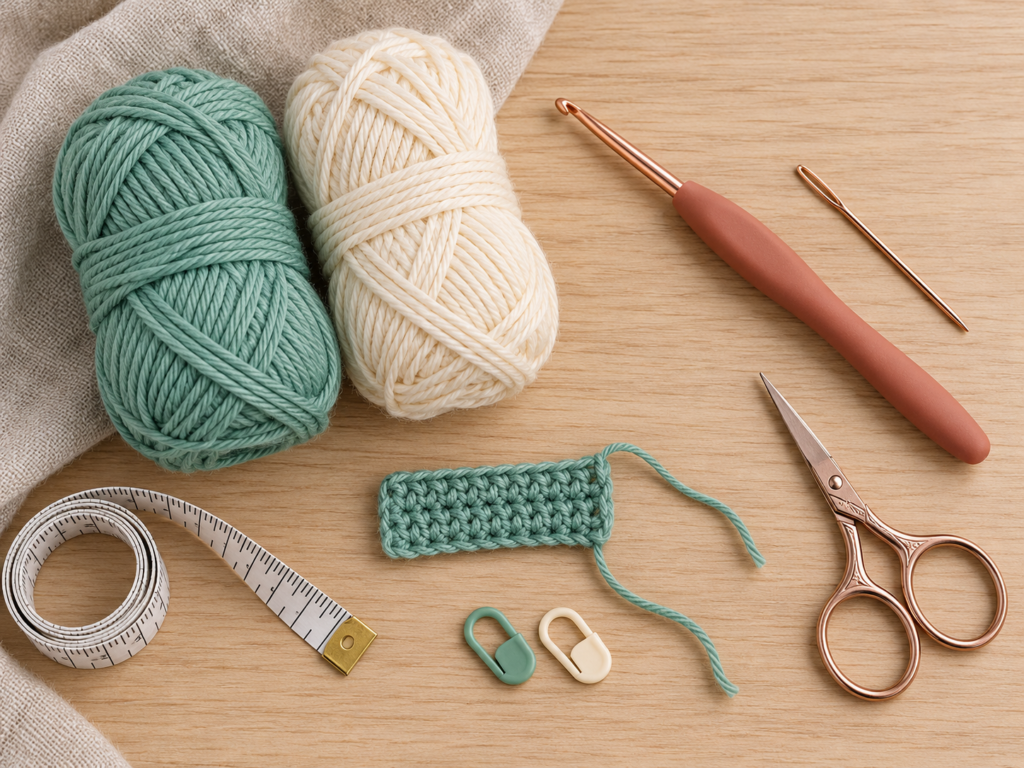
Yarn
Choose smooth cotton yarn in two complementary colors:
- Main color (A): Dusty sage green DK cotton for the cord and flower petals.
- Accent color (B): Warm cream DK cotton for the flower centers.
Approximately 15–25 g total should be plenty for this small project, although the amount will vary with your yarn thickness and chosen necklace length.
Cotton is a good choice because it creates visible, defined stitches and generally keeps small motifs looking neat. Smooth cotton is also easier to photograph and follow in a tutorial than fuzzy novelty yarn.
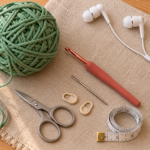
Tools
- 3.5 mm crochet hook
- Small sharp scissors
- Blunt yarn or tapestry needle
- Flexible measuring tape
- Two removable stitch markers, optional
- Pins and a blocking mat or soft towel, optional
You don’t need beads or a jewelry clasp for the basic design.
Crochet Abbreviations Used
This free crochet necklace pattern uses US crochet terminology.
| Abbreviation | Meaning |
|---|---|
| ch | Chain |
| sl st | Slip stitch |
| sc | Single crochet |
| dc | Double crochet |
| st / sts | Stitch / stitches |
| rep | Repeat |
| rnd | Round |
In UK crochet terms, US single crochet is called double crochet, and US double crochet is called treble crochet.
Throughout this tutorial, follow the US stitch names and instructions consistently.
If you’re completely new to crochet, spend a few minutes practicing the chain and slip stitch before beginning. These two techniques are particularly useful for making lightweight crochet jewelry.
Before You Start
A few simple preparations will make your finished necklace look much more polished.
Choose a comfortable necklace length
Think about how you would like to wear your finished necklace.
A shorter necklace sits close to the neck, while a longer version falls below the collarbone. Because this design has adjustable ties, you can try different positions before committing to the final length.
I recommend starting with a crocheted cord approximately 45–55 cm long, depending on your preferred fit and the length you need for tying. Remember that some of the cord will be used to form the bow, so it won’t all become the wearable circumference.
Important: The necklace should tie comfortably without feeling tight. Always leave enough slack for easy removal.
Practice your yarn tension
A necklace cord looks best when the chains are smooth and reasonably even.
Try making 15 chains and laying them on a table. If they curl into a tight spiral or are difficult to recognize, loosen your grip slightly.
If the chains are so loose that they form large holes, try holding the working yarn a little more firmly.
For the flower motifs, keep the stitches consistent but not excessively tight.
Decide on your flower arrangement
For this design, you’ll make five matching flowers. The center flower sits at the midpoint of the necklace cord, with two flowers on either side.
That creates a balanced result without requiring complicated calculations.
For a more colorful necklace, you can keep the cream centers and crochet each flower in a different pastel shade.
How to count the stitches
When counting a foundation chain, look for the small V shapes along the top. Each V represents one chain stitch.
When making the flower center, count each single crochet separately.
If you’re unsure where your round starts, place a removable stitch marker through the first stitch.
Keep the flowers flat
Small flower motifs can cup or twist if the stitches are too tight.
Don’t worry if a freshly crocheted flower isn’t perfectly flat. Gently shape its petals with your fingers before deciding whether it needs blocking.
The petals should lie naturally around the center without having to be pulled aggressively into place.
Step-by-Step Crochet Necklace Tutorial
The necklace is made in three simple parts: the cord, the flowers and the final assembly.
We’ll begin with the easiest part.
Step 1: Crochet the necklace cord
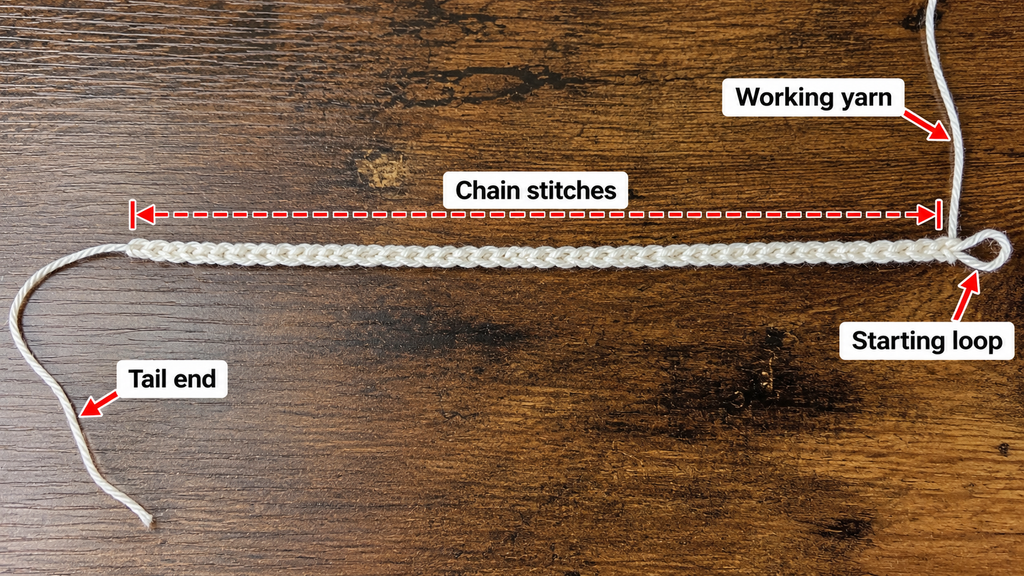
Using your dusty sage green yarn and 3.5 mm crochet hook, make a slip knot.
Leave a yarn tail approximately 15 cm (6 in) long. This will give you enough yarn to secure or weave in the end later.
Insert your hook into the slip knot and gently tighten the loop until it fits around the hook without squeezing it.
Now begin chaining.
To make one chain stitch, yarn over your hook and pull the yarn through the loop already on the hook.
Repeat this movement until your chain measures approximately 45–55 cm (18–22 in), including enough length for comfortable ties.
Don’t worry about reaching a specific number of stitches. Your chain count depends on your yarn, tension and desired finished length.
Instead, measure the chain gently while it lies flat on the table.
Once you have your desired length, fasten off and pull the yarn tail through the final loop.
Your necklace cord is ready.
Beginner tip: Make your chains slightly looser than you would for a tightly stitched amigurumi project. This keeps the necklace flexible.
Common mistake to avoid: Don’t stretch the chain firmly while measuring. A heavily stretched cord can seem longer than it will be when worn.
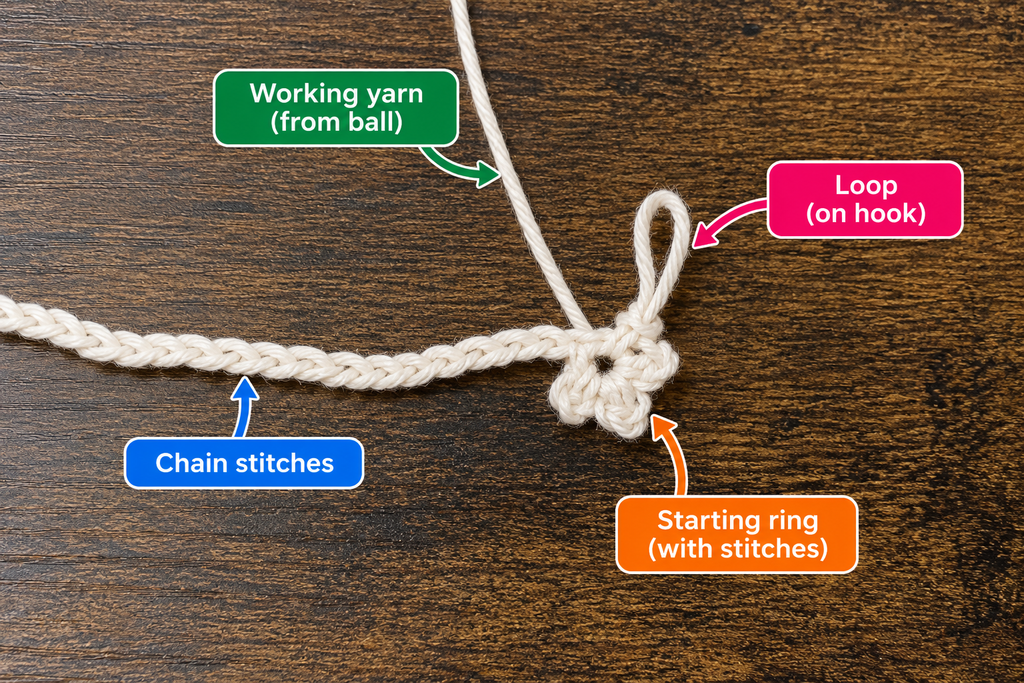
Step 2: Make the center of your first flower
Set the necklace cord aside for now.
With your warm cream yarn, make a slip knot and chain 4.
Insert the hook into the first chain stitch and make a slip stitch to close the chain into a small ring.
You should now have a tiny circular opening in the center.
Chain 1, then work 5 single crochet stitches into the middle of the ring.
Instead of inserting your hook into individual chain loops, insert it through the central opening of the ring.
After making five single crochet stitches, slip stitch into the first single crochet to join the round.
Fasten off the cream yarn, leaving a short tail that you can weave into the back of the flower.
You now have a small, compact center.
Stitch count: 5 single crochet stitches.
Beginner tip: If the hole in the center seems large, gently pull the beginning yarn tail to help tighten the ring, but do not force it shut.
Common mistake to avoid: Don’t accidentally count the beginning chain-1 as one of the five single crochet stitches.
Step 3: Crochet the first rounded petal
Now we’re ready to add the flower petals.
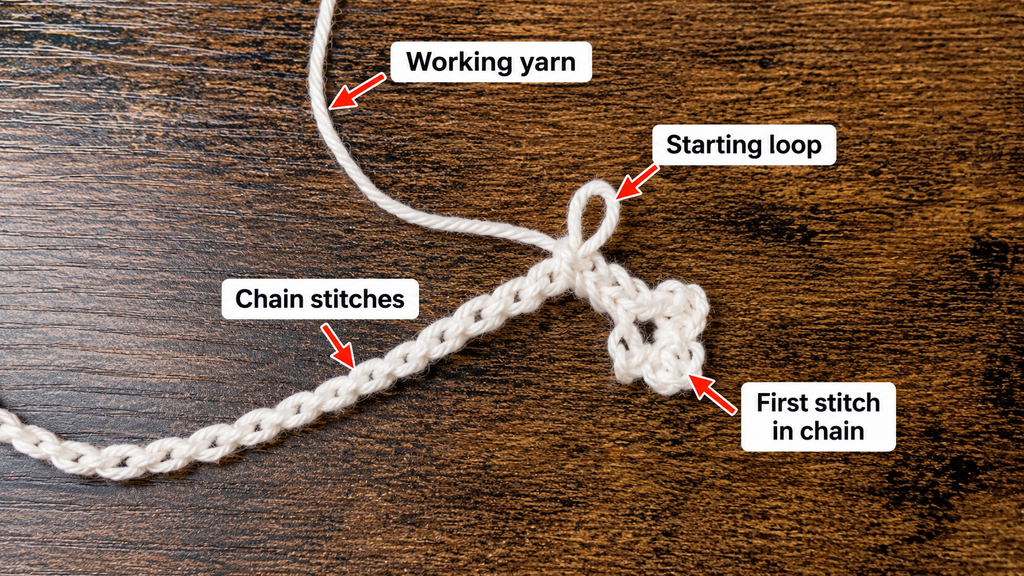
Attach your dusty sage green yarn with a slip stitch into any single crochet stitch around the cream center.
Chain 2, then make 2 double crochet stitches into that same single crochet stitch.
Chain 2 again.
Finish the petal with a slip stitch into the same single crochet stitch where you began.
You should now see a small rounded petal extending outward from the cream center.
The chain stitches create the sides of the petal, while the two double crochet stitches provide its rounded shape.
Gently spread the stitches with your fingers.
Don’t pull too firmly. Cotton petals look nicest when they have a little softness and dimension.
Beginner tip: Keep all the stitches of this petal in the same center stitch. That is what creates the rounded shape.
Common mistake to avoid: Moving into the next stitch before completing the petal can make the flower look uneven.
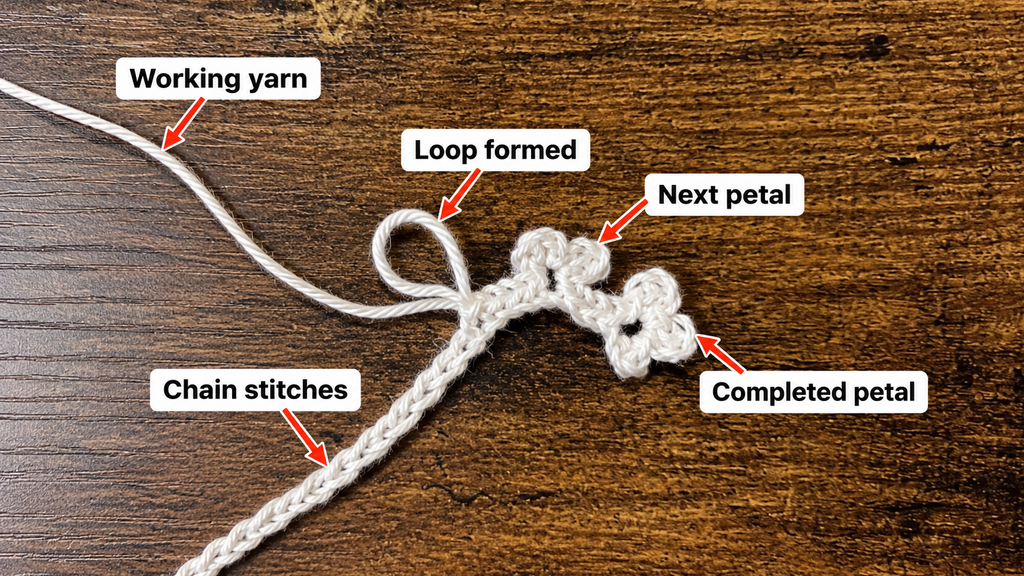
Step 4: Make the remaining four petals
The rest of the flower follows the same simple idea.
Move to the next single crochet stitch on your cream flower center with a slip stitch.
In that stitch, work:
- Chain 2.
- Make 2 double crochet stitches.
- Chain 2.
- Slip stitch into the same stitch.
Repeat this petal sequence in each of the remaining center stitches.
After completing the fifth petal, fasten off the sage yarn.
Your flower should have five rounded petals arranged around the cream center.
If one petal looks slightly narrower than the others, gently shape it using your fingers.
Don’t worry if your first flower isn’t completely symmetrical. Handmade flowers often improve as you practice keeping an even tension.
Stitch count: 5 flower petals, one worked into each center single crochet stitch.
Beginner tip: Count the petals before fastening off. It’s easier to fix a missing petal while the working yarn is still attached.
Common mistake to avoid: Avoid adding two petals into one center stitch while accidentally skipping another. This can make the flower lopsided.
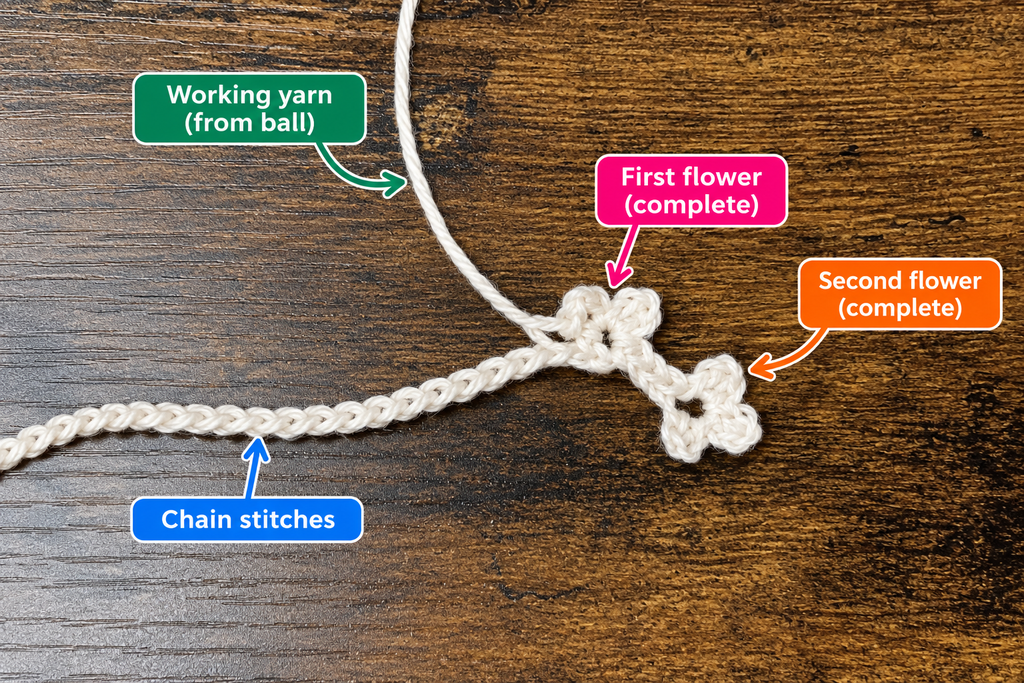
Step 5: Crochet four more matching flowers
Once you’ve completed your first daisy, repeat Steps 2–4 until you have five flowers altogether.
This is a good opportunity to practice making your stitches consistent.
Try to use approximately the same yarn tension for every flower.
You can compare the completed flowers by laying them side by side on a flat surface.
If one flower is slightly larger, that may simply mean you held the yarn more loosely.
Small variations are completely normal, but aim for flowers that are close enough in size to look balanced together.
Arrange your finished daisies in a row.
You should now have:
- Five cream flower centers.
- Five sage green five-petal flower shapes.
- One completed sage green necklace cord.
You can gently press and shape each flower with your fingers before assembling the necklace.
Beginner tip: Crochet all five flower centers first if you enjoy repeating the same technique. Then add the petals to each center. Working in batches can help you develop a consistent rhythm.
Common mistake to avoid: Don’t change your hook size between flowers unless you’re intentionally creating different-sized motifs.
Step 6: Arrange the flowers on your necklace cord
Lay your necklace cord flat on the table.
Find the middle by folding it gently in half and matching the two ends.
Place a removable stitch marker at the midpoint, or mark it temporarily with a contrasting piece of yarn.
Unfold the cord and arrange your five flowers around this midpoint.
Place the first flower directly in the center.
Add two flowers to the left and two flowers to the right.
For an evenly spaced design, begin with approximately 1–2 cm between the outer edges of neighboring flowers. You can adjust this spacing to suit your preferred look.
Step back and look at the complete arrangement.
Do the flowers appear balanced? Is the middle flower centered?
If one side looks crowded, move the flowers until you’re happy with the layout.
Remember, nothing has been sewn down yet, so this is the easiest moment to make changes.
Beginner tip: Take a photo of your arrangement before attaching the flowers. It gives you a handy guide if any of them move while you’re sewing.
Common mistake to avoid: Don’t attach all the flowers before checking the finished spacing. Uneven spacing becomes more difficult to correct after sewing.
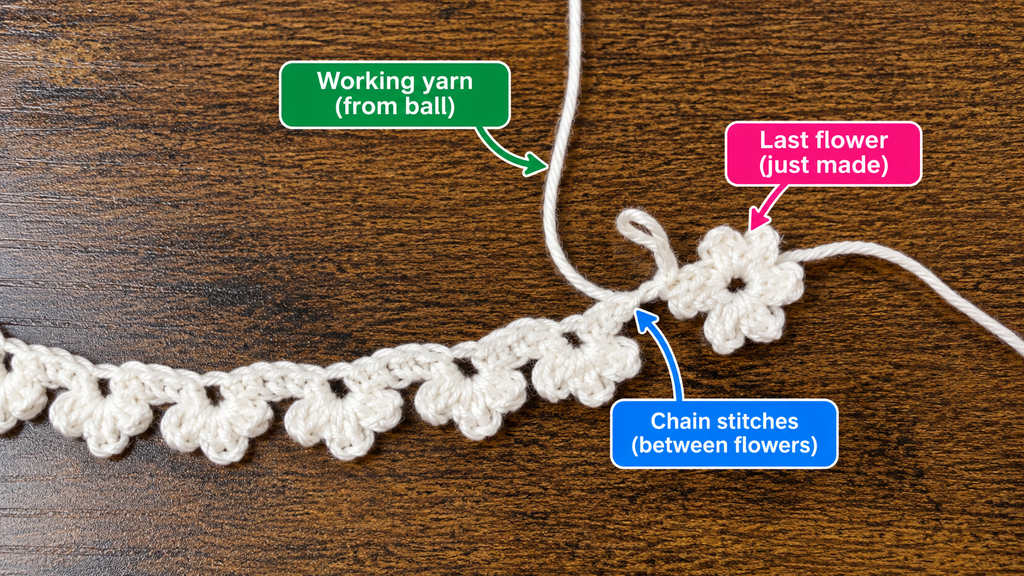
Step 7: Sew the crochet flowers onto the cord
Thread your yarn needle with a short length of matching sage green yarn.
Starting with the center flower, position the cord behind the flower center.
Pass the needle through a stitch at the back of the flower center, then under one or two loops of the crochet cord.
Bring the needle back through the back of the flower center.
Repeat a few small stitches to secure the flower.
Try to keep your sewing stitches on the back so they’re less visible from the front.
Avoid pulling the sewing yarn too tightly. You want the flower to stay secure without bunching up around the center.
Once the flower is attached, weave the yarn end through nearby stitches on the back and trim the excess.
Repeat this process for the remaining flowers, working outward from the center.
Check the necklace occasionally to make sure the flowers still lie flat and face forward.
Beginner tip: Sewing through the thicker center area usually gives the flower a more stable attachment than sewing through the delicate tip of a petal.
Common mistake to avoid: Using only one loose joining stitch can allow a flower to rotate. Make several small, secure stitches instead.
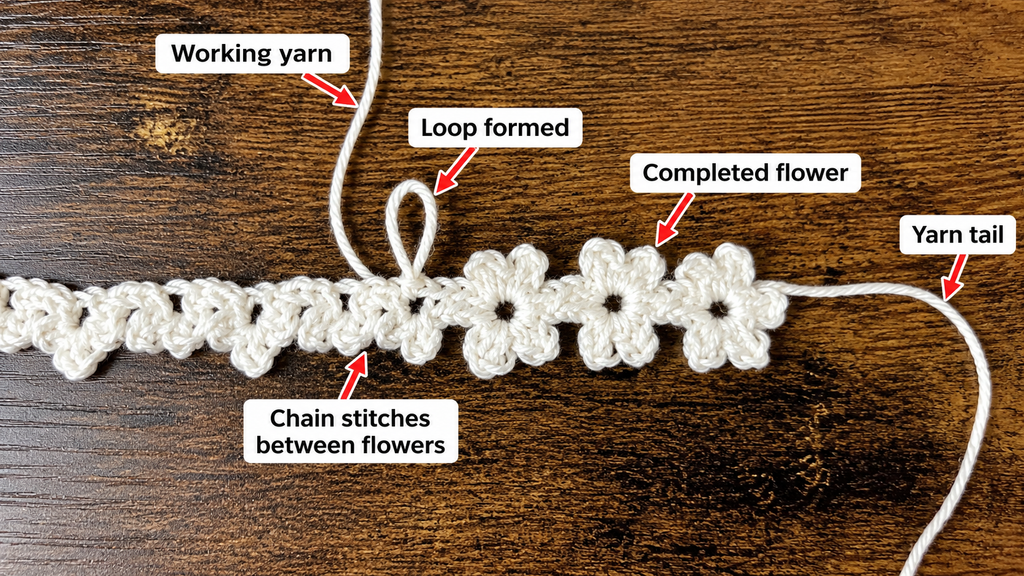
Step 8: Finish the necklace and make the adjustable ties
You’re almost finished!
Lay your necklace flat with all five flowers facing upward.
Look for any loose yarn tails and weave them carefully through the back of the nearest stitches.
At each end of the cord, leave enough length to tie a small bow or comfortable knot behind the neck.
If you planned the ties as part of your original foundation chain, you shouldn’t need to add anything else.
Test the necklace gently by placing it around your neck and tying the ends without tightening them too much.
The flower section should rest comfortably at the front.
If the necklace is too long, you can shorten the ties, but be careful to secure the ends before trimming.
If it’s too short, you may need to make a longer cord and reattach your flowers.
Finally, gently shape the five flowers so their petals point outward and their centers face forward.
Beginner tip: A double bow or a secure, easily removable knot can help keep the necklace in place.
Common mistake to avoid: Don’t make the knot so tight that it’s difficult to remove. Neck jewelry should always be comfortable and easy to take off.
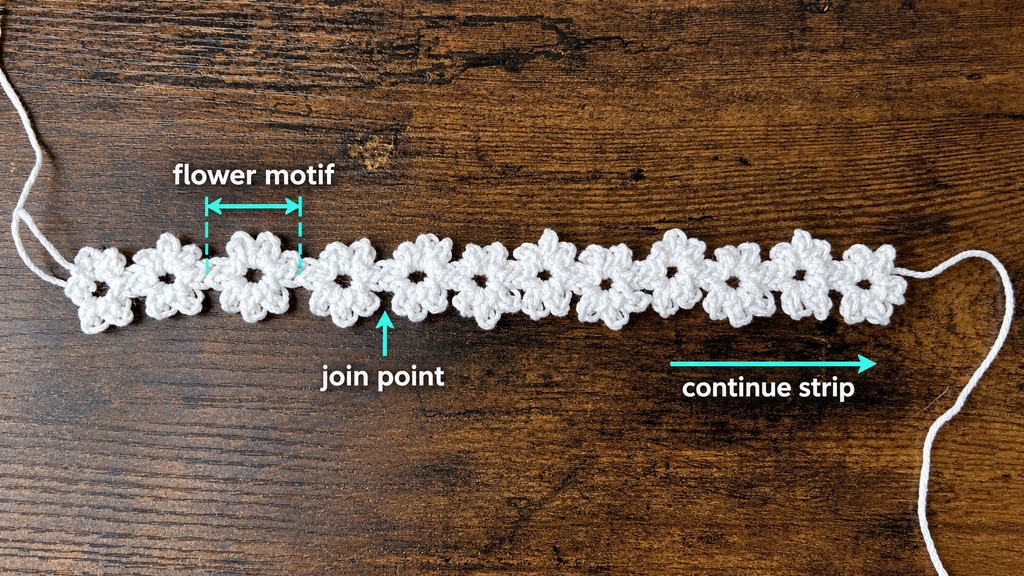
Your finished handmade crochet necklace
Congratulations! Your daisy crochet necklace is ready to wear.
The soft cotton cord keeps the design lightweight, while the tiny flowers add a sweet handmade detail.
Wear it with a simple blouse, a casual summer dress or a plain top that could use a little color.
You can also pair it with matching crochet earrings or create several necklaces in different colors.
Crochet Necklace Pattern Notes
Here are a few helpful details to keep in mind if you want to make the necklace again.
Turning chains and rounds
The necklace cord is made from one continuous chain and doesn’t need turning rows.
Each flower begins with a joined chain ring.
The beginning chain-1 used before the flower-center single crochets does not count as a stitch.
Stitch counts
Each flower contains five single crochet stitches in the center and five petal groups around the outside.
The number of foundation chains in the necklace cord depends on the length you choose.
Flower repeat
Every flower follows the same construction:
- Make a chain-4 ring.
- Crochet five single crochet stitches into the ring and join.
- Make one petal in each of those five center stitches.
- Fasten off and shape the flower.
Repeat until you have five completed flowers.
Right side and wrong side
The front of each flower should show the raised petals and cream center clearly.
The back is the side where you will secure your sewing stitches and weave in the yarn ends.
Since the crochet cord itself has no complicated front or back, simply arrange it so the flowers face outward when worn.
Adjusting the size
To make a longer necklace, crochet a longer cord before attaching the flowers.
For a smaller necklace, shorten the cord while retaining enough length for the ties.
To create a fuller floral look, add two more flowers and arrange all seven evenly across the central section.
To make the flowers larger, you can use thicker yarn and a matching hook. Keep in mind that this changes the final size and may require a longer cord.
Common Beginner Crochet Necklace Mistakes
Even a small project can have a few tricky moments. The good news is that most necklace problems are easy to fix.
| Common Mistake | How to Fix It |
|---|---|
| 1. Chains are too tight | Relax your working yarn or use a slightly larger hook for the cord. |
| 2. Flower petals have different sizes | Count the stitches in each petal and maintain similar tension. |
| 3. Flower centers look too open | Gently adjust the starting yarn tail or remake the center with tighter stitches. |
| 4. The necklace twists while laid flat | Straighten the cord before sewing and check the flower orientation. |
| 5. Flowers are spaced unevenly | Mark the midpoint and arrange all five flowers before attaching them. |
| 6. Sewing stitches show on the front | Sew through the back of the flower center and use matching yarn. |
| 7. The necklace is uncomfortable to wear | Add sufficient slack and make sure the ties are easy to release. |
One extra tip: if a flower looks different from the others, resist the urge to pull individual loops forcefully. Cotton yarn can lose its smooth appearance when repeatedly tugged.
Often, gently reshaping the motif is enough.
How to Customize This Crochet Necklace Pattern
One of the most enjoyable things about crochet jewelry is how easy it is to personalize.
Try different yarn colors
Dusty sage and warm cream create a soft, botanical look, but you can choose any combination you like.
A few ideas include:
- Blush pink petals with ivory centers for a romantic necklace.
- Lavender petals with pale yellow centers for spring.
- Terracotta flowers with oatmeal centers for an earthy look.
- Bright yellow and white daisies for a cheerful summer accessory.
- All-cream flowers with a matching cord for a minimalist design.
Experiment with different yarn weights
Fine cotton crochet thread can create smaller, more delicate flower motifs, although it may be more challenging for beginners to handle.
DK cotton gives a slightly bolder look and makes the stitches easier to see.
If you’re new to crochet jewelry, start with DK cotton and experiment with finer yarn once you’re comfortable.
Make a shorter or longer version
A shorter version works well as a close-fitting floral choker.
A longer version can create a softer necklace that rests lower on the chest.
You can also make a matching bracelet using the same flower construction and a shorter cord.
Add a simple decorative border
If you want a stronger necklace cord, try making a new cord with one row of slip stitches worked back along the foundation chain.
This creates a firmer structure, although it may also make the finished necklace slightly thicker.
Work loosely enough that the cord remains comfortable.
Change the flower texture
You can experiment with different petal heights once you understand the original design.
For example, taller stitches will usually produce fuller petals, while shorter stitches can make a smaller flower.
Make one practice flower before changing every motif.
Make matching handmade gifts
This crochet necklace is an easy project to personalize for birthdays, friendship gifts, spring celebrations and handmade craft collections.
You could create a matching set with:
- A crochet daisy bracelet.
- Small floral hair clips.
- A crochet flower bag charm.
- A handmade bookmark with a flower at one end.
For gift packaging, attach the necklace to a small piece of cardstock or tuck it inside a soft fabric pouch.
Finishing Instructions and Care
A little extra attention to finishing will help your crochet necklace keep its shape.
Fastening off
Every time you finish a flower, cut the working yarn, leaving a tail long enough to secure neatly.
Pull the tail through the final loop and gently tighten it.
Weaving in ends
Use a blunt yarn needle to guide each yarn tail through several stitches on the back of the flower.
Avoid making large visible knots on the front.
For the cord ends, weave short tails neatly through the chain structure or incorporate a secure finishing knot as appropriate.
Gentle blocking
If your petals curl, lightly dampen the flower motifs and arrange them flat on a towel or blocking mat.
You can use rust-resistant pins to keep the petals in shape while drying.
Don’t stretch the flowers excessively.
Allow everything to dry completely before wearing.
Washing and storage
Hand washing is the gentlest option for a small crochet necklace.
Use cool water and a small amount of mild detergent appropriate for the yarn.
Avoid wringing the crochet flowers.
Instead, squeeze excess water gently using a clean towel, then lay the necklace flat to dry.
Store it flat or loosely coiled to prevent unnecessary stretching.
Safety and comfort
Avoid sleeping in the necklace or wearing it where it could snag on machinery or equipment.
For small children, neck cords can present a strangulation hazard. This project is intended as an adult accessory, not as an unsupervised child’s toy.
If adding beads, use secure attachments and consider the risks of small detachable pieces around young children.
Quick Printable-Style Crochet Necklace Pattern Summary
Easy Five-Flower Crochet Necklace
Skill level: Beginner
Materials: DK cotton in sage green and cream, 3.5 mm hook, scissors, yarn needle and measuring tape.
Stitches: ch, sl st, sc, dc.
Necklace cord: Using sage green yarn, crochet a chain approximately 45–55 cm long, including tie length. Fasten off.
Flower center (make 5): With cream yarn, ch 4 and join with sl st to make a ring. Ch 1, work 5 sc into ring, sl st to first sc. Fasten off.
Flower petals: Join sage green yarn to any center sc. In each of the 5 center stitches, work: (ch 2, 2 dc, ch 2, sl st) into the same stitch. Move to the next stitch with a sl st as needed.
Repeat: Complete 5 matching flowers.
Assembly: Position one flower at the center of the cord and two on either side. Sew each flower securely to the cord from the back.
Finishing: Weave in ends, shape petals and tie the necklace comfortably.
Copy pattern summary
Crochet Necklace Pattern FAQ
1. Is this crochet necklace pattern suitable for absolute beginners?
Yes. The necklace uses basic crochet stitches, including chains, slip stitches, single crochet and double crochet.
The small flowers require a little practice, but the pattern repeats the same steps several times, so you can improve your technique as you work.
If you’re completely new to crochet, practice making chains and single crochet stitches first.
2. What is the best yarn for a crochet necklace?
Smooth cotton is an excellent choice because it creates clearly defined stitches and usually holds small flower shapes well.
Lightweight DK cotton is suitable for beginners, while finer cotton thread can produce more delicate jewelry.
Avoid very fuzzy yarn if you want your flower details to remain visible.
3. How much yarn do I need to crochet a necklace?
A small five-flower necklace uses very little yarn.
For this project, approximately 15–25 g of DK cotton in total is a reasonable planning allowance, but the actual quantity depends on your yarn thickness, tension and cord length.
This makes it a great project for small leftover balls of cotton yarn.
4. Can I make a crochet necklace without a clasp?
Absolutely.
This design uses two adjustable crochet ties, so no metal jewelry findings are required.
Simply tie the ends behind your neck with a comfortable, easily removable knot or bow.
If you prefer a more traditional jewelry finish, you can add a suitable necklace clasp instead.
5. How do I stop my crochet necklace from curling?
Curling can happen when your stitches are too tight or your flower petals are not evenly shaped.
Try maintaining relaxed, consistent tension.
You can also dampen and gently block the finished flowers to help them lie flat.
If the chain cord twists, straighten it before attaching the motifs.
6. Can I turn this crochet necklace pattern into a bracelet?
Yes!
Make a shorter cord that fits comfortably around your wrist and attach three small flowers instead of five.
Use the same flower pattern and attachment method.
A coordinating crochet bracelet is a lovely way to use leftover motifs from the necklace project.
7. Can I sell necklaces made from this tutorial?
The instructions in this article are an independently created free pattern, and you can use them to make physical necklaces for personal use, gifts or sale.
If you publish your own version of the project, create your own instructions and photographs rather than copying another creator’s article or pictures.
Conclusion
Making your own crochet necklace is a simple way to turn basic stitches into something personal and wearable.
With just a little cotton yarn, a crochet hook and five small flowers, you can create a lightweight accessory that’s perfect for everyday outfits, handmade gifts or matching crochet jewelry sets.
Once you’ve made your first daisy necklace, try a new color combination or adjust the length to suit your style.
Save this easy crochet necklace pattern to your favorite crochet Pinterest board so you can find it again whenever you’re in the mood for a quick, creative project.