Have you ever pulled your wired headphones out of your bag only to find the cable twisted into a frustrating little knot?
I used to think decorating earphone cords would be complicated, but this is one of those crochet projects where a single basic stitch can completely change the look of an everyday item.
With a little cotton yarn and a crochet hook, you can turn plain wired earbuds into a handmade accessory that looks colorful, feels softer, and is easier to recognize among other cables.
The technique is surprisingly simple: instead of crocheting a separate piece and sewing it onto the wire, you work single crochet stitches directly around the earphone cable. Every stitch wraps around the wire, creating a narrow textured sleeve.
You don’t need to make a long foundation chain, crochet in rounds, or follow complicated stitch counts. Once you understand how to hold the cable and position your hook, the rest becomes a relaxing repeat.
In this crochet wired headphones tutorial, I’ll guide you from the very first yarn loop to the finishing details. We’ll cover the two earbud branches and the main cable separately, which makes the method easy to understand and avoids complicated joining techniques.
The finished result is a pretty, personalized cord cover that may help reduce tangling, although it won’t make the cable completely tangle-proof or protect damaged electrical components.
What You’ll Learn
By the end of this tutorial, you’ll know how to:
- Choose the best yarn for crocheting around earphone wires.
- Attach yarn securely without damaging the cable.
- Make single crochet stitches around a cord rather than into an existing row.
- Keep stitch tension even along a thin cable.
- Handle the Y-shaped section where the two earphone wires meet.
- Finish each section neatly without glue.
- Customize your crochet headphones with different colors and textures.
This project is particularly suitable for beginners who already know how to make a slip knot and are ready to practice single crochet.
Project Details
| Detail | Information |
|---|---|
| Project | Crochet earphone cord sleeve |
| Difficulty | Beginner |
| Technique | Single crochet around a cord |
| Construction | Three separate crochet-covered sections |
| Main stitch | Single crochet |
| Yarn | Lightweight cotton, DK/category 3 |
| Hook | 3.25 mm |
| Approximate yarn | 15–35 yards, depending on cord length and yarn thickness |
| Time | 1.5–3 hours |
| Sizing | Adjustable to most suitable wired earbuds |
| Assembly | No sewing of separate crocheted panels |
The yarn quantity is an estimate for this original variation, not a measured requirement for every headset. Longer cords, thicker yarn, and tightly packed stitches change how much yarn you need.
Materials You’ll Need
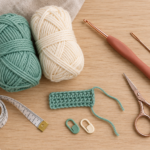
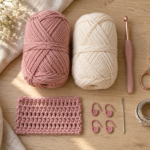
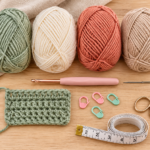
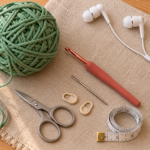
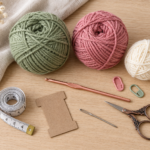
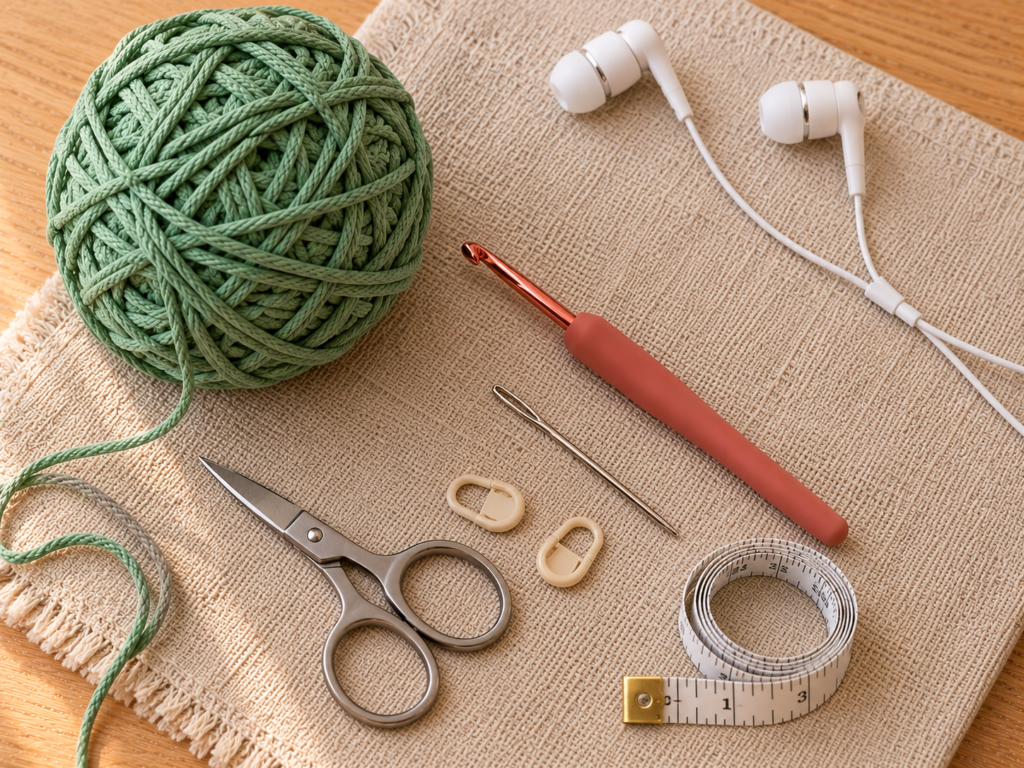
Before starting, gather everything in one place. A small craft setup is easier to manage because the cable will stay attached to the earphones throughout the project.
1. Cotton yarn
For this tutorial, choose a smooth DK-weight cotton or cotton-blend yarn in dusty sage green.
Cotton offers good stitch definition, so beginners can see where each loop sits. A soft cotton blend may feel a little more flexible if you prefer a less structured sleeve.
Avoid very fuzzy, shedding, or unusually bulky yarn. Thick yarn can make a delicate earphone cable feel heavy.
2. Crochet hook
Use a 3.25 mm ergonomic crochet hook.
A slightly smaller hook gives the stitches a neat appearance without requiring the yarn to be pulled excessively tight. If your yarn is finer, you may prefer a 2.5–3.0 mm hook.
The goal is a comfortable stitch that stays in place while allowing the cable to bend naturally.
3. Wired earphones
Choose a pair of standard wired earbuds with a flexible, undamaged cable.
Earphones with a simple Y-shaped splitter are easiest to work with. Models with a microphone, volume controller, thick molded connectors, or unusually short branches can still work, but you’ll need to leave those components exposed.
Do not use cables with broken insulation, exposed conductors, fraying, overheating, or intermittent electrical behavior.
4. Scissors
Small embroidery or craft scissors are useful for trimming the yarn ends without cutting near the cable insulation.
5. Yarn needle
A blunt tapestry needle helps hide the ends inside the crocheted stitches.
Use a needle that passes through the stitches comfortably rather than one that could pierce the wire.
6. Stitch markers and measuring tape
These are optional but helpful. Stitch markers can indicate where to stop crocheting, while a measuring tape allows you to compare the two upper branches and plan color changes.
Crochet Abbreviations Used
This tutorial uses US crochet terminology throughout.
| Abbreviation | Meaning |
|---|---|
| ch | Chain |
| sc | Single crochet |
| sl st | Slip stitch |
| st / sts | Stitch / stitches |
| rep | Repeat |
| yo | Yarn over |
You won’t need increases, decreases, double crochet, or advanced shaping for the basic cord sleeve.
US/UK terminology note: A US single crochet is called a double crochet in UK crochet terminology. Follow the US instructions here to avoid accidentally making taller stitches.
Before You Start
A little preparation makes the actual crocheting much easier.
Check the earphone cable
First, unplug the headphones from your phone or computer.
Run your fingers gently along the cable and inspect the insulation, molded joints, and exposed plug. Make sure the wire is intact and the earphones work correctly before covering them.
Crochet is decorative. It is not a repair for defective insulation and should never be used to hide cable damage.
Understand the three sections
Most wired earbuds have three flexible cable sections:
- The upper cable leading to the left earbud.
- The upper cable leading to the right earbud.
- The longer main cable extending from the Y-shaped splitter to the audio plug.
For this beginner project, we’ll crochet these areas separately, leaving the rigid splitter and connector housings uncovered.
This makes the work easier to control and allows you to replace or adjust one section without disturbing the others.
Decide where the crochet should stop
Leave a small gap around rigid plastic components and strain-relief areas.
Do not crochet tightly across a built-in microphone, buttons, inline remote, connector, or place where the cable needs to flex freely.
The exact gap depends on your headphone model. A practical starting point is around 1–2 cm from rigid housings, adjusted to keep all controls accessible and strain reliefs flexible.
Check your tension
There is no conventional fabric gauge because you’re not creating rows of fabric.
Instead, make a short test section around the cable. It should feel secure but still bend without the stitches pulling apart or restricting movement.
You should never need to pull the wire tightly to form a crochet stitch.
How to count stitches
This is a continuous covering technique, not a counted rectangular pattern.
Your stitch count depends on the actual length of the cord and how closely you place the stitches. Rather than counting every stitch, pay attention to the smoothness and consistency of the sleeve.
How to avoid curling
Because this project is worked around a cord, curling usually comes from uneven tension or an accidental twisting of the wire.
Straighten the cable before every few stitches. If the sleeve begins to spiral too tightly, loosen your tension and allow the cable to return to its natural position.
Step-by-Step Crochet Wired Headphones Tutorial
Step 1: Attach the Yarn to the First Earbud Wire
Begin with one of the two short earphone branches.
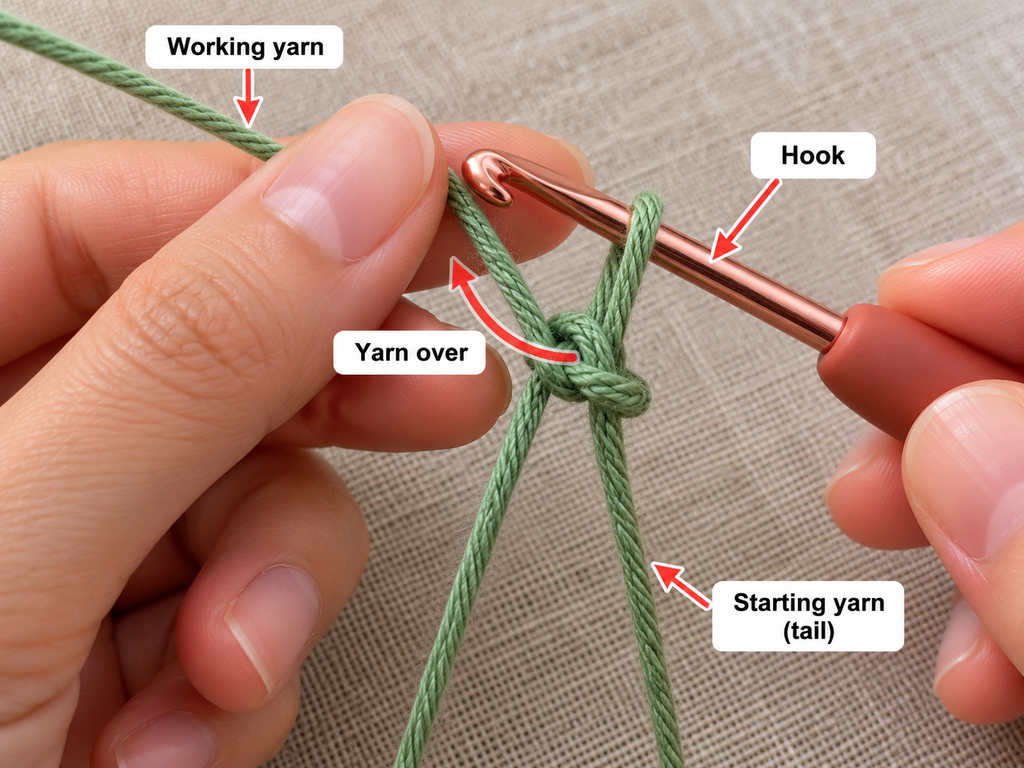
Unwind a comfortable length of yarn from the ball and make an ordinary slip knot. Before tightening the knot, position the flexible earbud wire through the opening so the yarn can sit around the cord.
Slide the knot to a safe starting point on the flexible wire, just below the earbud’s rigid connector or strain relief.
Tighten the knot gently so it stays in place, but don’t squeeze the wire.
Insert your crochet hook through the working loop of the slip knot.
You should now have the yarn attached to the earphone cable, with one loop resting on your hook and the working strand running toward the yarn ball.
Beginner tip: Hold the earphone wire between your thumb and index finger, leaving enough space for the hook to pass underneath.
Common mistake to avoid: Don’t tie a hard knot around the earphone housing or make the yarn so tight that it creates a sharp bend in the cable.
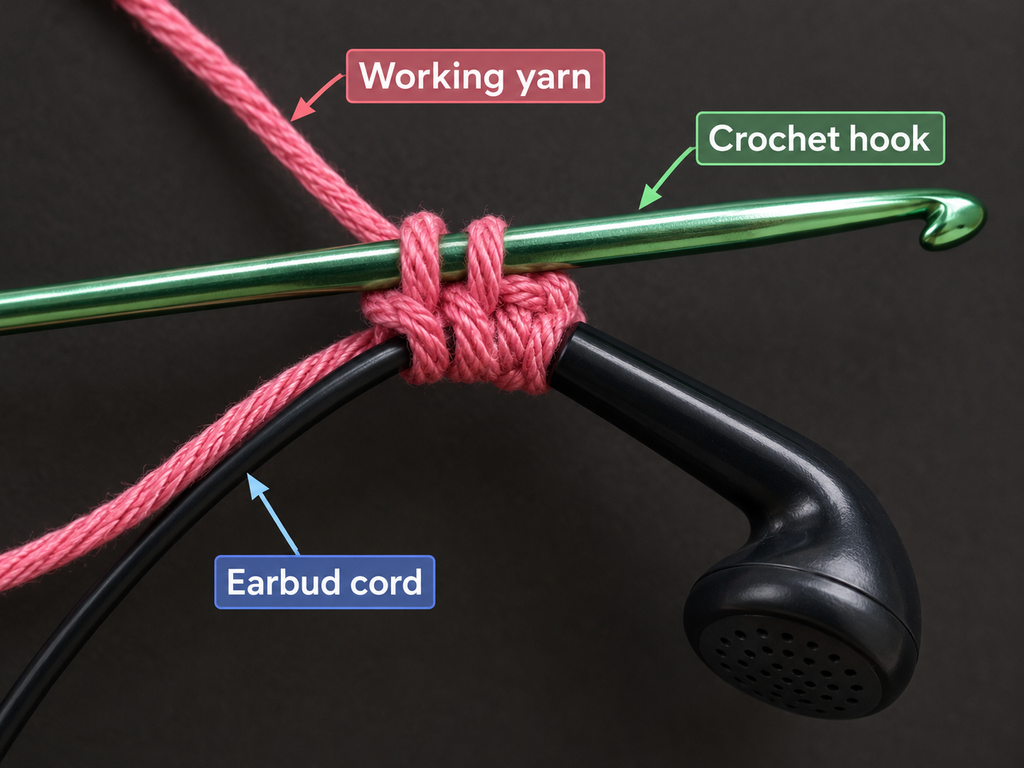
Step 2: Make Your First Single Crochet Around the Cable
This is the most important technique in the whole project.
Normally, single crochet is worked into an existing stitch. For a cord cover, you work around the wire itself, using the cable as the central core.
Hold the hook with the working loop already on it, and position the wire horizontally in front of you.
Move the hook underneath the wire and catch the working yarn. Pull the yarn back around the wire to bring a new loop onto the hook.
You should now have two loops on your crochet hook.
Wrap the working yarn over the hook again and pull it through both loops.
You’ve completed your first single crochet around the earphone cable.
The stitch should wrap neatly around the cord without being attached to any previous crochet fabric.
Take a moment to examine it. You should see a small knot-like stitch around the wire, with the hook ready to make the next one.
Beginner tip: Practice the motion slowly: under the cord, catch the yarn, draw up a loop, yarn over, pull through two loops.
Common mistake to avoid: Don’t insert the hook into the cable insulation or force it between wires. All movements must go around the outside of the cable.
Step 3: Continue Crocheting Along the First Wire
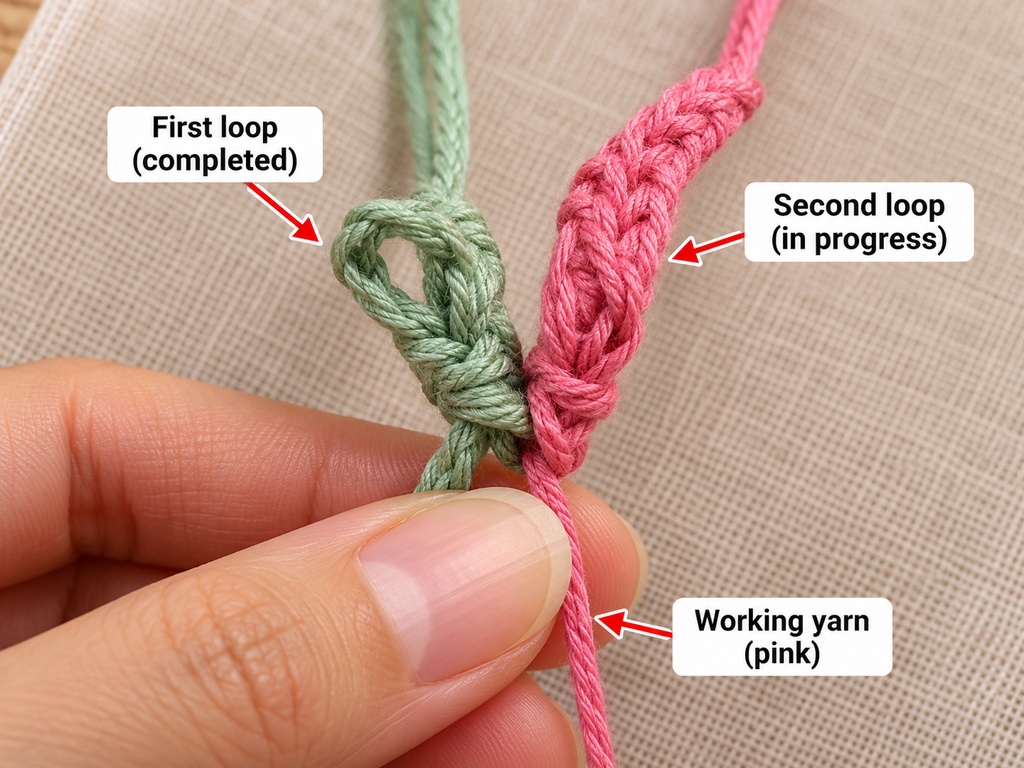
Now repeat the same single crochet movement along the cable.
Each time you complete a stitch, move it gently toward the previous stitch. The goal is to form a continuous sleeve with little or no large gap between stitches.
You may notice that the stitches naturally gather along one side of the cable at first.
Use your fingers to settle them around the wire as you progress. Don’t twist the earphones to force the yarn into position.
Work slowly for the first few centimeters. Once your hands become familiar with the movement, you’ll be able to crochet more comfortably.
After about 2–3 cm, stop and check your work.
Ask yourself whether the stitches look even, whether the cable is still flexible, and whether the crocheted sleeve is staying where you placed it.
If the yarn looks too loose, try slightly firmer stitches. If the cable feels stiff or bends sharply, loosen your tension.
Continue until you approach the Y-shaped splitter.
Beginner tip: Let the yarn feed smoothly from the ball instead of cutting a very long strand beforehand. This reduces unnecessary tangles.
Common mistake to avoid: Don’t pull each stitch tight as though you’re making a knot. Even crochet tension is more important than squeezing the cord.
Step 4: Finish the First Branch Near the Splitter
When you reach the area just above the Y-shaped plastic splitter, stop crocheting.
You want the sleeve to end neatly without wrapping tightly over the rigid joining piece.
For our beginner version, finish this branch independently instead of joining it directly to the next section.
Cut the yarn, leaving a tail of approximately 10–12 cm.
Pull the yarn tail through the working loop to fasten off.
Thread the tail into your tapestry needle and weave it through several nearby crochet stitches. Keep the needle in the yarn loops, away from the cable insulation.
Work the tail back through a second short section if there is enough room, then trim any excess.
The first upper earbud wire should now be covered with a tidy length of crochet.
Beginner tip: Don’t worry if the last stitch sits slightly away from the splitter. A small exposed gap is better than an overly tight join.
Common mistake to avoid: Avoid using hot glue or hard adhesive near delicate cable connections. Neatly woven yarn ends are the preferred finish here.
Step 5: Crochet the Second Earbud Wire
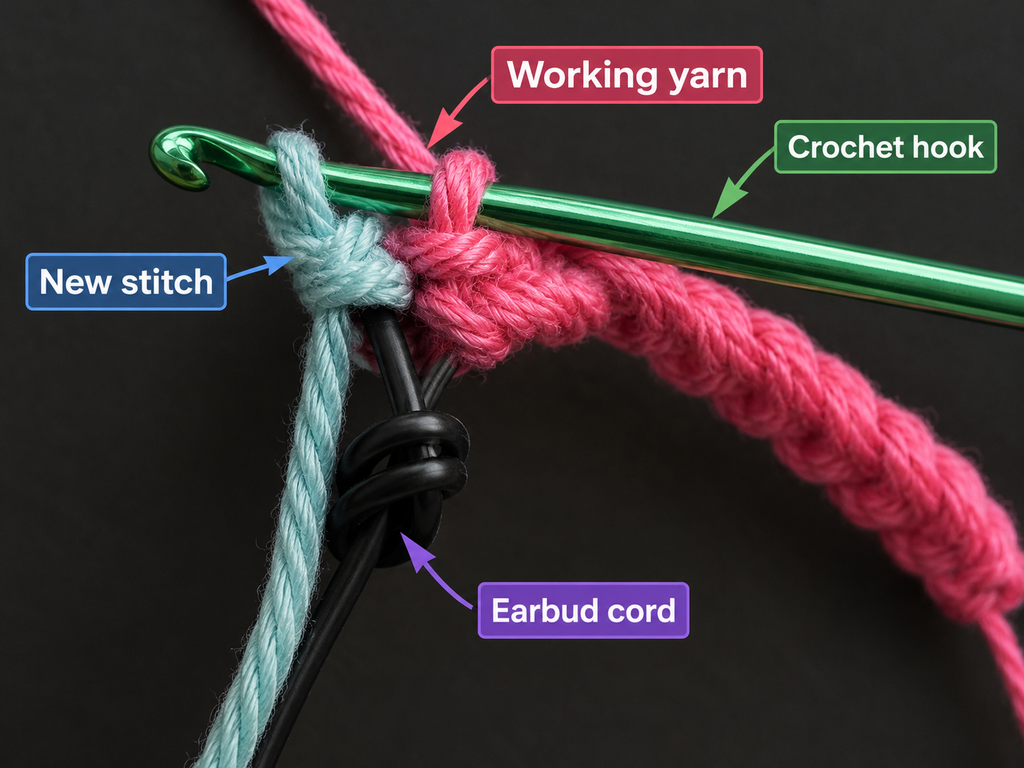
Place the completed earbud branch to one side and pick up the second upper wire.
Repeat the same process used for the first branch.
Make a slip knot around the flexible section below the earbud housing, position your crochet hook, and work single crochet stitches around the wire.
As you progress, compare the stitch spacing to the first branch.
The two sides do not need to have exactly the same number of stitches, especially if the earphones have uneven cable lengths or an inline microphone. What matters is that the finished texture looks consistent.
If one branch contains a remote or microphone, finish the crochet before that component and restart afterward only if there is a suitable flexible section.
Once you reach the splitter area, fasten off and weave in the yarn end.
You should now have two matching crocheted upper branches.
Beginner tip: Keep the original headphones flat on the table to avoid accidentally crossing the cables as you work.
Common mistake to avoid: Don’t attempt to crochet across the rigid Y-junction or cover microphone openings.
Step 6: Start Crocheting the Main Headphone Cord
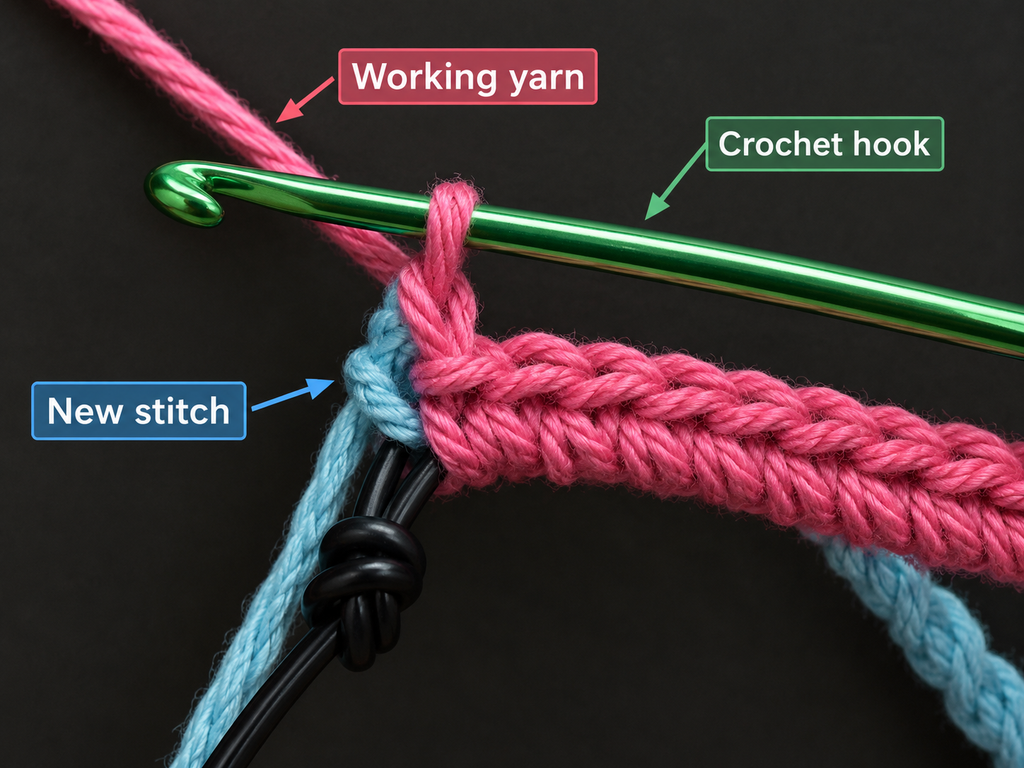
The longest section of your earphones is the cable that runs between the Y-shaped splitter and the plug.
This is usually the most repetitive part of the project, but it is also where your crochet sleeve starts to look impressive.
Make a new slip knot and attach the yarn to the flexible cable just below the rigid splitter.
Leave enough space for the splitter to move naturally.
Work single crochet stitches around the main wire in exactly the same manner as before.
The cable may be slightly thicker here than it was along the upper branches. That’s normal. You may need to adjust the spacing of the stitches so the cover looks even.
Continue down the length of the cord, pausing occasionally to check that it is not twisting.
If the yarn becomes tangled with the earbuds, lay the whole project flat and gently untangle the working strand before continuing.
Beginner tip: Work in short, comfortable sessions. Holding a narrow cable for a long time can make your hands tense, especially if you’re new to crochet.
Common mistake to avoid: Don’t let the weight of the dangling earbuds tug on the stitches. Support the cable on your work surface.
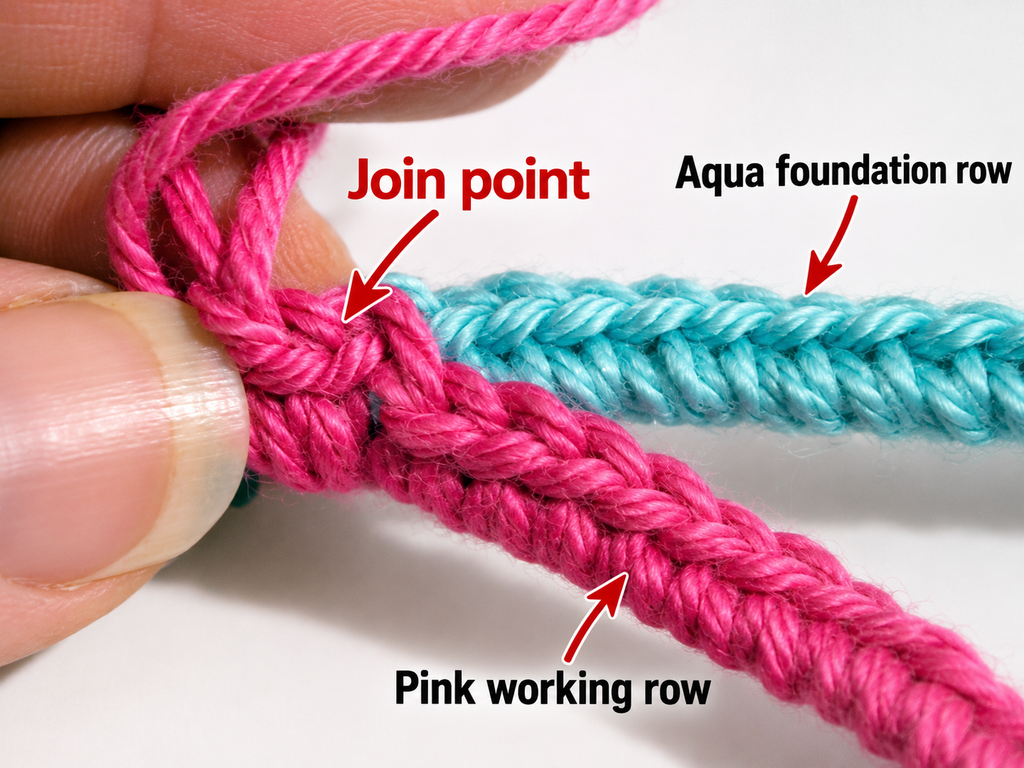
Step 7: Check the Stitch Tension and Cable Flexibility
After crocheting approximately one-third of the main cable, stop for a quick inspection.
Hold the covered section loosely in your hand. It should feel like a flexible cord wrapped in fabric, not a rigid rod.
Look for a smooth and consistent line of stitches.
If you see large gaps, you may have left too much space between stitches. Carefully slide the neighboring stitches together if your construction allows it.
If the cover is too tight, undo a few stitches and remake them with a gentler hand.
Be especially careful around any part of the cable that naturally curves when worn.
A little texture is welcome, but excessive thickness or rigidity can make the earbuds uncomfortable to use and can put stress on connection points.
You can also check whether your yarn is twisting around itself. Smooth the working strand as needed.
Beginner tip: Compare several centimeters of the main cord to the short branches rather than trying to make every single stitch visually identical.
Common mistake to avoid: Don’t keep adding stitches just to hide unevenness. Sometimes undoing a small section is faster and gives a cleaner result.
Step 8: Finish the Cord Near the Plug
Continue crocheting until you approach the molded plug or connector at the bottom of the headphone cable.
Leave the plug housing, strain relief, and any contact surfaces completely uncovered.
When you reach your planned stopping point, complete one final single crochet.
Cut the yarn, leaving a tail long enough to weave through the stitches comfortably.
Pull the yarn end through the last loop and tighten gently.
Thread the yarn tail through a tapestry needle and weave it into several stitches on the outside of the cable sleeve. Avoid catching or puncturing the wire.
Trim the extra yarn.
Once finished, gently run your fingers along the sleeve. Check that nothing is snagging, no long yarn tail is loose, and the plug remains easy to handle.
Beginner tip: Use small scissors and cut away from the wire. The last thing you want is to accidentally damage the insulation after completing the crochet.
Common mistake to avoid: Don’t crochet directly over the plug’s strain-relief ridges. They are designed to support the connection during movement.
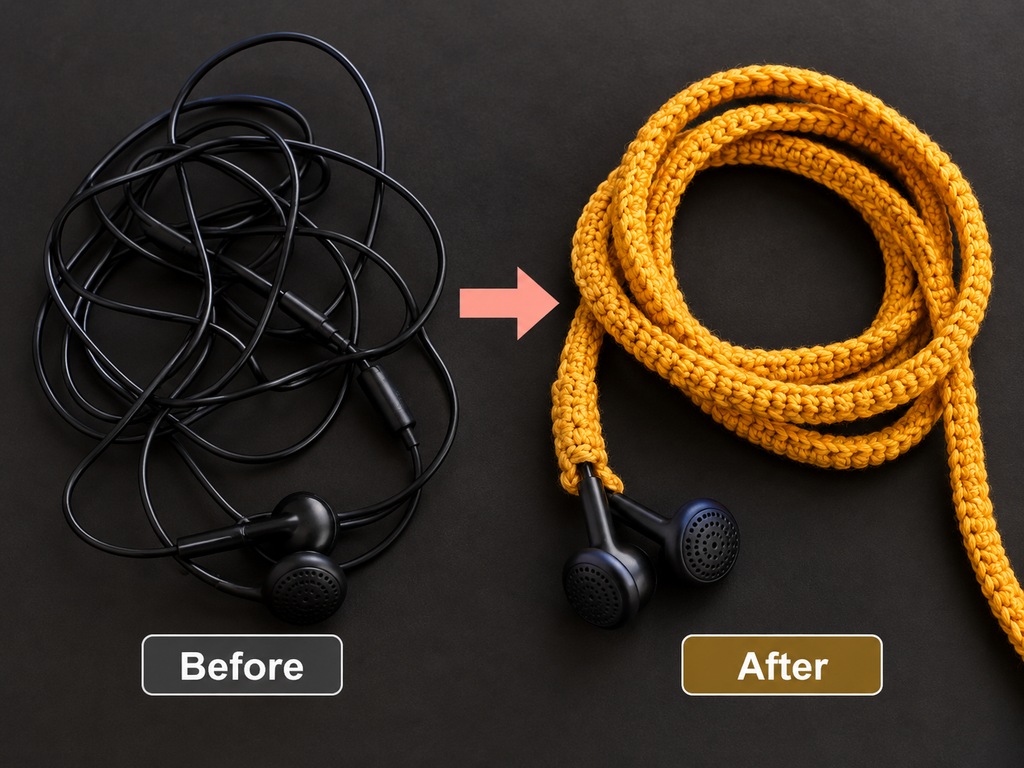
Step 9: Inspect Your Finished Crochet Wired Headphones
Lay the earphones flat on the table and straighten the cable gently.
Both upper branches should have matching crochet sleeves, and the longer main wire should have the same overall texture.
The rigid Y-splitter, earbud housings, remote controls, and audio plug should remain accessible.
Before using your headphones, check that the cable still bends naturally and that the added yarn does not pull on the earbud connectors.
Next, connect the headphones to an appropriate device and test both audio channels and any microphone or control buttons. Unplug them again before making further adjustments.
If everything works normally, you’ve completed your handmade crochet wired headphones.
You can now loosely coil the earphones for storage, taking care not to pull or stretch the crochet when wrapping the cable.
Pattern Notes and Stitch Notes
There are a few important differences between this project and a traditional crochet pattern.
Foundation chain
No foundation chain is required.
The earphone cable acts as the base for your single crochet stitches.
Turning chains
You do not turn your work at the end of a row, so there are no turning chains.
Each stitch is worked around the cord, moving along its length.
Repeat pattern
Repeat one single crochet around the cable until you reach the end of your chosen section.
There is no fixed stitch count because every cord is different.
Right side and wrong side
A crochet-covered cable does not have the same distinct right and wrong sides as a flat rectangle.
The surface is visible from multiple angles, so consistent stitch direction and tension are more important than traditional fabric orientation.
Size adjustment
To change the finished length, simply stop working sooner or continue crocheting along the flexible wire.
For a finer sleeve, try thinner cotton and a smaller hook. For a more textured look, choose slightly thicker yarn, provided it does not add excessive stiffness or weight.
Yarn changes
For a decorative color transition, finish the current yarn securely at the end of one cable section and restart with the new color.
Changing at a natural section boundary is the easiest option for a beginner.
Common Beginner Mistakes and How to Fix Them
Even though this is an easy crochet project, working around a cable can feel unusual during the first few minutes.
| Common mistake | Why it happens | Simple fix |
|---|---|---|
| Stitches are too tight | Pulling too hard after every stitch | Loosen tension and make a short test section |
| Crochet looks uneven | Different spacing between stitches | Work slowly and settle stitches next to each other |
| Cable starts twisting | Rotating the earphones while crocheting | Lay the whole cable flat and straighten it periodically |
| Yarn slides along the wire | Slip knot or first stitches are loose | Restart the first few stitches with steadier tension |
| Yarn gets tangled | Working strand wraps around the earbuds | Keep the yarn ball separate and support the cord on the table |
| Sleeve looks bulky | Yarn is too thick for the cable | Switch to finer cotton and an appropriate hook |
| Ends keep coming loose | Insufficient weaving-in | Thread each end through several nearby stitches |
| Controls become difficult to use | Crochet is placed over rigid hardware | Remove the stitches covering the hardware and leave it exposed |
One of the most useful beginner habits is to check your work regularly.
It is much easier to adjust five uneven stitches than to redo half the earphone cable.
How to Customize Your Crochet Wired Headphones
The basic version looks lovely in one color, but there are plenty of ways to make the project your own.
Choose a different yarn color
Dusty sage is soft and subtle, but you can use cream, lavender, blush pink, terracotta, dusty blue, or deep berry.
If your original headphones are white, nearly any solid yarn color will create an attractive contrast.
For black earbuds, try muted pastels or bright cotton yarn that makes the stitch texture stand out.
Try a two-color version
A simple two-color design is beginner-friendly because you don’t need to change colors repeatedly within a stitch.
Crochet both upper branches in one color and the longer main cable in another.
For example, cream upper branches with a dusty pink main cable create a delicate handmade look.
Create a subtle striped effect
Once you’re comfortable with yarn changes, make short color blocks along the cord.
Keep the joins secure and the tails carefully woven in. Many frequent color changes can add bulk, so use this option sparingly.
Use finer yarn for a slimmer cover
If you prefer the earphone cable to remain lightweight, thinner cotton or crochet thread may be a better choice.
Use a smaller hook and keep the stitches even.
This variation can take longer but produces a more delicate finish.
Change the texture
For the first project, plain single crochet is the most reliable choice.
After practicing, you can experiment with slightly looser stitch spacing or small decorative yarn accents, but avoid heavy raised stitches that make the cable rigid.
Add a small decoration
A tiny crochet bow or flat flower attached to a suitable nonfunctional area can make the earphones more personal.
Keep decorations lightweight, well away from the earbud speaker, microphone, plug, and strain reliefs.
Avoid loose beads and large dangling pieces, which can snag on clothing or create a choking hazard for young children.
Make them as a handmade gift
Crochet-covered earphones can make a personalized present for someone who likes music, podcasts, or handmade accessories.
Choose the recipient’s favorite color and use a working, undamaged pair of compatible earphones.
A small handwritten care note is a thoughtful addition, especially if the recipient has never used crochet-covered cables before.
Finishing Instructions and Care
The last few minutes of this project are important because the finished cover will be handled regularly.
Fastening off
For each of the three cord sections, secure the yarn by passing the cut end through the final loop.
Pull gently to close the loop without pulling on the cable.
Weaving in ends
Use a blunt tapestry needle to guide the yarn tails through existing stitches.
Since the crochet is wrapped around the cable, weave parallel to the cord and keep the needle away from the insulation.
If an end doesn’t stay hidden, undo the final stitches and remake a short section more evenly rather than using sharp tools or hot adhesive.
Blocking
Traditional wet blocking is not recommended while the sleeve is installed on electronic cables.
Do not soak the headphones, use steam, or apply a hot iron.
Instead, reshape the sleeve gently with dry fingers and smooth the stitches into place.
Washing and cleaning
Do not machine-wash or immerse wired headphones.
If the yarn becomes dusty, gently brush away lint with a soft dry cloth. If the device manufacturer permits it, lightly spot-clean the textile without wetting connectors, earbud openings, remote controls, or electrical components.
Allow any cleaned area to dry completely before using the earphones again.
Storage
Coil the cable loosely rather than winding it tightly around a phone or pulling it into a small bundle.
The crochet may make the cable easier to grip, but proper storage is still important for avoiding tangles and strain.
Quick Printable-Style Summary
Easy Crochet Headphone Cord Cover
Skill level
BeginnerTime
1.5–3 hoursYarn
DK cotton, approx. 15–35 ydHook
3.25 mm
Stitches: Slip knot, single crochet.
Starting method: Attach a slip knot around a flexible section of the headphone cord.
Repeat: Work single crochet stitches around the cable until the desired length is covered.
Construction: Cover the two earbud branches and main cable separately, leaving rigid components exposed.
Finishing: Fasten off, weave in ends, check cable flexibility and test headphone operation. Copy pattern summary
Frequently Asked Questions
1. Can beginners crochet wired headphones?
Yes. This is a great small project for beginners who understand the basics of single crochet.
The most unusual part is working around the cable rather than into an existing foundation row. Once you’ve practiced a few stitches, the technique becomes repetitive.
If you’re completely new to crochet, practice slip knots and single crochet with ordinary yarn first.
2. How much yarn do I need for a crochet headphone cord cover?
For this lightweight DK version, approximately 15–35 yards is a reasonable planning allowance, although the actual amount varies with cord length, yarn thickness, and stitch density.
A longer cord or thick, tightly packed stitches can require considerably more yarn.
It’s best to have extra yarn available rather than cutting a predetermined length.
3. What crochet stitch is best for headphone wires?
Single crochet is a good choice because it creates a compact, even texture and is easy to repeat.
It can be worked directly around a cord without a foundation chain.
Taller stitches, such as double crochet, may make the covering looser, bulkier, or more likely to catch on nearby objects.
4. Will crocheting around headphones stop them from tangling?
A crochet sleeve can make a thin cord thicker and easier to separate, which may reduce some common tangles.
However, it is not guaranteed to prevent knots. The amount of improvement depends on the cable, yarn, sleeve thickness, and how you store the earphones.
Loose coiling remains the best everyday habit.
5. Is it safe to crochet around headphone wires?
Crocheting around an intact, unplugged, low-voltage earbud cord can be suitable as a decorative craft if you work gently and keep connectors, controls, and strain-relief areas exposed.
Never cover damaged insulation, use sharp tools against the wire, pull it tight, or crochet over electrical connectors.
Don’t apply the same technique to household mains power cords or cables carrying significant heat or electrical loads.
6. Can I crochet around headphones with a microphone or volume control?
Yes, but you should stop before the rigid microphone or control unit and restart after it, provided there’s enough flexible cable.
Don’t cover speaker holes, buttons, control openings, or parts of the housing that may need to remain accessible.
If a section is too short or awkward, it’s better to leave it uncovered.
7. Can I remove the crochet cover later?
Yes, although a directly crocheted sleeve is not designed to slide off intact.
To remove it, carefully undo the crochet stitches by pulling out the yarn in the reverse direction from which it was worked.
Avoid cutting close to the wire, and don’t pull hard on the connectors.
If the yarn has become tightly lodged against a rigid component, work slowly to avoid damaging the cable.
Conclusion
Crocheting around wired headphones is a satisfying way to turn a simple everyday accessory into something handmade.
You don’t need complicated stitches, a large amount of yarn, or an elaborate crochet pattern. Just a basic single crochet technique, a comfortable hook, and a little patience.
The most important part is keeping the stitches neat while preserving the cable’s natural flexibility.
Once you’ve finished your first pair, you can experiment with new colors, finer yarn, or matching crochet accessories. A small crochet cord holder or earbud storage pouch would make a practical companion project.
Save this crochet wired headphones tutorial for your next quick craft session, and enjoy giving an ordinary pair of earbuds a little handmade personality.