Some Christmas presents become extra special because someone took the time to make them. A handmade crochet cup cozy is one of those little gifts. It doesn’t need expensive yarn, complicated stitches, or weeks of preparation. Just a few basic crochet supplies and a little patience can turn an everyday coffee cup into something thoughtful and personal.
If you’ve been searching for easy crochet Christmas gifts, this beginner-friendly cup cozy is a lovely place to start.
The project combines a stretchy ribbed section with simple single crochet rounds and one festive contrasting stripe. You can make it in classic Christmas colors, use soft neutrals for a more modern look, or match the recipient’s favorite colors.
It’s small enough to carry in your project bag, practical enough to use throughout the winter, and simple enough to make several for teachers, neighbors, coworkers, and friends.
In this tutorial, you’ll learn how to crochet the foundation chain, make a ribbed fabric, join the edges, work in rounds, change yarn colors, and finish everything neatly.
The step-by-step image placements follow the construction from the first slip knot to the finished gift.
What You’ll Learn
By the end of this beginner crochet Christmas project, you’ll know how to:
- Make a foundation chain and a neat row of single crochet stitches.
- Crochet through the back loops to create a stretchy ribbed texture.
- Check your project against a real coffee cup for a better fit.
- Join a flat crochet strip into a continuous ring.
- Add single crochet rounds and a contrasting Christmas stripe.
- Fasten off, hide yarn tails, and prepare your cozy for gifting.
The finished project is especially suitable for simple handle-free takeaway cups or reusable cups with straight or gently tapered sides. It is not intended for drinking vessels whose handles prevent the sleeve from sliding into place.
Project Details
| Detail | Information |
|---|---|
| Skill | Beginner |
| Time | Approximately 45–90 minutes |
| Construction | Ribbed strip joined into a ring, then worked upward |
| Finished height | Approximately 3.5–4 inches (9–10 cm), adjustable |
| Cup circumference | Approximately 9–10 inches (23–25 cm), adjustable |
| Yarn weight | Medium #4 |
| Hook | 5 mm (H-8) |
| Main color | Deep forest green |
| Contrast color | Warm ivory |
| Difficulty | Basic stitches, joining, and one color change |
The measurements are targets, not guaranteed results. Yarn choice, individual tension, and cup shape will affect the final size.
Materials You’ll Need
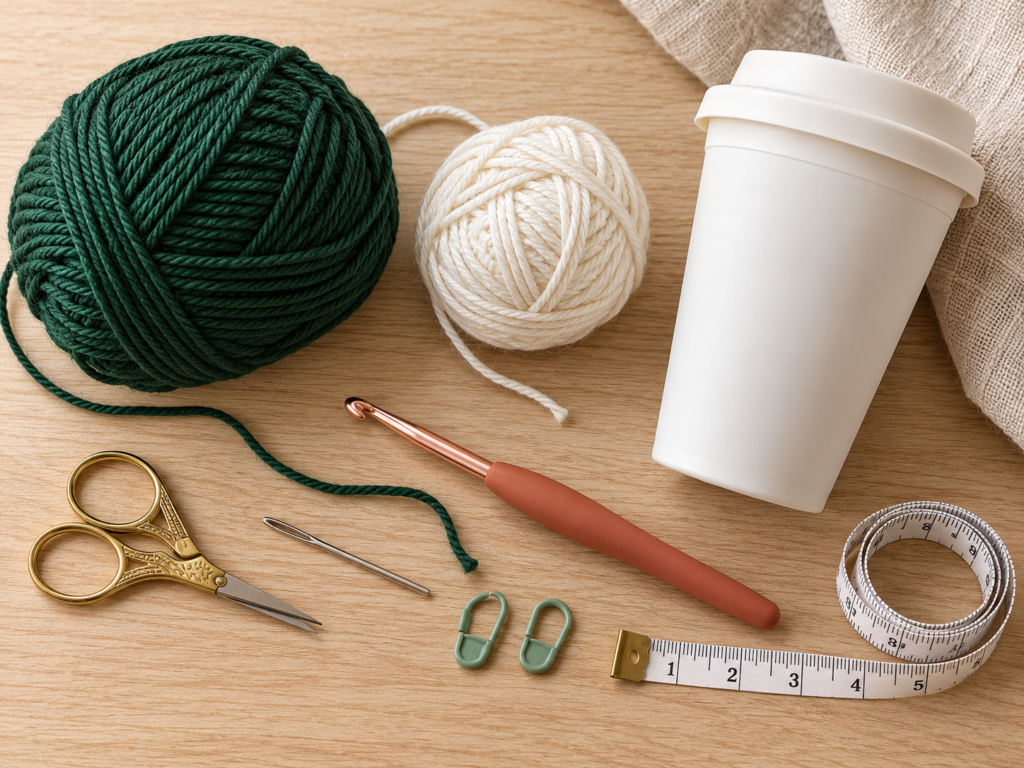
You don’t need to buy an entire crochet kit for this project. If you already have a hook and some leftover medium-weight cotton yarn, you might have nearly everything you need.
Yarn: Choose approximately 30–45 yards (27–41 meters) of forest-green smooth cotton or cotton-blend yarn and 3–6 yards (3–5 meters) of warm ivory for the decorative stripe. These are planning estimates; your actual usage will vary.
Cotton is a good option because the stitches are easy to see and the fabric generally holds its shape. A cotton blend can feel a little softer. Look for a yarn with a smooth, even strand rather than a fuzzy or novelty texture.
Crochet hook: A 5 mm ergonomic hook is a comfortable starting choice for medium-weight yarn. If the fabric feels stiff, try a slightly larger hook. If the stitches are loose enough to leave large gaps, try a slightly smaller one.
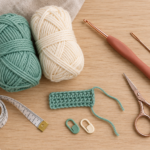
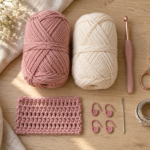
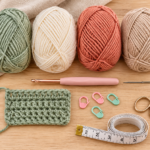
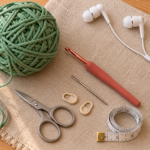
Other tools: You’ll need sharp scissors, a blunt yarn needle, one or two stitch markers, and a measuring tape. Keep the actual cup you plan to use nearby so you can check the fit before joining.
Crochet Abbreviations Used
This tutorial uses US crochet terminology throughout.
| Abbreviation | Meaning |
|---|---|
| ch | Chain |
| sc | Single crochet |
| sl st | Slip stitch |
| st / sts | Stitch / stitches |
| BLO | Back loop only |
| rep | Repeat |
| rnd | Round |
In UK crochet terminology, the stitch called single crochet in this tutorial is called double crochet. The US and UK names describe the same stitch but use different labels.
You only need a few basic crochet movements to complete the project.
To make a chain, yarn over and pull the yarn through the loop on your hook.
To make a single crochet, insert your hook into the stitch, yarn over, pull up a loop, yarn over again, and pull through both loops.
For a slip stitch, insert the hook, yarn over, and pull the yarn straight through the stitch and the loop already on your hook.
Before You Start
Check the size of your cup
Not all coffee cups are the same. Some are narrow at the bottom and noticeably wider near the lid. Others have straighter sides.
Use a flexible measuring tape to measure the area where you want the cozy to sit. Measure the circumference, not the diameter.
Your crochet band should fit snugly without stretching so hard that the stitches become visibly distorted. The best way to confirm the size is by wrapping the band around the actual cup while you work.
Understand crochet tension
Tension describes how tightly or loosely you hold your working yarn.
If you crochet tightly, the fabric becomes firmer and smaller. If you crochet loosely, it becomes more flexible and may stretch beyond your intended dimensions.
For this project, aim for fabric that bends comfortably without large gaps between stitches.
An optional gauge check is to crochet a small square in single crochet. Because you will fit the band directly to the cup, an exact stitch gauge is less important than a consistent fabric and comfortable tension.
Learn to recognize the last stitch
One of the easiest ways to lose stitches is to forget the final stitch at the edge of a row.
Look for the V-shaped top of each stitch. Before turning your work, count across the row to make sure you still have the expected number.
When you reach the circular section, place a stitch marker near the beginning of each round. It makes it much easier to find your starting point.
Choose your Christmas colors
Classic holiday colors are wonderful, but they are not required.
Forest green with ivory makes a calm, woodland-inspired cozy. Cranberry with cream has a traditional Christmas feel. Burgundy and soft pink can look more elegant, while charcoal and oatmeal work well for someone who prefers neutral accessories.
For this tutorial, we’ll use forest green as the main color and warm ivory for one stripe.
Step-by-Step Crochet Tutorial
Step 1: Make a Slip Knot
Begin with your forest-green yarn.
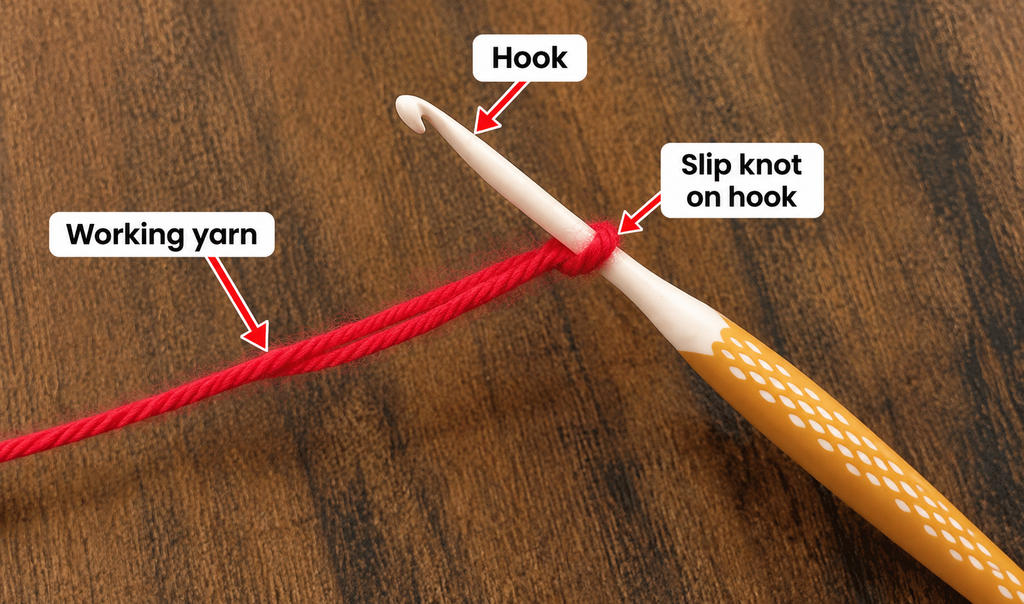
Pull a short length from the yarn ball, leaving a tail of approximately 5–6 inches. Cross the working yarn over itself to form a loop, then pull a small section of yarn through that loop to create a slip knot.
Insert your crochet hook and gently tighten the loop.
The knot should sit comfortably around the shaft of your hook. It shouldn’t be so tight that the hook cannot move.
Beginner tip: Hold the yarn tail in one hand while adjusting the working loop. This gives you more control over the knot.
Common mistake to avoid: Pulling the slip knot too tightly. A tight starting loop can make the first chain difficult to create.
Step 2: Crochet the Foundation Chain
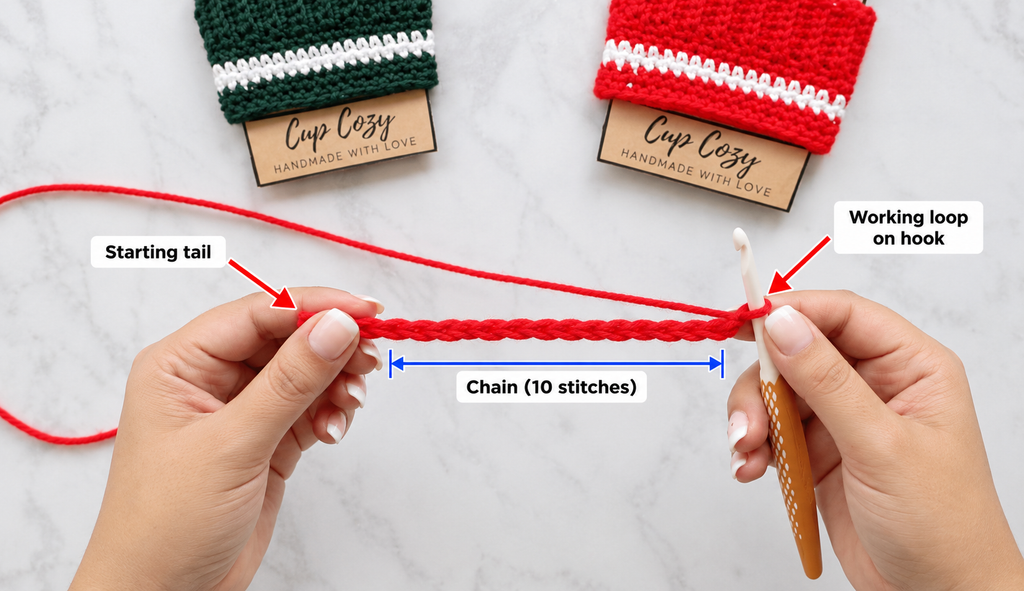
Now make 10 chains.
Hold your hook in your dominant hand and control the working yarn with the other. Wrap the yarn over the hook and pull it through the loop.
That creates one chain stitch.
Repeat until you have 10 chains in total.
Your chain should look like a short, flexible braid with individual V shapes along one side.
This chain determines the height of the ribbed section. With your chosen yarn and hook, it should make a narrow band rather than a wide rectangle.
Beginner tip: Count the V shapes instead of including the loop currently on your hook.
Common mistake to avoid: Accidentally making your foundation chain much tighter than the following rows. Relax your yarn tension and allow each chain to move along the hook.
Step 3: Crochet the First Row
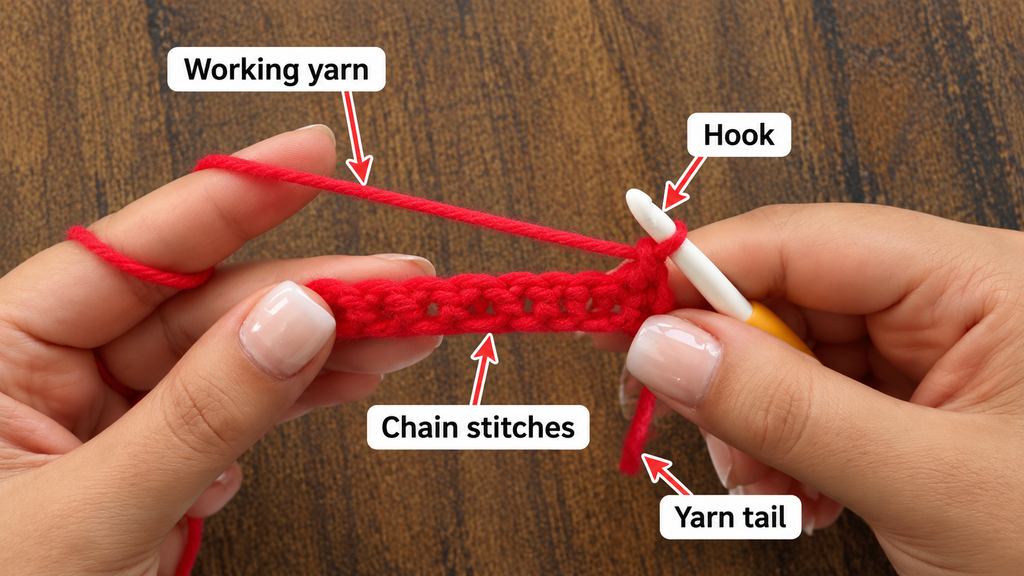
Turn the foundation chain so you can see the stitches clearly.
Insert your hook into the second chain from the hook. Yarn over and pull up a loop. You should now have two loops on the hook.
Yarn over again and pull through both loops.
You’ve completed your first single crochet.
Continue making one single crochet in each remaining chain until you reach the end.
Row 1: Sc in the second ch from the hook and in each remaining ch. (9 sc)
Stop and count your stitches.
You should have nine single crochet stitches across the row.
The fabric may curl slightly at this point. That is common while the first rows are developing.
Beginner tip: Turn the short piece toward you and look at the tops of the stitches before counting.
Common mistake to avoid: Crocheting into the very first chain directly beneath your hook. The turning setup requires beginning in the second chain.
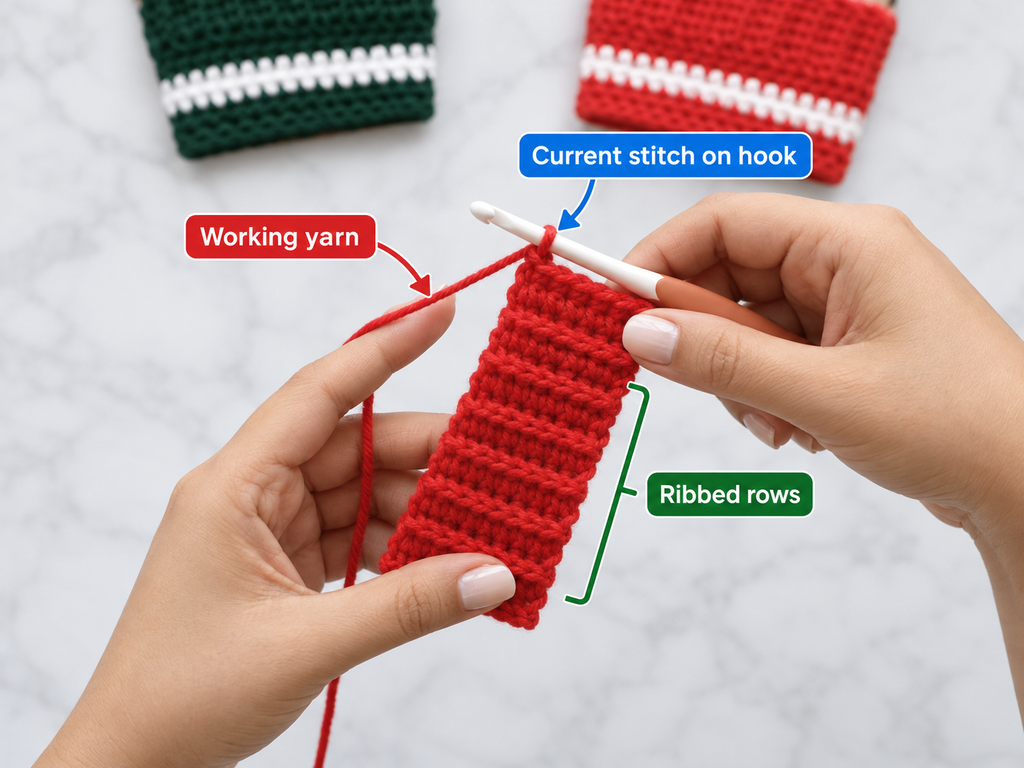
Step 4: Create the Ribbed Crochet Texture
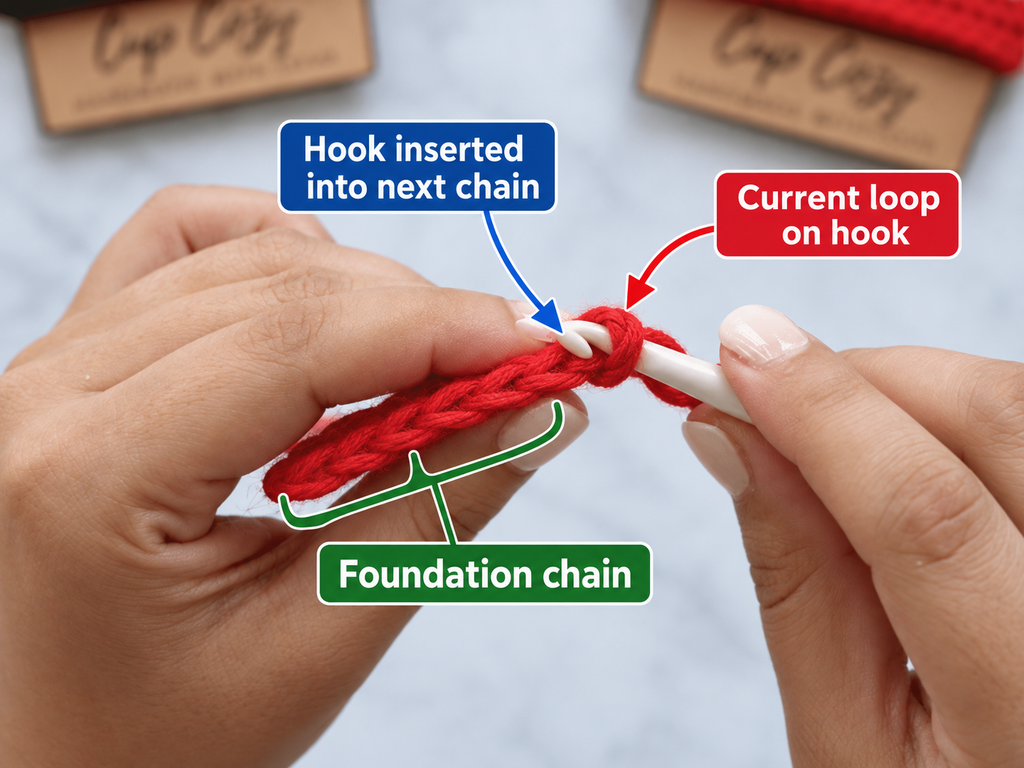
This is where your project starts to develop its stretchy texture.
Normally, a single crochet stitch is worked under both loops of the V at the top of the previous row.
For this section, you’ll work through the back loop only, commonly abbreviated BLO.
Chain one, then turn your work.
Look closely at the top of the first stitch. You’ll see a loop closest to you and a loop farther away from you. Insert the hook under only the loop farthest from you.
Make a single crochet as usual.
Continue across the row, working through the back loop only of each stitch.
Row 2: Ch 1, turn, sc BLO in each st across. (9 sc)
Repeat Row 2 to build a ribbed strip.
The unused front loops help create the raised ridges that give the fabric its knitted appearance.
Beginner tip: Tilt the crochet fabric slightly toward the light if you’re having trouble distinguishing the two loops.
Common mistake to avoid: Accidentally crocheting through both loops in the middle of a BLO row. This can interrupt the texture, although the fabric will still hold together.
Step 5: Continue the Ribbing Until It Fits
Keep repeating the same back-loop-only row.
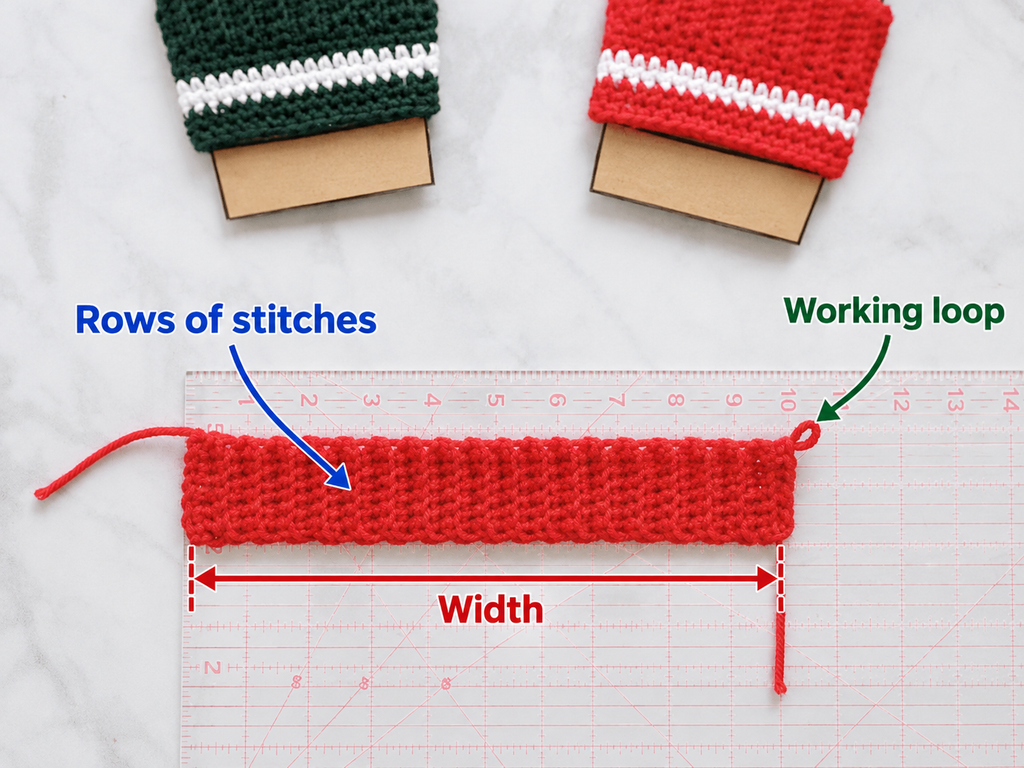
After several rows, your fabric should look like a narrow rectangle with raised vertical ridges when viewed in its eventual cup-cozy orientation.
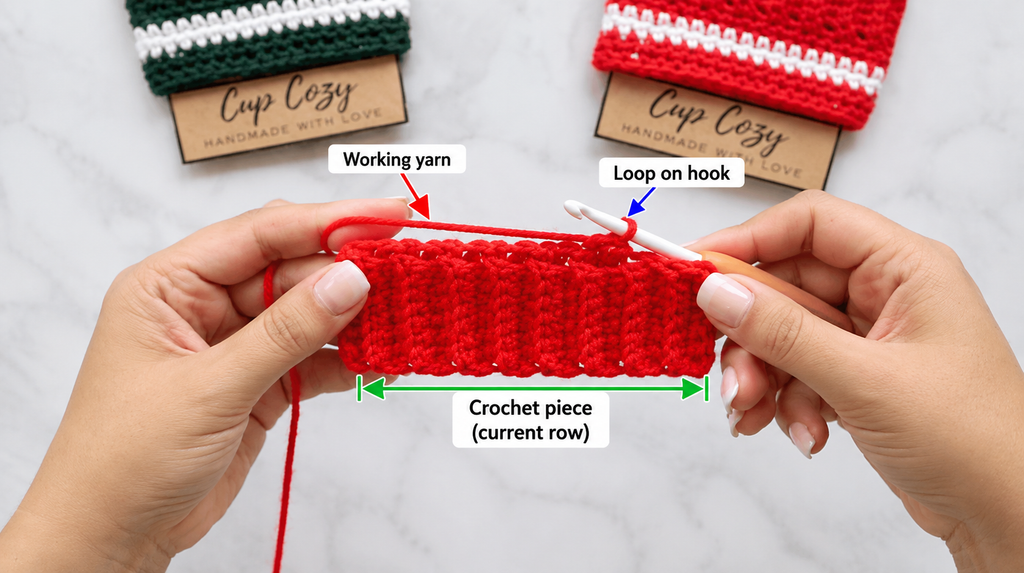
Continue until the strip is long enough to wrap around the cup.
For an average reusable takeaway cup, you may need approximately 30–38 rows, but this is only a rough range. Your yarn and tension determine the real count.
Hold the ends together around the cup and check the fit.
The strip should meet comfortably when lightly stretched. It must not press deeply into the cup’s sides or slide off freely.
If it’s too short, crochet a few more rows. If it’s too long, remove a few.
Beginner tip: Fit the strip at the actual height where the cup cozy will sit, especially if the cup is tapered.
Common mistake to avoid: Choosing an exact row count without measuring. Different cups can vary considerably in size.
Step 6: Join the Ribbed Strip Into a Ring
Once your strip fits, it’s time to connect the two short ends.
Lay your work flat and check that the strip isn’t twisted.
Bring the first row and the last row together. Fold them so the edges align neatly and the ridge pattern continues around the band.
With the working loop still on your hook, insert the hook through a pair of corresponding edge stitches.
Yarn over and pull through all the loops to make a slip stitch.
Continue through the remaining corresponding stitches until the seam is complete.
Because your strip is nine stitches tall, you’ll have nine paired positions to join.
Once joined, open the band and check the seam.
The cozy should now form a small stretchy cylinder.
Beginner tip: The seam doesn’t have to be completely invisible. A tidy, secure join is more important than an elaborate finishing technique.
Common mistake to avoid: Twisting the strip before joining. Untwist it and confirm that both short edges are aligned before making the first joining stitch.
Step 7: Crochet the First Round Above the Ribbing
You now have a joined ring with one long edge ready for additional stitches.
Keep the forest-green yarn attached.
Position the ring so the long edge is accessible and the body will grow upward from the ribbed section.
Work one single crochet into the end of each ribbing row around that edge.
Because these are row ends rather than regular stitch tops, the insertion points may not look like perfect V shapes.
Look for suitable spaces along the edge, distributing your stitches evenly.
If you completed 34 rows of ribbing, for example, work approximately 34 single crochets around the edge: one for each row.
When you reach the beginning, join with a slip stitch into the first single crochet.
Round 1: Work 1 sc into each ribbing row-end around. Join with sl st.
Use the same number of stitches for the subsequent body rounds unless you’re intentionally adjusting for the shape of your cup.
Beginner tip: Place a marker in the first single crochet of the round so you know where to join.
Common mistake to avoid: Adding too many stitches along the edge. Excess stitches can cause the body to flare or ripple.
Step 8: Build the Green Body
Work two more rounds in forest green.
At the beginning of each round, chain one. This chain is a height adjustment and does not count as a stitch.
Single crochet into each stitch around, then join with a slip stitch to the first single crochet.
Round 2: Ch 1, sc in each st around, join with sl st.
Round 3: Repeat Round 2.
Your stitches should begin forming a smooth, continuous band above the ribbing.
At this stage, it’s useful to place the cozy on the cup once more.
If the body feels slightly narrower than the ribbed area, that can be acceptable as long as it fits comfortably and doesn’t distort the fabric.
If it feels much too tight, consider undoing the body rounds and checking your hook size or stitch distribution.
Beginner tip: Count your stitches at the end of each round. If you began the body with 34 stitches, every round should still contain 34.
Common mistake to avoid: Treating the joining slip stitch or beginning chain as an additional single crochet stitch. This can accidentally increase the stitch count.
Step 9: Change to the Ivory Accent Color
This small color change is what makes your cup cozy look especially festive.
At the end of Round 3, prepare to introduce the ivory yarn.
Before completing the final green single crochet, stop when you have two green loops on your hook.
Lay the new ivory yarn over the hook and pull it through both green loops.
The last single crochet is finished using the new yarn.
Leave a short ivory tail on the inside of the work.
Complete the join in the new color and prepare to begin the next round.
Try not to pull the new yarn too tightly.
The change should sit neatly against the previous green row without puckering.
Beginner tip: Hold the green and ivory yarn tails against the inside of the fabric for the first couple of stitches to help control the transition.
Common mistake to avoid: Changing colors after fully completing the last stitch instead of during its final pull-through. This can make the transition appear one stitch later than intended.
Step 10: Crochet the Ivory Stripe
With the ivory yarn now attached, begin the next round.
Round 4: Ch 1, sc in each st around using ivory, join with sl st.
Work each stitch normally through both top loops.
As you crochet, you’ll see a contrasting band appear above the green rows.
Take your time at the round join. The goal is a clean stripe with the same number of stitches as the previous rounds.
When the ivory round is complete, change back to forest green during the final pull-through of the last ivory single crochet.
You can cut the ivory yarn, leaving a tail long enough to weave in later.
Beginner tip: Keep your tension similar for both colors. If you pull the ivory more tightly, the stripe may narrow the cup cozy.
Common mistake to avoid: Pulling the unused yarn across the inside of the cozy too tightly when changing colors. This can make the sleeve less flexible.
Step 11: Finish the Green Upper Edge
Continue working in forest green.
Round 5: Ch 1, sc in each st around, join with sl st.
Round 6: Repeat Round 5.
Now stop and check the height.
For many standard cups, this produces a useful starting size. You may need additional rounds if your yarn is thin, your stitches are short, or you want more coverage.
You can continue adding green rounds until the cozy reaches your preferred height.
Be sure that the top edge stays well below the lid and doesn’t interfere with drinking.
To create a tidy final edge, complete the last round neatly and join with a slip stitch without pulling the yarn excessively tight.
The cup cozy should look like a small knitted-style sleeve, with raised ribbing below and smooth crochet rounds above.
Beginner tip: Try the cozy on the cup before cutting the yarn. It’s easier to add another round while your working yarn is still attached.
Common mistake to avoid: Adding too much height. A sleeve that touches the lid or drinking opening may be inconvenient and can become wet.
Step 12: Fasten Off and Weave in the Ends
Once you’re happy with the size, cut the working yarn, leaving a tail approximately 5–6 inches long.
Pull the tail completely through the final loop and tighten gently to secure the last stitch.
Thread the tail through a blunt tapestry needle.
Turn the cup cozy inside out so you can work on the less visible side.
Pass the needle through several nearby stitch backs, then change direction and weave through a few more stitches. Avoid pulling so tightly that the fabric gathers.
Repeat this process for the ivory tail and any other loose ends.
Trim the excess yarn only after the tails are securely hidden.
Turn the cozy right side out and smooth it gently with your fingers.
Beginner tip: Weave the tails through similar-colored sections whenever possible so they won’t show on the outside.
Common mistake to avoid: Cutting the tails immediately beside the last stitch without weaving them in. Those short ends can work loose with repeated handling.
Pattern Notes and Stitch Counts
This beginner crochet gift is adjustable, but a few construction rules help keep the pattern predictable.
Foundation chain: Begin with 10 chains, giving nine single crochet stitches in Row 1.
Turning chain: Chain one when turning the ribbed strip. The turning chain does not count as a stitch.
Ribbing: Work each subsequent row in the back loops only, maintaining nine stitches across.
Length: Repeat the ribbing row until the strip fits around the cup. Aim for a comfortably snug fit rather than a fixed row count.
Joining: Join corresponding stitches from the two short ends without twisting the strip.
Body Round 1: Work one single crochet into each ribbing row-end. Your total body stitch count will generally match the number of completed ribbing rows.
Body Rounds 2–3: Forest-green single crochet.
Body Round 4: Warm-ivory single crochet.
Body Rounds 5–6: Forest-green single crochet, with additional rounds if needed.
Right side and wrong side: Choose the side with the neatest-looking ribbing as the outside. Hide the yarn tails and less attractive joining details on the inside.
Seam placement: Position the join toward the back of the cup for a cleaner presentation.
Size adjustment: To make the sleeve taller, increase the starting chain or add more body rounds. To make it wider around the cup, work additional ribbing rows before joining.
Tapered cups: A straight-sided sleeve fits most easily on cups with little taper. If the upper circumference increases significantly, you may need to introduce evenly spaced increases in later body rounds. Use the cup itself as your guide.
Common Beginner Mistakes and How to Fix Them
Even simple crochet Christmas gifts can feel frustrating when you’re learning new techniques. These are the most common problems to watch for.
1. The foundation chain is too tight
A tight foundation may make the bottom edge look narrower than the rest of the band.
Fix: Undo the chain and try again with more relaxed tension. You can also use a slightly larger hook just for the foundation.
2. The ribbed strip gets wider or narrower
This usually happens when a stitch is accidentally added or skipped at the edge.
Fix: Count nine stitches at the end of every row. If the count changes, inspect the edge and undo the last row if necessary.
3. The ribbing doesn’t look ribbed
If you insert the hook under both top loops instead of the back loop only, you’ll create ordinary single crochet fabric.
Fix: Look closely at the stitch V and work beneath the loop farther away from you after turning.
4. The sleeve twists after joining
Joining the ends without checking the orientation can make the ribbed cylinder twist.
Fix: Lay the strip flat and inspect both edges before the first slip stitch. If you’ve already joined incorrectly, undo the seam and rejoin.
5. The body ripples or flares outward
Too many stitches worked along the ribbed edge can cause unwanted rippling.
Fix: Make your stitches more evenly distributed and keep the round count consistent. Rework the first body round if needed.
6. The color stripe has a visible step
A small step where joined rounds meet is normal with many crochet techniques.
Fix: Keep the round join tidy and place it toward the back. For a very smooth decorative finish, you can experiment with an invisible joining technique later.
7. The cozy slides off the cup
The band may be too large, or the chosen yarn may stretch more than expected.
Fix: Check the fit before joining. Remove several ribbing rows if needed, and test the sleeve on the real cup before finishing.
How to Customize This Crochet Christmas Gift
One of the best things about a small handmade crochet gift is how easily you can make it personal.
Try different Christmas colors
A forest-green and ivory combination looks natural and understated. For a bolder traditional holiday style, choose bright red with white.
You could also try dusty blue and cream for winter, deep plum and blush for something elegant, or tan and dark brown for a coffee-inspired look.
For multiple gifts, choose two or three coordinated palettes so your finished cozies look like a matching collection.
Change the stripe placement
The stripe doesn’t always need to be centered.
Place it closer to the ribbed section for a subtle accent, or add several narrow stripes using different colors.
Remember that every additional color creates yarn tails to secure.
Make a taller or shorter sleeve
For a taller sleeve, start with more chains or continue the body for more rounds.
If you’re making a cozy for a short cup, use fewer starting chains and finish the upper body earlier.
Always leave the drinking opening and lid area unobstructed.
Add a decorative border
A simple final round of slip stitches can give the upper edge a compact finish.
For a slightly softer look, try an additional round of single crochet in the contrasting color.
Keep the border flat and avoid large loose loops that could snag during use.
Experiment with texture
Once you feel comfortable with the basic version, you can experiment with other stitches.
Half double crochet creates slightly taller stitches and a softer surface. Alternating simple crochet stitch heights can add texture. Moss stitch can create a gentle woven appearance.
These alternatives will change the dimensions and may need revised stitch counts, so treat them as variations rather than direct substitutions in this pattern.
Turn one project into several Christmas gifts
This is an especially practical pattern for batch-making.
For teachers, pair the cozy with a reusable cup and a handwritten thank-you note.
For coworkers, add a small packet of tea or instant hot chocolate.
For neighbors, create matching cozies in coordinated colors.
For a family member who loves coffee, use their favorite colors and include a café gift card.
A personalized handmade present doesn’t need elaborate decoration to feel thoughtful.
Finishing Instructions: Make It Gift-Ready
After weaving in the ends, check the entire cup cozy for loose loops or uneven stitches.
Gently stretch and reshape the ribbed section with your fingers.
If necessary, lightly dampen the cotton fabric and allow it to dry flat. Avoid stretching it beyond its intended size.
Wash according to your yarn label, especially when using bright holiday colors that may release dye.
Let the project dry completely before placing it around the gift cup.
For presentation, slide the cozy onto a clean, empty, reusable cup and tuck a gift card or small sealed treat inside.
Wrap it in tissue paper or place it in a small kraft gift bag.
A simple handmade gift tag is a lovely finishing touch.
Safety note: Crochet fabric is not a substitute for a heat-rated insulating sleeve. Use care with hot beverages, make sure the cozy is secure, and never position it where it interferes with the cup’s lid or drinking opening. Keep loose embellishments away from young children. Do not place an ordinary yarn cozy in a microwave or near an open flame.
Quick Printable-Style Summary
Easy Christmas Crochet Cup Cozy
Skill level: Beginner
Materials: Medium #4 cotton yarn in green and ivory, 5 mm hook, yarn needle, scissors, stitch marker, measuring tape.
Stitches: Chain, single crochet, single crochet BLO, slip stitch.
Foundation: Ch 10.
Row 1: Sc in second ch from hook and across. (9 sts)
Row 2: Ch 1, turn, sc BLO across. (9 sts)
Repeat Row 2 until the strip fits comfortably around the cup.
Join: Slip stitch the two short ends together without twisting.
Body Round 1: Sc into each row-end around, join.
Rounds 2–3: Sc around in green.
Round 4: Sc around in ivory.
Rounds 5–6: Sc around in green. Add rounds for height as needed.
Finish: Fasten off, weave in ends, check fit, and gift.Original adjustable tutorial design. Sizes and yarn estimates are approximate and should be checked against the chosen cup.
Frequently Asked Questions About Crochet Christmas Gifts
What are the easiest crochet Christmas gifts for beginners?
Small projects made with basic stitches are usually easiest. Cup cozies, simple washcloths, scarves, coasters, and basic headbands can all be suitable depending on the pattern.
A cup cozy is particularly useful because it doesn’t require complicated shaping and uses only a modest amount of yarn.
How long does it take to crochet a Christmas cup cozy?
An experienced crocheter may finish a simple cozy quickly, while a beginner may need around 45–90 minutes or longer.
The first attempt usually takes the most time because you’re learning to recognize stitches and control your tension. Subsequent cozies often become much faster.
What yarn is best for handmade crochet Christmas gifts?
It depends on the project. Smooth cotton and cotton-blend yarns are useful for cup accessories and washable household gifts. Acrylic yarn can be suitable for decorative projects and many wearable accessories.
For this cup cozy, choose a medium-weight yarn that creates a firm, comfortable fabric.
Can I crochet a cup cozy without knowing complicated stitches?
Yes. This beginner version uses chains, single crochet, slip stitches, and back-loop-only single crochet.
The back-loop technique isn’t a new stitch; it’s simply a different place to insert your hook.
How much yarn do I need for one crochet cup cozy?
A small cup cozy typically needs only a relatively modest amount of yarn. For this design, approximately 30–45 yards of the main color and a few yards of contrast yarn are reasonable starting estimates.
Always allow extra yarn for tension differences, sizing changes, and finishing.
Can I use the same pattern for different cup sizes?
Yes, with adjustments.
Change the number of ribbing rows to fit the cup’s circumference, and adjust the foundation-chain length or body rounds to change the sleeve’s height.
Strongly tapered cups may require extra shaping, so the easiest starting point is a cup with fairly straight sides.
What can I include with a crochet cup cozy for a Christmas present?
A reusable cup, tea sampler, hot-chocolate packet, café gift card, or handwritten note all work well.
Keep the presentation simple and make sure the cup and cozy are clean and dry before wrapping.
Conclusion
Handmade gifts are often the ones people remember, especially when they are practical and made with care.
This easy Christmas crochet cup cozy is a small project that helps you practice several useful beginner skills without committing to a large blanket or complicated garment.
You begin with a foundation chain, build stretchy ribbing, join the fabric, add a festive stripe, and finish with a useful handmade accessory.
Once you’ve completed one, it’s easy to make another in a new color combination.
Save this Crochet Christmas Gifts tutorial for your next cozy crafting afternoon, and try making a matching set for someone who loves a warm drink during the holidays.