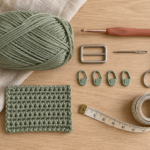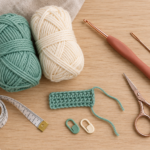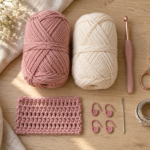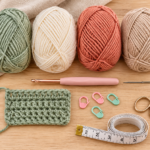
Sometimes the smallest crochet projects become the accessories you wear most often. A handmade belt is one of those projects: practical, surprisingly easy to customize, and a lovely way to bring a little texture to an everyday outfit.
If you have been searching for an easy crochet belt pattern, this beginner-friendly tutorial will show you how to make a simple belt using cotton yarn, basic stitches, and a small metal buckle.
The best part? You don’t need to know complicated stitch patterns or follow a difficult chart. This design uses single crochet stitches to create a narrow, sturdy fabric that looks neat and handmade without feeling overly decorative.
We’ll begin by attaching yarn to the buckle, work a long strip of crochet fabric, shape the end, and finish with a small crocheted keeper loop.
You can make your belt longer or shorter, select a color that matches your wardrobe, or use leftover cotton yarn from another project.
The instructions include helpful stitch counts, sizing guidance, common mistakes, and image placements so you can follow the entire process with confidence.
What You’ll Learn
By the end of this tutorial, you will know how to:
- Attach crochet stitches directly to a belt buckle.
- Crochet a sturdy, narrow belt strap using single crochet.
- Keep your edges straight and your stitches even.
- Adjust a handmade belt to fit your preferred waist or hip measurement.
- Shape a neat, tapered end using simple decreases.
- Crochet a small keeper loop to hold the loose strap.
- Fasten off, weave in yarn ends, and finish your belt.
This is a particularly satisfying project if you’ve already practiced basic crochet stitches and want to make your first wearable accessory.
Crochet Belt Pattern at a Glance
| Detail | Pattern information |
|---|---|
| Project | Adjustable crochet belt with buckle |
| Difficulty | Beginner |
| Yarn | Worsted-weight #4 cotton |
| Hook | 3.5 mm |
| Construction | Short rows worked directly from buckle |
| Main stitch | Single crochet |
| Starting stitches | 7 sc around the buckle bar |
| Regular row stitch count | 7 sc |
| Finished width | Approximately ¾–1 inch (2–2.5 cm) |
| Length | Made to measure |
| Time | Approximately 3–5 hours |
| Special feature | Tapered end and separate keeper loop |
The finished measurements are approximate. Your actual width and length will depend on yarn, tension, and number of rows.
Materials You’ll Need
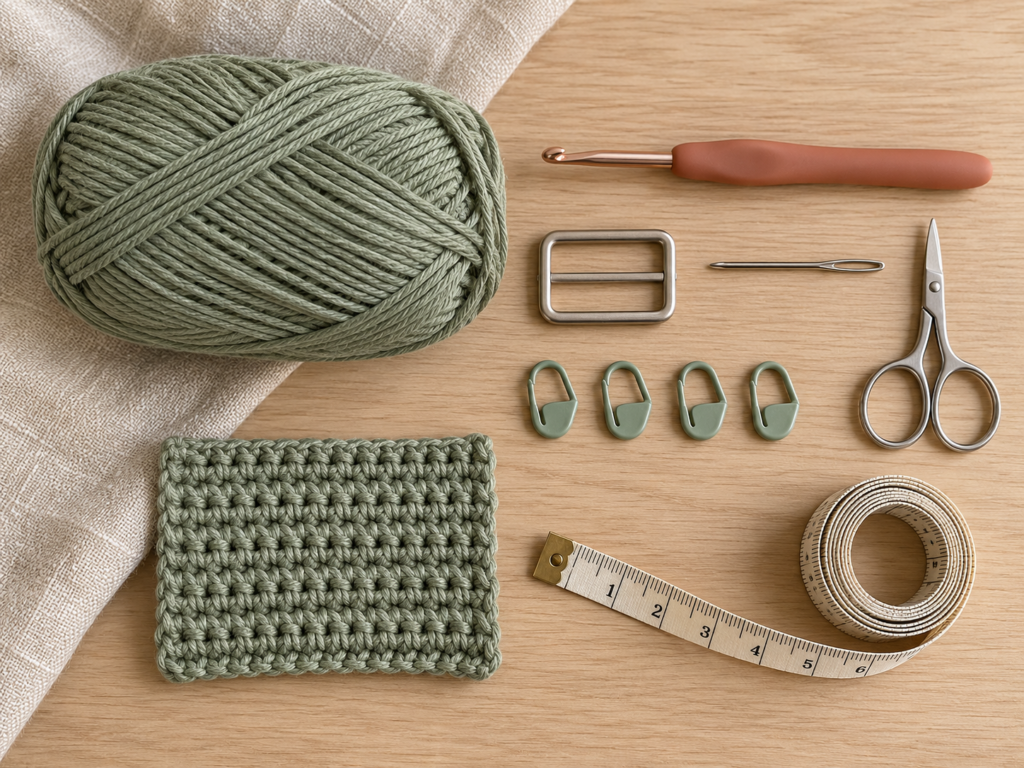
Gather everything before beginning. This project uses only a small collection of tools, so there is no need to purchase an expensive crochet kit.
Yarn
Choose a smooth, tightly spun worsted-weight (#4) cotton yarn. Cotton is a good option because it creates clearly defined stitches and generally has less elasticity than many wool yarns.
Plan on approximately 70–110 yards (64–100 meters), with the exact amount depending on the required belt length and your tension. Have extra yarn available if you’re making a long belt.
For this tutorial, the suggested photo color is dusty sage. You can choose cream, cocoa brown, terracotta, black, or another color that works with your clothing.
Crochet hook
Use a 3.5 mm (US E/4) crochet hook as a starting point. This is smaller than the hook often recommended for worsted-weight yarn because we want a firm, closely worked fabric.
If your stitches feel too tight to work comfortably, try a 4 mm hook. If the fabric stretches too easily, test a smaller hook.
Belt buckle
Choose a rectangular buckle with a usable straight attachment bar approximately 1–1.25 inches wide.
For this version, use a buckle with a movable prong that can pass through the spaces between crochet rows. Test that compatibility before committing to the entire strap.
Other supplies
- Sharp scissors.
- Blunt yarn or tapestry needle.
- Measuring tape.
- Two locking stitch markers, optional but helpful.
- Small ruler for checking strap width.
Crochet Abbreviations Used
This pattern uses standard US crochet terms.
| Abbreviation | Meaning |
|---|---|
| ch | Chain |
| sc | Single crochet |
| sc2tog | Single crochet two stitches together |
| sl st | Slip stitch |
| st / sts | Stitch / stitches |
| rep | Repeat |
How to Make a Single Crochet
Insert your hook into the stitch, yarn over, and pull up a loop.
You should have two loops on the hook.
Yarn over again and pull through both loops.
You’ve completed one single crochet.
How to Make a Single Crochet Decrease (sc2tog)
Insert your hook into the first stitch, yarn over, and pull up a loop.
Insert the hook into the next stitch, yarn over, and pull up another loop.
You should now have three loops on your hook.
Yarn over and pull through all three loops.
This joins two stitches into one and reduces the stitch count by one.
US/UK terminology note: The single crochet in US terminology is called a double crochet in UK terminology. Follow the US definitions throughout this tutorial.
Before You Start
Measure Where You Want to Wear Your Belt
Not everyone wears a belt at their natural waist. You might prefer yours around your hips, over a cardigan, or higher on a dress.
Use your measuring tape to measure around the position where you’ll wear it.
For a basic buckle belt, begin with a target strap length approximately 6–8 inches longer than your body measurement, measured from the buckle attachment. The extra length allows room for adjustment and a free tail.
For example, if your waist measures 30 inches, you might aim for a strap measuring approximately 36–38 inches before finalizing its tip.
This is only a starting estimate. Try the belt around your body as you crochet, because buckle style, tension, and how you wear the belt affect the fit.
Check Your Gauge and Tension
Gauge means the number of stitches and rows within a measured section of crochet fabric.
For this project, exact gauge is less important than making a belt that is the correct width, length, and firmness.
Begin with seven single crochet stitches across. After approximately ten rows, measure the width of your fabric.
You want a relatively dense strap that keeps its shape when held horizontally.
If your work looks very loose, your belt may stretch out when worn. If your stitches feel so tight that you can barely insert the hook, loosen your tension or increase your hook size slightly.
Learn to Count Your Stitches
Each regular row should contain seven single crochet stitches.
The top of each stitch looks like a small V.
Count these V shapes after every few rows. Counting regularly is much easier than discovering that you’ve accidentally added several stitches after crocheting half a belt.
Your turning chain does not count as a stitch.
Understand the Edges
Crochet belts look best when the edges are straight.
At the beginning of each row, make a chain one, turn, and work your first single crochet into the first actual stitch.
At the other end, make sure you work into the last single crochet.
Missing the last stitch is one of the most common reasons a beginner’s crochet strip becomes narrower.
Test the Buckle Before Making a Full Belt
This is important for a functional accessory.
Some buckles have prongs designed to pass through punched holes in leather. Those prongs may be too wide or sharp for a closely crocheted strap.
Work a short sample of your proposed belt fabric and test whether the buckle prong passes comfortably between rows without cutting or forcing apart the yarn.
If it does not, select compatible hardware or use a buckle style intended for woven straps. Do not force a sharp metal prong through tightly packed fibers.
Step-by-Step Crochet Belt Tutorial
Step 1: Attach Your Yarn to the Belt Buckle
Begin by placing the belt buckle flat on your work surface.
Identify the straight bar where the crochet fabric will attach. Make sure you are working around a fixed bar rather than a moving prong.
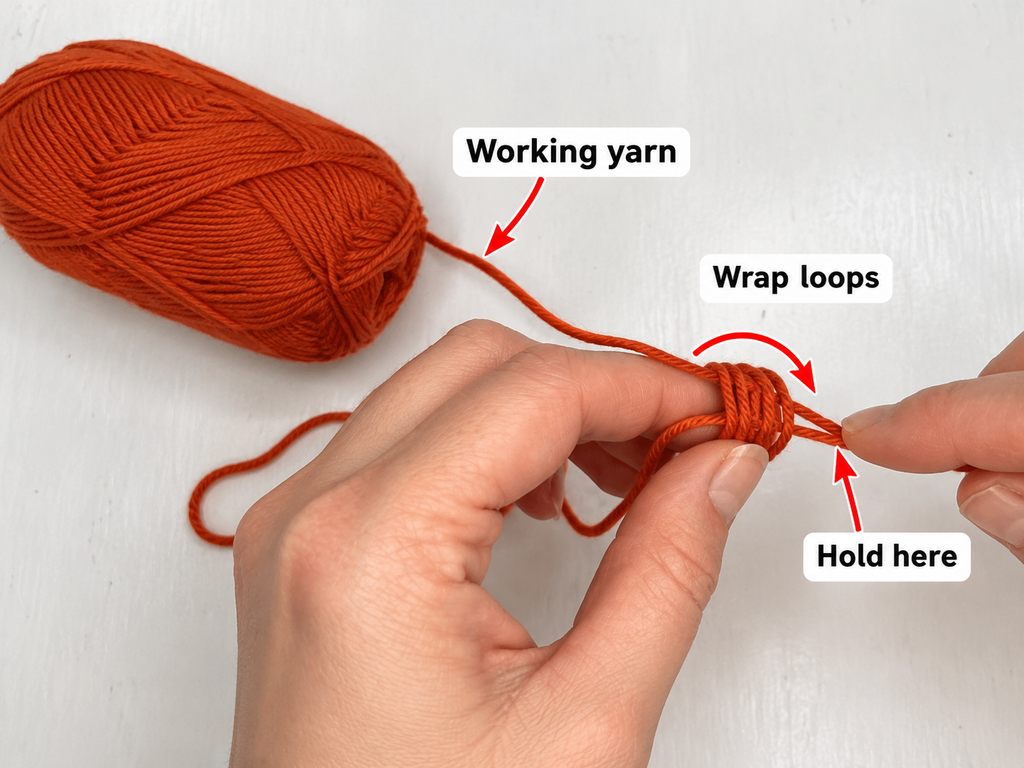
Create a slip knot on your hook.
Hold the yarn behind the buckle bar. Bring your hook around the bar, yarn over, and draw the yarn through the loop on your hook to secure the attachment.
You should now have the yarn connected to the buckle with the working loop ready for your first stitch.
Keep the buckle facing in the direction it will be worn.
At this stage, your work will look quite small, and the yarn may move slightly along the metal. That is normal. Once the foundation stitches have been made, they’ll sit together more securely.
Beginner tip: Leave a yarn tail approximately 6 inches long. You’ll use a tapestry needle to hide it securely later.
Common mistake to avoid: Don’t attach your yarn around a section of the buckle that needs to move. The prong and other working parts of the hardware should remain free.
Step 2: Crochet the Foundation Row Around the Buckle
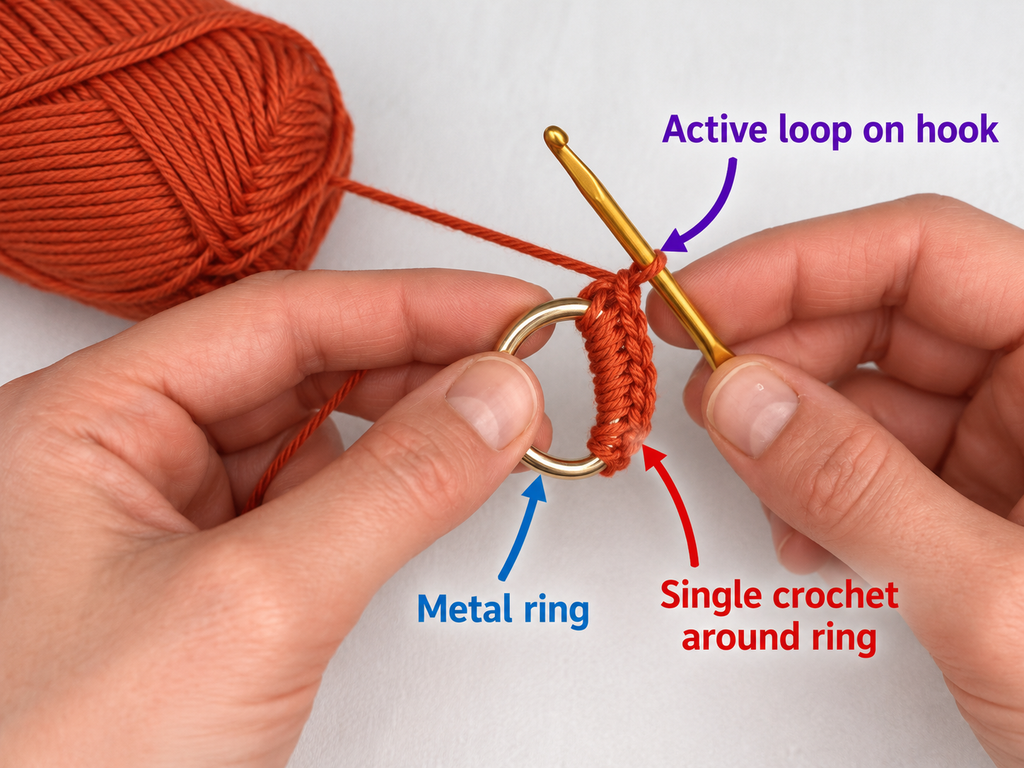
Now you’ll make the first row of stitches directly around the buckle bar.
Instead of inserting your hook into a foundation chain, you’ll insert it underneath the bar.
For each single crochet:
- Bring the hook under the buckle bar.
- Yarn over and pull up a loop around the bar.
- Yarn over again.
- Pull through both loops on your hook.
That completes one single crochet around the metal.
Repeat until you have exactly seven single crochet stitches around the buckle bar.
Slide the stitches gently together so they sit evenly across the bar without becoming crowded.
These seven stitches form the starting width of your crochet belt.
They should not bunch up or make the buckle curve.
If your buckle is too narrow to hold seven stitches comfortably, adjust the buckle size or use a thinner yarn and hook rather than squeezing all the stitches together.
Stitch count: 7 sc.
Beginner tip: After completing the foundation row, lay the buckle flat and check that the crochet stitches are facing in the correct direction. It’s much easier to fix an incorrectly oriented buckle now than after finishing the strap.
Step 3: Crochet the First Row of the Belt Strap
Now that your foundation is secure, it’s time to begin the actual belt strap.
Row 1
Chain one and turn your work.
Insert your hook into the first single crochet stitch.
Make one single crochet.
Continue across the row, making one single crochet into each stitch.
When you reach the end, you should have seven single crochet stitches.
Row 1: Ch 1, turn, sc in each of the 7 sts. (7 sc)
The fabric will be quite short, and it may feel slightly awkward because the buckle is still close to your hook.
Don’t worry about speed here. Concentrate on keeping your stitches comfortable and even.
The crochet should begin to form a small rectangular strip extending away from the buckle.
Beginner tip: Place a locking stitch marker in the first and last stitches if you have difficulty finding the row edges.
Common mistake to avoid: Don’t count the turning chain as a single crochet stitch. Doing so may accidentally increase the width of your belt.
Step 4: Continue Crocheting the Belt Strap
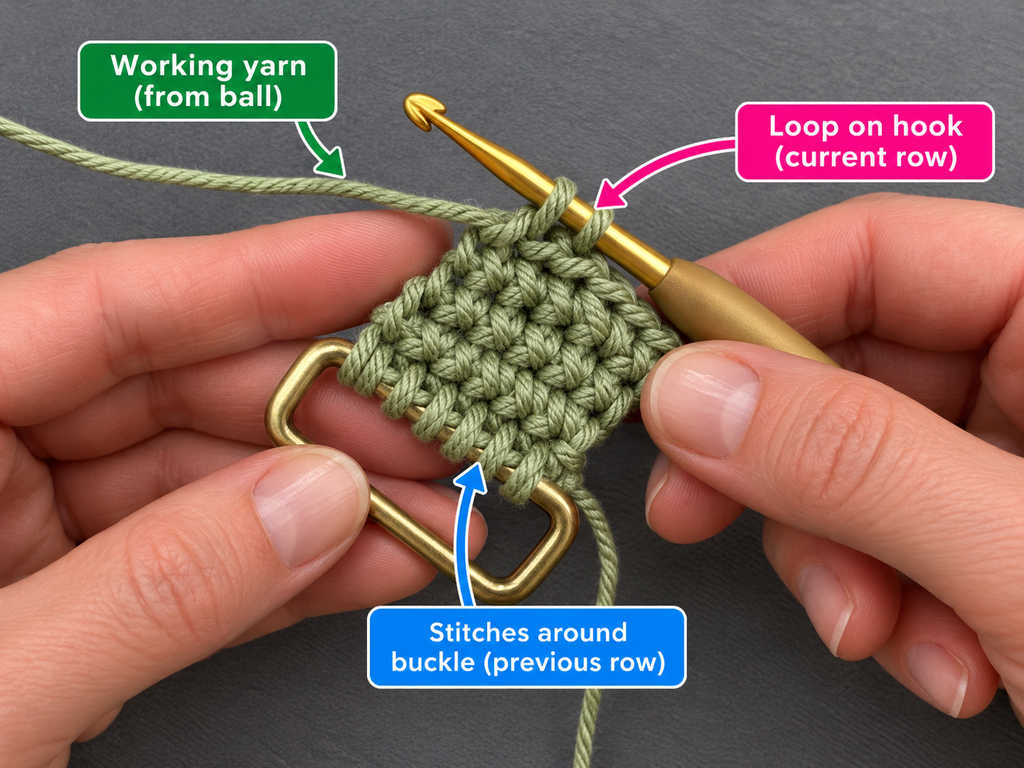
You’ve finished the foundation and first row. The rest of the main belt is simply a repeat of the same technique.
Row 2 and every regular row after that:
Chain one, turn, and work one single crochet in each stitch across.
You should always have seven stitches.
Continue until the strap reaches the length you need, leaving room for the final tapered tip.
As the piece grows, it will start to look like a narrow ribbon of crochet fabric.
Check your stitch count after every five or ten rows.
If you notice that the belt is getting wider or narrower, stop and examine the last few rows.
This is a good project to work on while listening to music because the stitch pattern is wonderfully repetitive.
However, resist the temptation to crochet too quickly at first. Even tension is more important than speed.
Beginner tip: Lay the belt flat on a table every few inches. Its edges should remain approximately parallel.
Common mistake to avoid: Avoid pulling the yarn excessively tightly when turning your work. This can make the edges curl inward and cause the strap to twist.
Step 5: Measure and Test the Belt Length
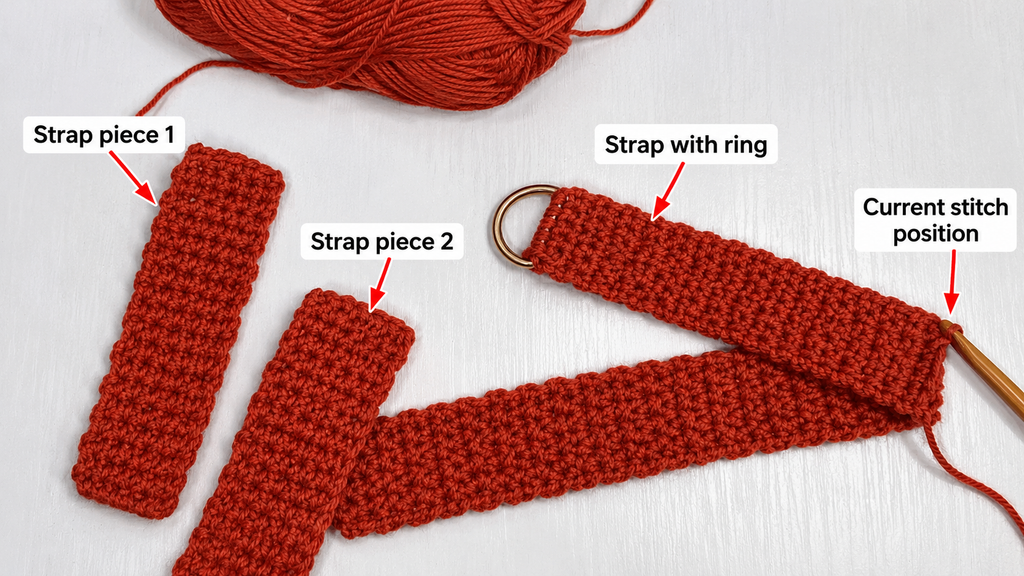
Before shaping the tip, stop crocheting and check the size.
This step is easy to skip, but it’s one of the most important parts of making a belt that you’ll actually enjoy wearing.
Place the belt around your waist or wherever you’d like to wear it.
Hold the buckle at the front and pass the crocheted strap through it.
Check how much length you have left after fastening.
For a comfortable adjustable belt, you generally want enough extra length to pass through the buckle and into the keeper loop without leaving an inconveniently long tail.
If your strap is too short, continue adding regular rows.
If it’s too long, carefully unravel several rows before shaping the end.
Remember that cotton fabric can relax slightly after use, especially if the stitches are loose.
Test the buckle prong against a sample section of the belt. It should pass through an appropriate opening between rows without excessive force.
Do not fasten a belt so tightly that it causes discomfort.
Beginner tip: Try the belt with the actual dress, jeans, or cardigan you plan to wear. A thick cardigan can require a noticeably longer belt than a thin summer dress.
Image guidance: This is an additional measurement shot that should be photographed or generated originally. The selected source does not have a dedicated still image showing the measurement step.
Step 6: Shape a Neat Tapered Belt Tip
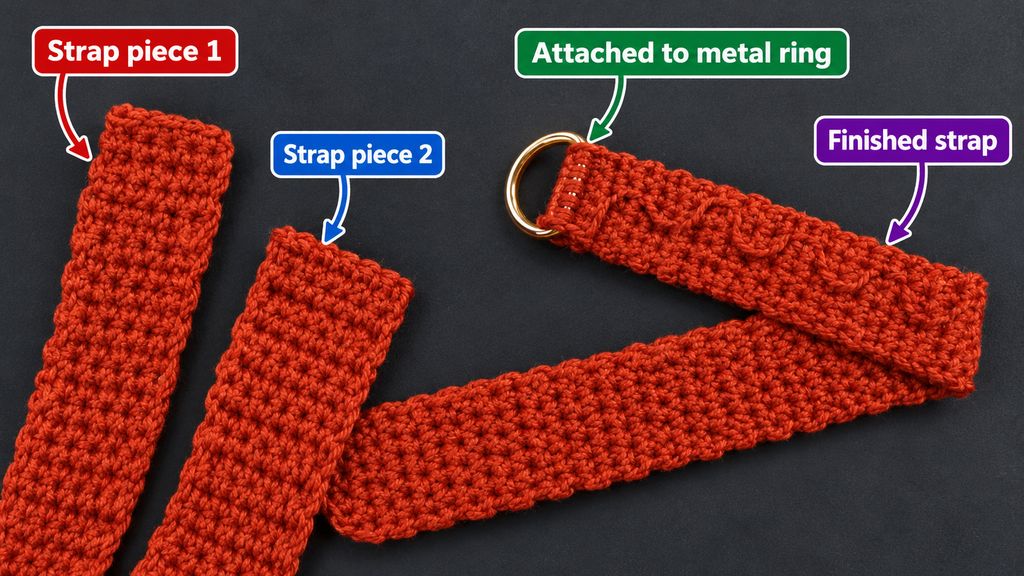
Once your belt is almost the correct length, we’ll shape the free end so it looks more finished and slides through the buckle more easily.
This optional tapered section is made using single crochet decreases.
The goal is to narrow the strap gradually rather than ending it with a completely square edge.
Start after completing a regular row of seven single crochet stitches.
Taper Row 1
Chain one and turn.
Make one sc2tog across the first two stitches.
Work one single crochet into each of the next three stitches.
Make one sc2tog across the final two stitches.
You now have five stitches.
Stitch count: 5 sc.
Taper Row 2
Chain one and turn.
Make one sc2tog over the first two stitches.
Work one single crochet into the center stitch.
Make one sc2tog over the last two stitches.
You now have three stitches.
Stitch count: 3 sc.
Taper Row 3
Chain one and turn.
Single crochet into each of the three stitches.
Fasten off with a yarn tail approximately 6 inches long.
This creates a short, narrow tip.
Don’t pull the final stitch so tightly that the fabric puckers.
If you prefer a softer, rounded appearance, you can work a small slip-stitch edge around the tip after checking that the additional bulk doesn’t interfere with the buckle.
Beginner tip: Practice sc2tog on a small sample before working the actual tip. The decreases will look neater when your tension is relaxed and consistent.
Common mistake to avoid: Don’t accidentally work a decrease over three stitches. Each sc2tog combines exactly two stitches into one.
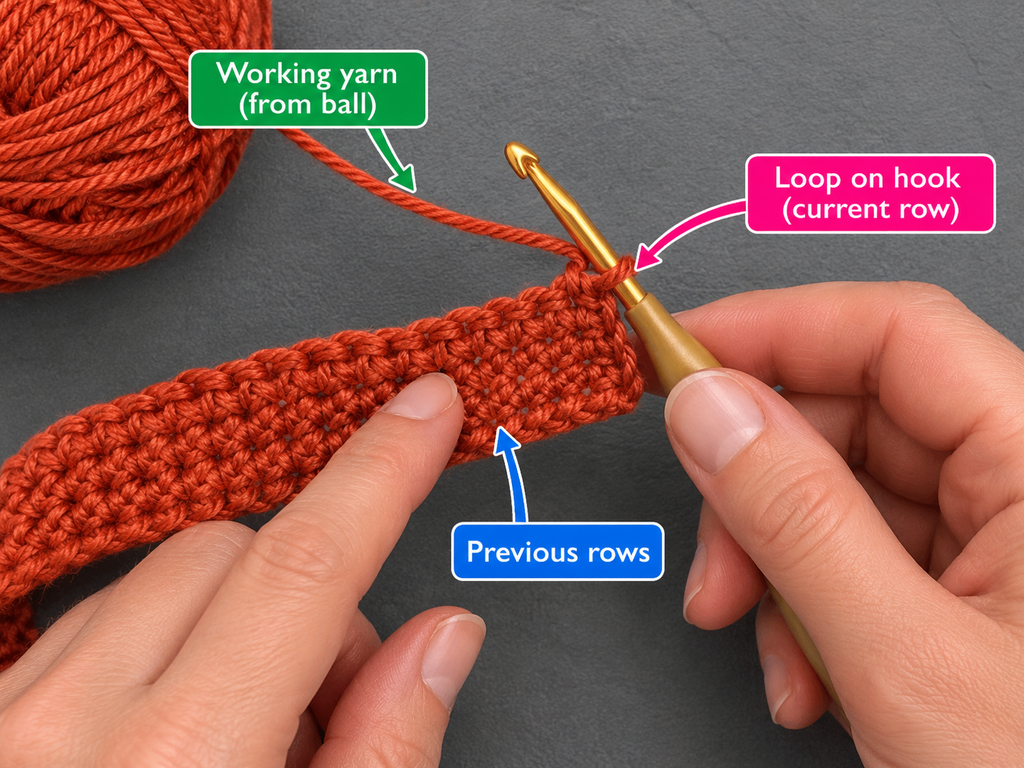
Step 7: Make the Crochet Belt Keeper
A belt keeper is the small loop that holds the extra strap in place after you’ve fastened the buckle.
It helps prevent the loose end from moving around and gives your handmade belt a more polished appearance.
We’ll crochet this loop separately.
Starting chain: Chain 5.
Row 1: Single crochet in the second chain from your hook and in each remaining chain. (4 sc)
Row 2: Chain 1, turn, sc in each stitch across. (4 sc)
Repeat Row 2 until the keeper strip is long enough to wrap around the completed belt with a little clearance.
The exact number of rows depends on your stitch height and the thickness of the main strap.
Rather than following a fixed count, wrap the small strip around the belt to check the fit.
The two short ends should meet comfortably without stretching tightly.
You want the keeper loop to slide along the strap, but not so loosely that it slips off unintentionally.
Once the keeper is the correct size, fasten off and leave a long tail for sewing.
Beginner tip: Use the same yarn and hook for the keeper. This keeps the stitch texture and appearance consistent.
Common mistake to avoid: Don’t make the keeper too tight. A loop that is too small can bunch up the strap and be difficult to move.
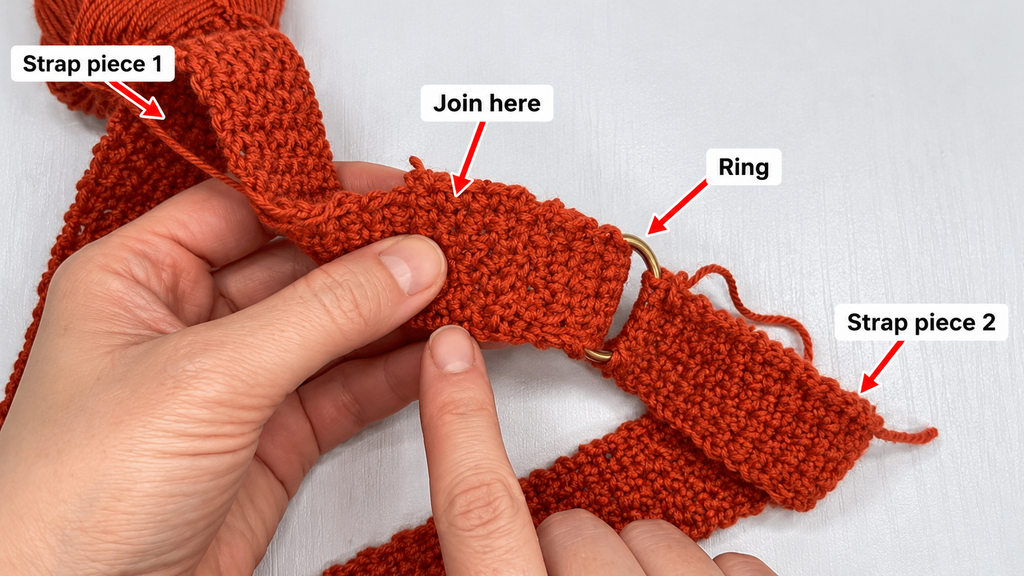
Step 8: Attach the Keeper Loop
Lay the belt flat with the front facing upward.
Wrap the separate crochet strip around the belt near the buckle.
Bring the two short ends together on the underside.
Thread the yarn tail into your tapestry needle and sew the ends together with small, secure stitches.
Avoid sewing directly through the main belt strap if you want the keeper to remain adjustable.
Once the seam is secure, gently slide the keeper along the belt to test its movement.
It should move with slight resistance, without stretching or distorting the fabric.
Weave in the sewing tail through the keeper stitches, then trim the excess.
The keeper is now ready to hold the free end of the belt.
Beginner tip: Position the seam on the underside so it stays hidden when the belt is worn.
Common mistake to avoid: Don’t twist the small strip before joining it. Check that both edges align correctly.
Step 9: Fasten Off and Weave In Every Yarn End
Your belt is almost ready to wear.
Take a few minutes to check the finishing details.
First, look at the section where your yarn was attached to the buckle.
Thread the remaining foundation yarn tail through your tapestry needle.
Weave the tail back and forth through the inside of several stitches, changing direction to help secure it.
Avoid pulling too tightly, which can make the crochet fabric bunch up around the metal.
Next, weave in the tail at the tapered end.
Finally, inspect the keeper loop and make sure its seam is secure.
The aim is to hide the yarn tails while leaving the belt smooth and flexible enough to wear comfortably.
Beginner tip: If you’re using cotton yarn, leave enough tail to weave securely through multiple stitches. Cutting ends too close to the fabric can make them work loose over time.
Common mistake to avoid: Don’t rely on a single knot to keep your finished belt secure. Properly woven ends are less visible and generally more reliable.
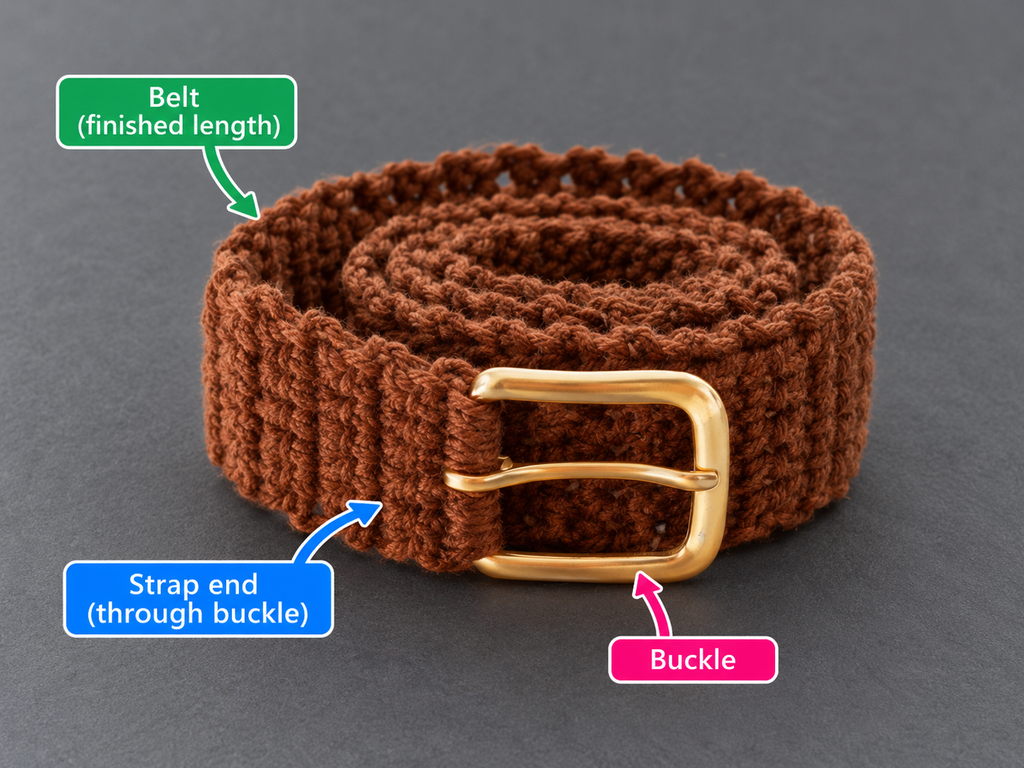
Step 10: Check the Buckle and Try On Your Finished Belt
Lay your finished belt on a clean tabletop.
Smooth it gently with your hands and check that the strap lies reasonably flat.
Make sure the buckle is securely connected and its moving parts operate freely.
Slide the free end through the buckle and check the fit.
Then guide the loose tail into the crochet keeper.
If the belt is a little stiff, that’s normal for firmly crocheted cotton. It may become more flexible with regular handling.
However, the fabric should not be excessively stretched when worn.
If the buckle catches or damages the yarn, stop using that buckle and choose more compatible hardware.
Your handmade crochet belt is now finished.
Pattern Notes and Stitch Counts
This crochet belt pattern is worked in turned rows instead of rounds.
The fabric begins directly on the buckle bar. From there, you work back and forth until the strap reaches your desired length.
Turning Chain Rules
The chain one at the beginning of each row helps your hook reach the correct height for the next row.
It does not count as a stitch.
Always work into the first actual single crochet after turning.
Main Stitch Count
Your foundation and regular strap rows contain seven single crochet stitches.
The tapered end decreases as follows:
| Section | Stitches |
|---|---|
| Buckle foundation | 7 |
| Each regular strap row | 7 |
| Taper Row 1 | 5 |
| Taper Row 2 | 3 |
| Taper Row 3 | 3 |
Row Repeat
Repeat the regular row of seven single crochet stitches until the belt reaches your desired length.
There is no complicated stitch multiple to remember.
The keeper loop is worked separately with four single crochet stitches per row.
Right Side and Wrong Side
Standard turned single crochet produces a similar-looking fabric on both sides.
You can choose the side with the neatest visible stitches as the front of the belt.
The keeper seam should sit on the underside whenever possible.
How to Adjust the Width
To make the belt wider, begin with nine or eleven single crochet stitches around a correspondingly wider buckle bar.
For a narrower belt, you could use five stitches if your buckle and yarn allow it.
Remember that changing the starting stitch count also changes the decrease instructions. A five-stitch-wide belt can begin tapering using the five-to-three-stitch decrease row instead.
Always test the resulting fabric with the buckle.
Common Beginner Crochet Belt Mistakes
Even though this crochet belt uses simple stitches, a few small mistakes can affect the finished shape.
1. The Belt Gets Wider as You Crochet
This usually happens when an extra stitch is added at the beginning or end of a row.
Fix: Count seven stitches every few rows. Make sure the turning chain isn’t accidentally counted as another stitch.
2. The Belt Gets Narrower
This often happens when the last stitch of a row is skipped.
Fix: Look carefully for the final V shape at the edge. A stitch marker can make it much easier to find.
3. The Crochet Fabric Looks Too Loose
A belt needs more structure than a decorative scarf.
Fix: Use a smaller hook or tighten your tension slightly. Choose smooth cotton rather than a very stretchy or fuzzy yarn.
4. The Belt Twists While Working
Uneven tension, tight turning chains, or inconsistent stitch placement can cause the strap to twist.
Fix: Stop periodically, lay the fabric flat, and check the edges. If a section is badly distorted, unraveling a few rows is often the simplest solution.
5. The Belt Is Too Short
This usually happens when you measure only your waist circumference without allowing for a free tail.
Fix: Test the belt around your body before shaping the tapered tip. Add extra rows if necessary.
6. The Buckle Doesn’t Hold the Belt Properly
Not all belt buckles are suitable for crochet.
Fix: Check the hardware against a sample before crocheting the full strap. Use a buckle that can grip or fasten your selected fabric without tearing it.
7. The Keeper Loop Keeps Sliding Off
The keeper may be too loose, or the free end may be too narrow.
Fix: Remove the keeper seam and remake the loop slightly smaller. Make sure it can still slide without distorting the main belt.
How to Customize This Crochet Belt Pattern
One of the nicest things about this project is how easily you can adapt it to your personal style.
Choose a Different Yarn Color
Neutral shades are easy to style with everyday clothing.
Cream works beautifully with summer dresses, while dark brown or black can give the belt a more classic appearance.
Dusty sage, muted terracotta, and denim blue are lovely choices for a softer handmade look.
For a more colorful belt, try changing yarn colors every several rows. Just remember to weave in all the additional ends securely.
Make a Wider Statement Belt
A wider belt can look especially attractive over a cardigan or loose dress.
You’ll need a larger buckle and more foundation stitches.
Make a sample first so the strap doesn’t become too bulky or flexible.
Add a Simple Textured Effect
Once you’re comfortable with the basic pattern, experiment with working some stitches through the back loop only.
This creates subtle ridges.
Be aware that changing the stitch placement can change the stretch, thickness, and appearance of the fabric.
For a functional belt, work a sample and test the buckle before making a full textured version.
Try a Contrasting Edge
A narrow slip-stitch edge in a second color can frame the belt.
Use a slightly larger hook if necessary so the edging doesn’t pull the fabric inward.
Keep the edging light around the buckle attachment and tapered tip.
Turn It Into a Handmade Gift
A crochet belt is a thoughtful gift for someone who enjoys handmade clothing accessories.
Choose a neutral color, take accurate measurements, and pair it with a coordinating crochet headband or small pouch.
You could even make two belts in complementary colors for different outfits.
Finishing Instructions and Care
A little finishing care helps your belt look tidy and stay in good condition.
Fastening Off
After completing the tapered end and keeper, cut the yarn while leaving a suitable tail.
Pull the tail completely through the final loop and gently tighten it.
Weaving In Ends
Use a blunt tapestry needle to weave each end through several stitches on the underside of the belt.
Change direction and weave through nearby stitches again to help secure the tail.
Trim only after the end feels secure.
Blocking
Blocking is optional.
If your cotton belt has slightly uneven edges, you can lightly dampen the fabric and arrange it flat on a clean towel.
Smooth the edges into shape without stretching the strap lengthwise.
Allow it to dry completely.
Keep metal hardware dry or protect it from prolonged moisture to reduce the risk of discoloration.
Avoid excessive stretching during blocking, as that can make the belt longer and less supportive.
Washing and Storage
Follow the yarn label’s care instructions.
If the buckle cannot be removed, hand-washing is usually the more cautious option.
Use cool water, mild detergent, and gentle handling.
Never wring the belt aggressively.
Press out excess moisture with a towel and reshape it flat to dry.
Store the belt loosely coiled instead of tightly folded.
Quick Printable-Style Crochet Belt Pattern Summary
Easy Single Crochet Belt
Skill level: Beginner
Materials: Worsted-weight cotton yarn, 3.5 mm hook, compatible rectangular belt buckle, tapestry needle, scissors, measuring tape.
Foundation: Attach yarn to fixed buckle bar. Work 7 sc around bar.
Regular rows: Ch 1, turn, sc 7. Repeat until the strap is almost the desired length.
Taper:
- Row 1: Ch 1, turn, sc2tog, sc 3, sc2tog. (5)
- Row 2: Ch 1, turn, sc2tog, sc 1, sc2tog. (3)
- Row 3: Ch 1, turn, sc 3. (3)
Keeper: Ch 5. Sc in second ch from hook and across. (4) Ch 1, turn, sc 4 each subsequent row until the strip wraps comfortably around the strap. Sew ends together.
Finishing: Fasten off, weave in yarn ends, inspect buckle, and lightly shape if needed.
Sizing: Adjust the number of regular strap rows to fit your waist or hips.
Frequently Asked Questions
1. Can beginners really crochet a belt?
Yes. A simple crochet belt made from single crochet stitches is a very approachable beginner project.
The main skills are making even stitches, turning the work, and maintaining a consistent stitch count.
Attaching the yarn to the buckle may feel unfamiliar at first, but it becomes easier once the first few stitches are complete.
2. What yarn is best for a crochet belt?
Smooth cotton yarn is a good choice because it produces visible stitches and relatively firm fabric.
For this pattern, worsted-weight cotton is recommended.
If you want a thinner belt, you can experiment with DK or sport-weight cotton and an appropriately sized hook.
Avoid very fuzzy or highly elastic yarn if your main goal is a practical belt that keeps its shape.
3. How much yarn do I need to crochet a belt?
For this narrow adult belt, approximately 70–110 yards is a reasonable planning estimate.
Your actual yarn use depends on the belt’s length, width, yarn thickness, and stitch tension.
A longer or wider belt will require more yarn.
4. Can I crochet a belt without a buckle?
Absolutely.
A tie-style crochet belt is another beginner-friendly option.
Instead of starting on a metal buckle, you can crochet a long, narrow strip with tapered or cord-style ends that can be tied at the front.
However, that is a different construction from the buckle belt taught in this pattern.
5. How do I stop my crochet belt from stretching?
Choose a firm yarn, use a smaller hook, and work consistently tight stitches without making them difficult to crochet.
Cotton generally has less elasticity than many wool yarns, although crocheted cotton can still lengthen under tension.
For a more supportive accessory, test a denser stitch pattern or consider an internal fabric backing.
6. How long should I make my crochet belt?
Measure the area where you want to wear it, then allow additional length for threading through the buckle and creating a short free tail.
A starting allowance of approximately 6–8 inches is useful for many designs, but fit should always be checked before the final shaping.
The correct length depends on your buckle and how much visible tail you prefer.
7. Can I sell crochet belts made from this pattern?
You may use this independently written tutorial to make finished handmade belts for personal use or sale, subject to any applicable local requirements.
If you’re selling handmade accessories, choose sturdy materials, check buckle safety, and inspect the finished item carefully.
Do not republish the original photos from the reference website without permission. Use your own product photography.
Conclusion
Making your own crochet belt is a lovely way to turn a few basic stitches into something useful.
What starts as a short row of cotton stitches slowly becomes a wearable accessory that can be styled with dresses, jeans, tunics, and cardigans.
If you’re new to crochet, take your time with the buckle attachment and concentrate on keeping those seven stitches consistent. After that, the repetitive rows become much easier.
Once you’ve finished your first belt, you can experiment with new yarn colors, different widths, or a simple tie-belt version.